Operation instructions | MK 8-00 | MK 16-00 | MK 8-06 | MK 16-06
8 2018-10-05 | Technical improvements, changes in design, printing- and other errors expected.
2. Mounting and Installation
Installation must be performed by authorized and skilled electricians only.
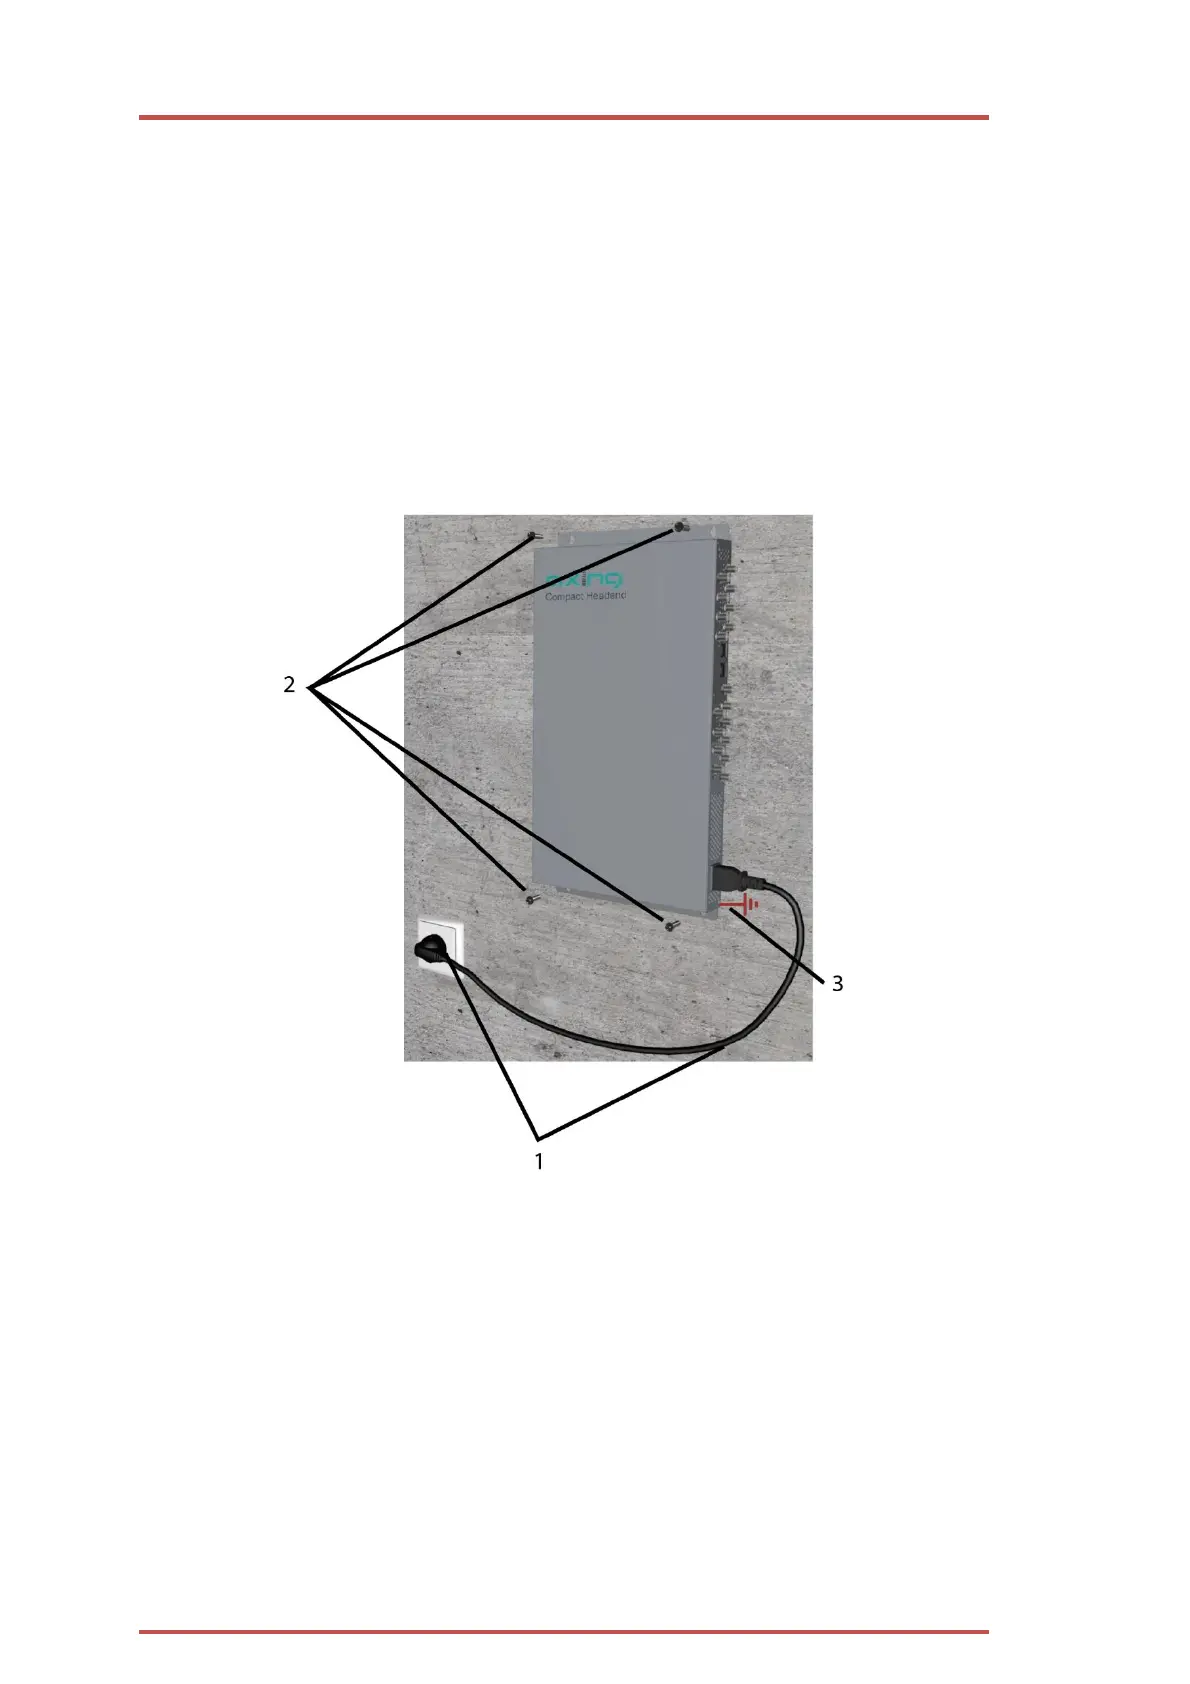
Before mounting and installation, pull the mains plug (1)!
The antenna system must be installed and grounded according to the EN 60728-11 standard.
The compact headend can be mounted on either at the wall or be mounted in a 19 "rack.
2.1. Wall mounting
The compact headend are factory-fitted with wall brackets.
Note: The unit must be wall mounted with at least 5 cm clearance along the 4 sides.
The installation must be carried out on an even and vertical surface (any unevenness must be
compensated).
Fix the headend with with minimum four pcs. of 4 × 30 mm screws.
The headend must be connected to the equipotential bonding according to EN 60728-11 (3)