40
Motion
Proportional speed : Turn on to set the maximum proportional speed.
• Max proportional speed : Set a value between 1 and 1000 to limit the pan and tilt speed. Max
proportional speed is defined as a percentage, where the value 1000 equals 1000%.
This is useful when the joystick is pushed all the way out. For example, if the image is approximately
44 degrees wide when fully zoomed out and the max proportional speed is set to 100 (100%), the
maximum speed is about 44 degrees/second. If the image is then zoomed in from 44 to 10 degrees
wide, the maximum speed reaches about 10 degrees/second, which is probably too fast for easy
viewing. To limit the speed, set the max proportional speed to 50 (50%). This way, the maximum
speed only reaches 50% of the maximum for the currently selected zoom level. This means that when
the image is 44 degrees wide, the greatest possible speed is limited to about 22 degrees/second, and
when the view is zoomed in to 10 degrees the speed is limited to about 5 degrees/second.
Adjustable zoom speed: Turn on to use variable speeds when controlling the zoom with a joystick or a mouse
wheel. The zoom speed is automatically set through the command continuouszoommove in the VAPIX®
Application Programming Interface (API). Turn off to use the highest zoom speed which is the same speed for
moving to presets.
Freeze image on PTZ
• Off: Never freeze image.
• All movements: Freeze the image while the camera is moving. Once the camera reaches its new
position, the view from that position is shown.
• Preset positions: Freeze the image only when the camera moves between preset positions.
Pan-tilt speed: Select the speed of the camera’s pan and tilt movements.
OSDI zones
On-screen direction indicator (OSDI) gives information of the direction the camera is pointing at in the text
overlay. The camera uses the coordinates of the center of the image when you set the lower left and upper
right zone area.
Create OSDI zone: Click to create an OSDI zone.
• Name: Enter a name for the zone.
• Active: Turn on to display the zone in the live view.
• Zone limits
– : Navigate to your desired position, and click the icon to set the lower left point of the zone.
Click again to unset the lower left point.
– : Navigate to your desired position, and click the icon to set the upper right point of the zone.
Click again to unset the upper right point.
– Go to: Click to go to the lower left point or the upper right point of the zone.
The context menu contains:
• Create multiple zones: Click to create multiple zones. Enter a name for the zone, and specify the
coordinates for lower left and upper right of the zone.
– Add zone coordinates: Click to specify the parameters for another zone.
• Delete all zones: Click to delete all zones.
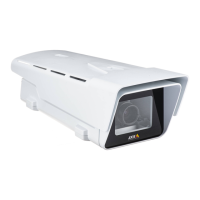
AXIS Q8752-E Mk II Bispectral PTZ Network Camera