3. Physical installation
1
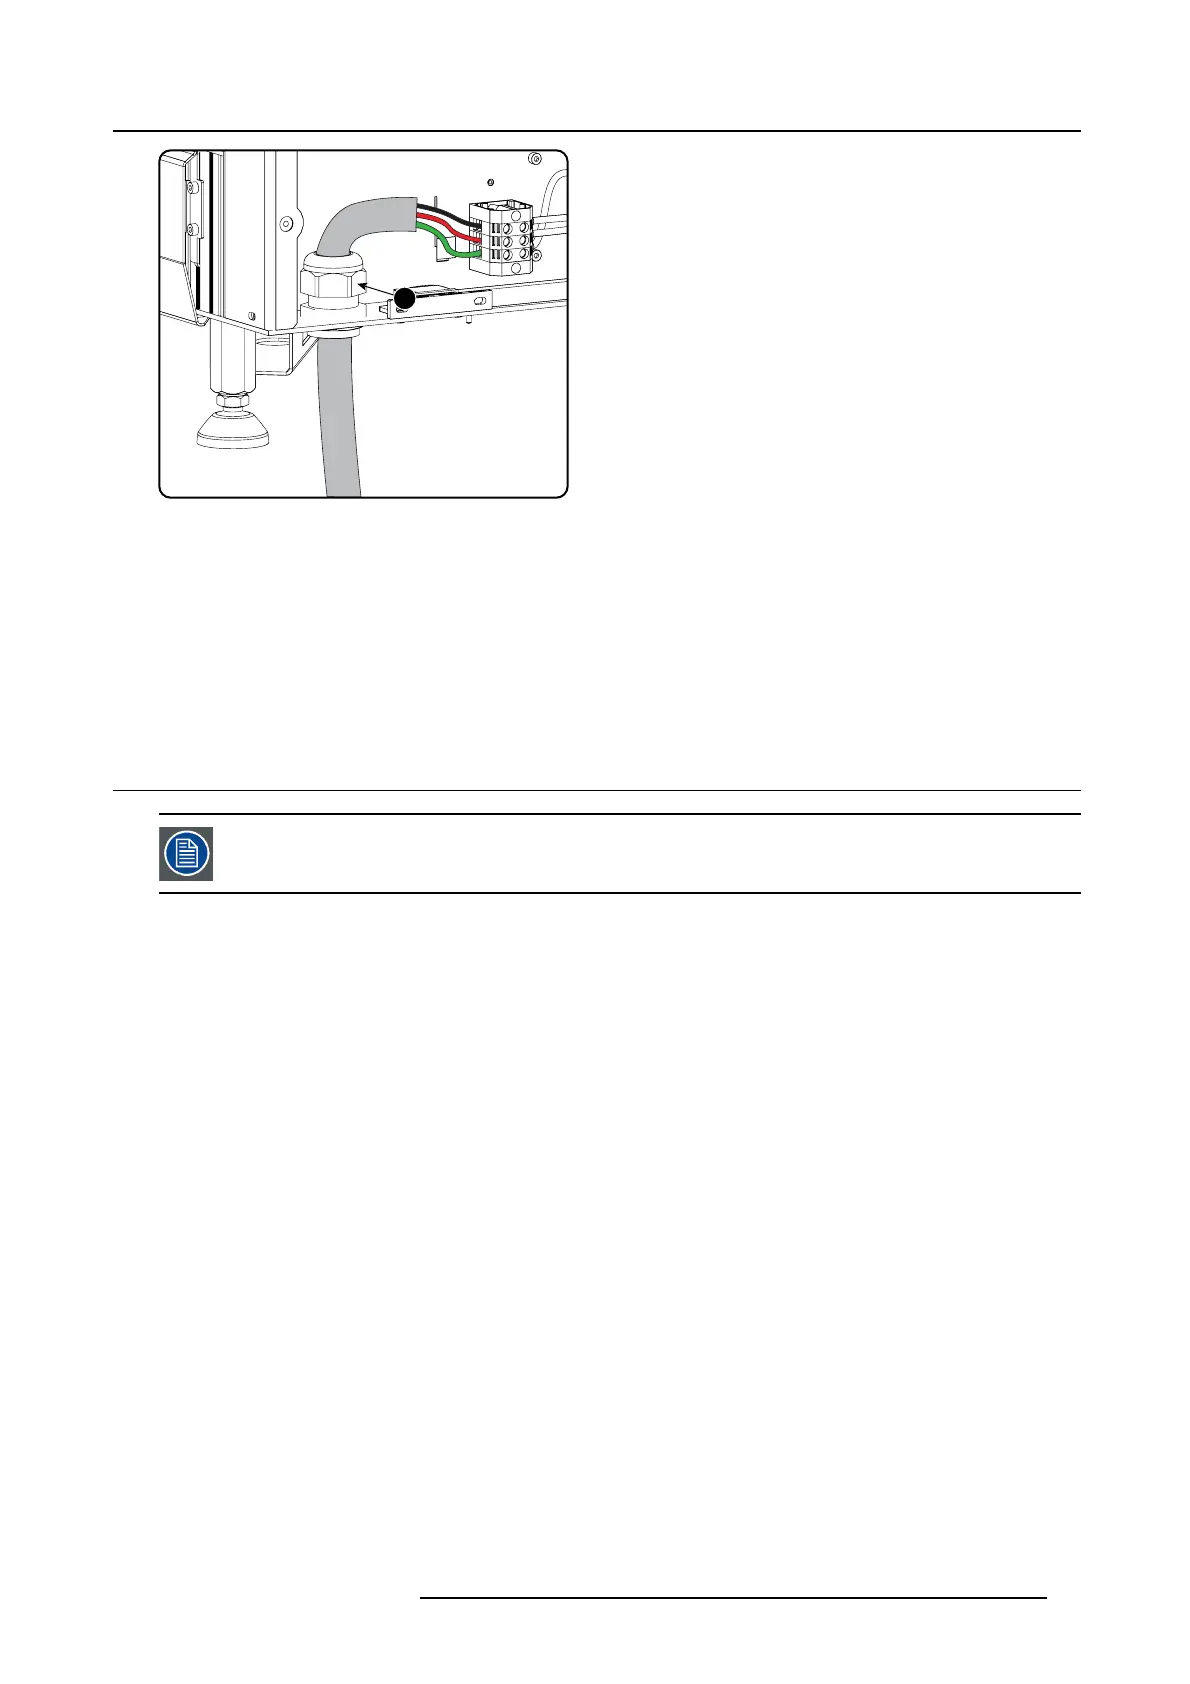
Image 3-10
Power cable connection
4. Push the s tripped pow er supply cable through the cable gland. W he n using a flexible power cord, ma ke sure that each conductor
end is provided with an end s leeve.
Fix the cable in the cable gland by s ecuring ring 1 w ith an adjustable wrench.
5. C onnect the power cord with the terminal barrier s trip. Use a flat torque screw driver set to 2Nm.
Always connect the ground wire (PE) with the connector indicated with PE on the terminal barrier s trip.
Warning: Always connect first the P E wire.
6. R einstall the power connection cov er and the back cover.
3.5 Power loop throu gh to the projector electronics
This procedure explains how to provide the projector e lectronics with power in case no UP S un it is used.
Note that the projector is by default configured for use without U PS. So, the short po w er link cab le is already
installed.
Necessary tools
No tools.
Necessary parts
Short power link c able with plug type C13/C 14
How to loop through the power
1. Plug in the short power cable (1) which was delivered with the projector.
Warning: Always use the Barc o short power cable w hich is d elivered with the projector.
R5905067 DPXK-19B/23B/P 17/09/2012
23

 Loading...


