BARRETT 900 SERIES TRANSCEIVERS
5.8 Adjustments
Following PCB repair, it may be necessary to realign or recheck adjustable components on the relevant
PCBs.
This section describes the methods employed to ensure that the reinstated PCB's conform to the original
specification.
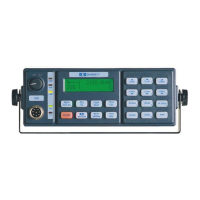
There are no adjustments on the front panel. If the LCD display is damaged or a key is non functional the
front panel should be replaced as a complete assembly by removing the two retaining screws and
unplugging the 14 way IDC connector. Should the ON/OFF, volume potentiometer sustain damage, this
is easily replaced by unsoldering the connections to the PCB and undoing the knob collet and retaining
nut.
There are a number of adjustable components on this PCB which under normal circumstances should be
left untouched.
(Standard oscillator)
The 45.455MHz reference oscillator is the internal frequency standard for the transceiver. It must be
adjusted to within a few cycles of declared frequency for reliable operation. It has a PTC thermistor
heating element which stabilises the reference crystal. Before making any adjustment the transceiver
should be left switched on for 5 minutes to allow thermal stabilisation. The core of L16 should be flush with
the top of the can.
A frequency counter should be connected to TP34 using an oscilloscope, probe set to 10M . Then using a
non metallic trimming tool, L15 should be carefully adjusted to obtain a frequency of 22.72750MHz Hz.
(High stability oscillator)
The 45.455MHz reference oscillator is the internal frequency standard for the transceiver. The high
stability oscillator option replaces the standard oscillator components described above with a modular
45.455 MHz TCXO/DCXO. Unlike the standard oscillator the high stability oscillator can be adjusted
straight after turn on.
A frequency counter should be connected to TP34 using an oscilloscope probe set to 10M . Then using a
trimming tool or small Philips screw driver, the pot in the top of the TCXO/DCXO should be carefully
adjusted to obtain a frequency of 22.72750MHz 1Hz.
Program the transceiver to 30MHz, measure voltage on TP26. Using a non-metallic trimming tool adjust
the core of L8 to 9.5V. In most case's, the core of L8 will not be required. The red out of lock light should be
extinguished.
Set the transceiver to any USB channel. Monitor TP37 with a CRO probe on sensitivity 0.5 V/div, 0.5
us/div. Adjust T1 for maximum amplitude on the CRO.
If a spectrum analyzer with tracking generator is available, this filter can easily be adjusted by setting the
two notch frequencies of 119 MHz and 178 MHz. Turn the transceiver off for this adjustment. Connect the
tracking generator to TP27 and the spectrum analyzer input to TP36. Adjust L10 for a notch at 178 MHz,
and L11 for a notch at 119 MHz. The filter response should be flat to 76 MHz.
This 50 low pass filter has been factory set to be flat to 75 MHz and . In
an emergency, satisfactory operation can be obtained by setting L10 core flush with the top and L11 core 5
mm inside can.
5.8.1 Front panel
5.8.2 Microprocessor PCB
5.8.2.1 Reference oscillator setup
5.8.2.2 Reference oscillator setup
5.8.2.3 VCO frequency adjustment
5.8.2.4 Carrier Insertion oscillator peaking
5.8.2.5 VCO Low pass filter
should not be adjusted in the field
+2
+
W
PAGE 40