Fig.68
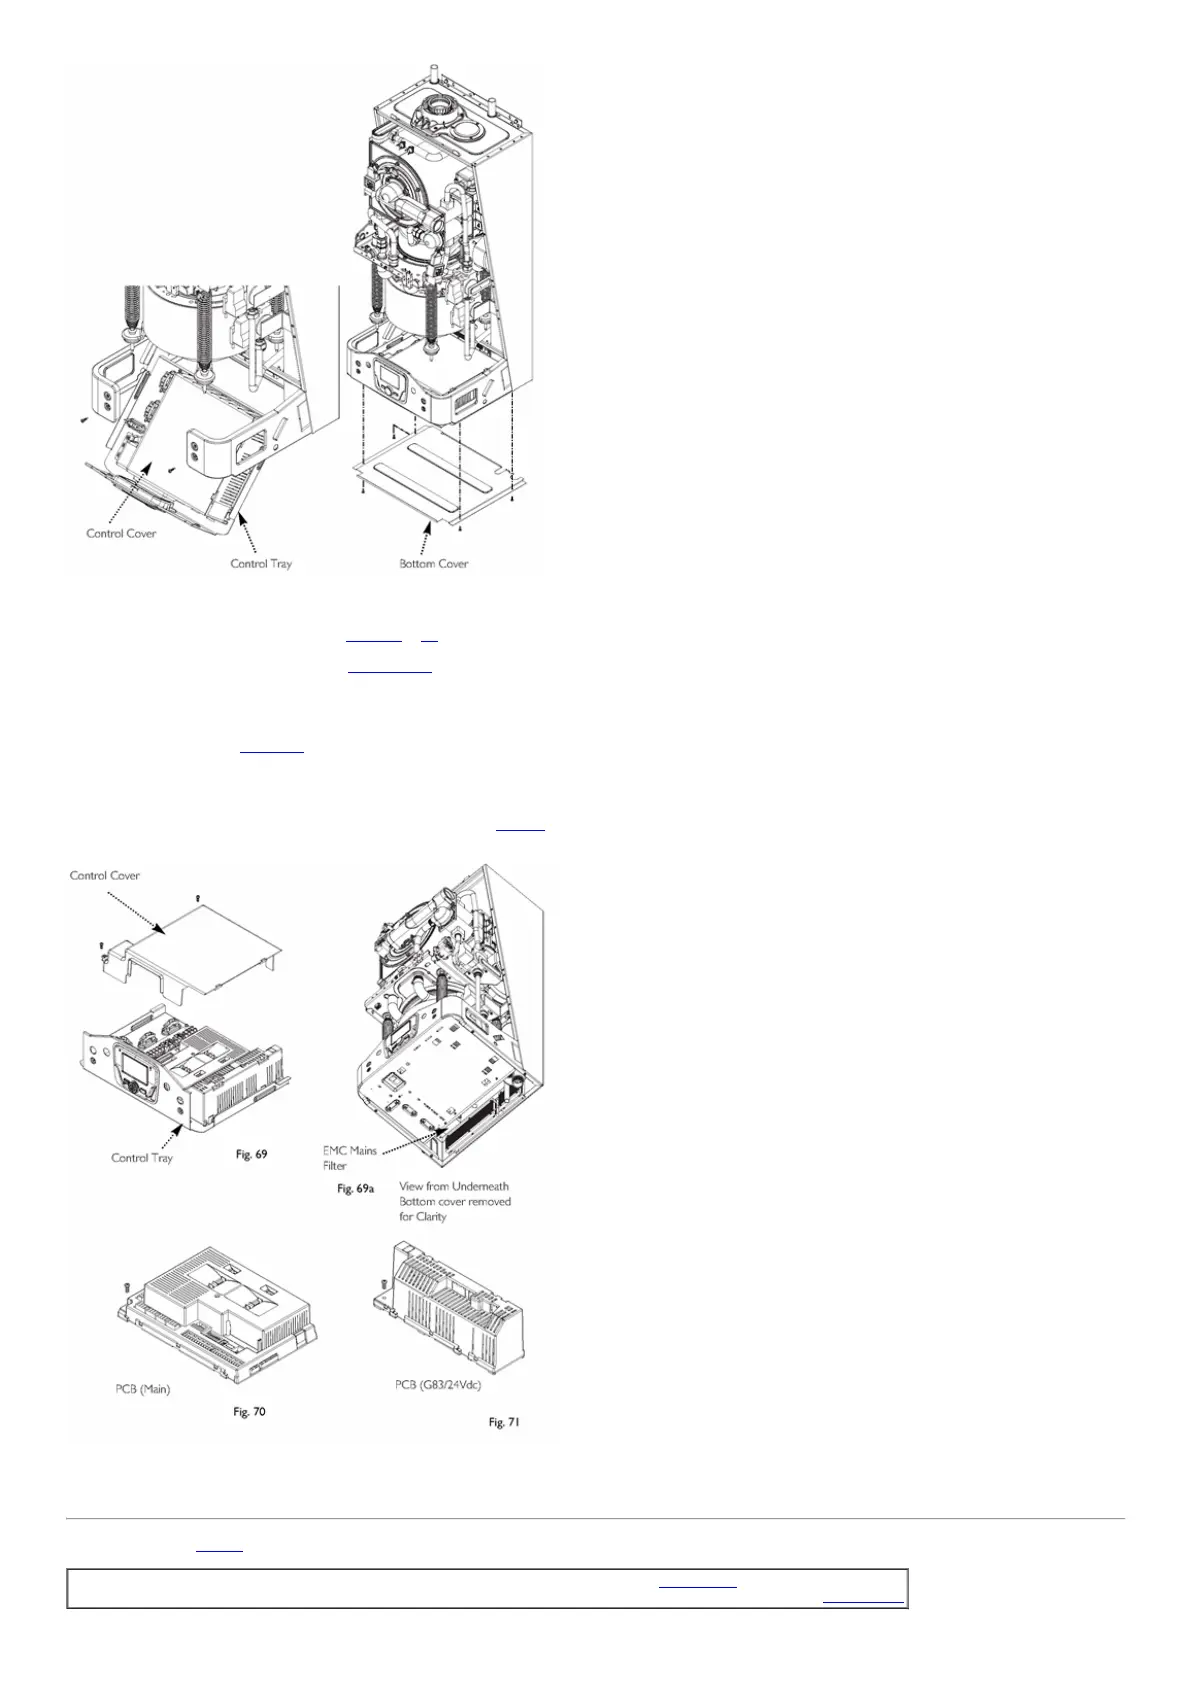
14.17PCB(G83/24VdcPowerSupply)(Figs.69&71)
1.Removethecontrolcoverasdetailedinsection14.16.
2.Carefullyremovethefourconnections.
3.Removethescrewfromthebacklefthandcorner.PushtheG83assemblyback(approx10mm)andliftout.
4.Reassembleinthereverseorder.
14.18EMCMainsFilter(Figs.69a)
1.Undothe4screwsfromthebottomcoverandremovethecover.
2.Undothe2screwssecuringthecontroltray,pulltheassemblyforwardandcarefullyallowtheassemblytodropdown.
3.RemovetheMainsconnectionsfromeithersideofthefilter.
4.Undothescrewssecuringthefiltertotheundersideofthepanel(Fig.69a).Removetheearthtag.
5.Reassembleinreverseorderensuringthattheearthtagisinplace.
Fig.69Fig.71
page66
14.19GasValves(Fig.72)
IMPORTANT:AfterreplacingthevalvetheCO2mustbecheckedandadjustedasdetailedinSection15.0CombustionCheck.
Onlychangethevalveifasuitablecalibratedcombustionanalyserisavailable,operatedbyacompetentpersonseesection13.1.
 Loading...