Fig.21s
page32
9.0Installation
NOTE:InstallersofthisappliancemusthaveundergoneBaxiEcogenTrainingandbeenapprovedtoinstallthisappliance.
9.1Unpacking&InitialPreparation
NOTE:Maintaintheapplianceuprightatalltimes.Donotlaytheapplianceonitsback,sidesorfront.
Drillingofthewallorceilingforflueandpipeworkmustbecompletedbeforetheapplianceisfittedtothewall.
Thegassupply,gastypeandpressuremustbecheckedforsuitabilitybeforeconnection(seeSection7.5).
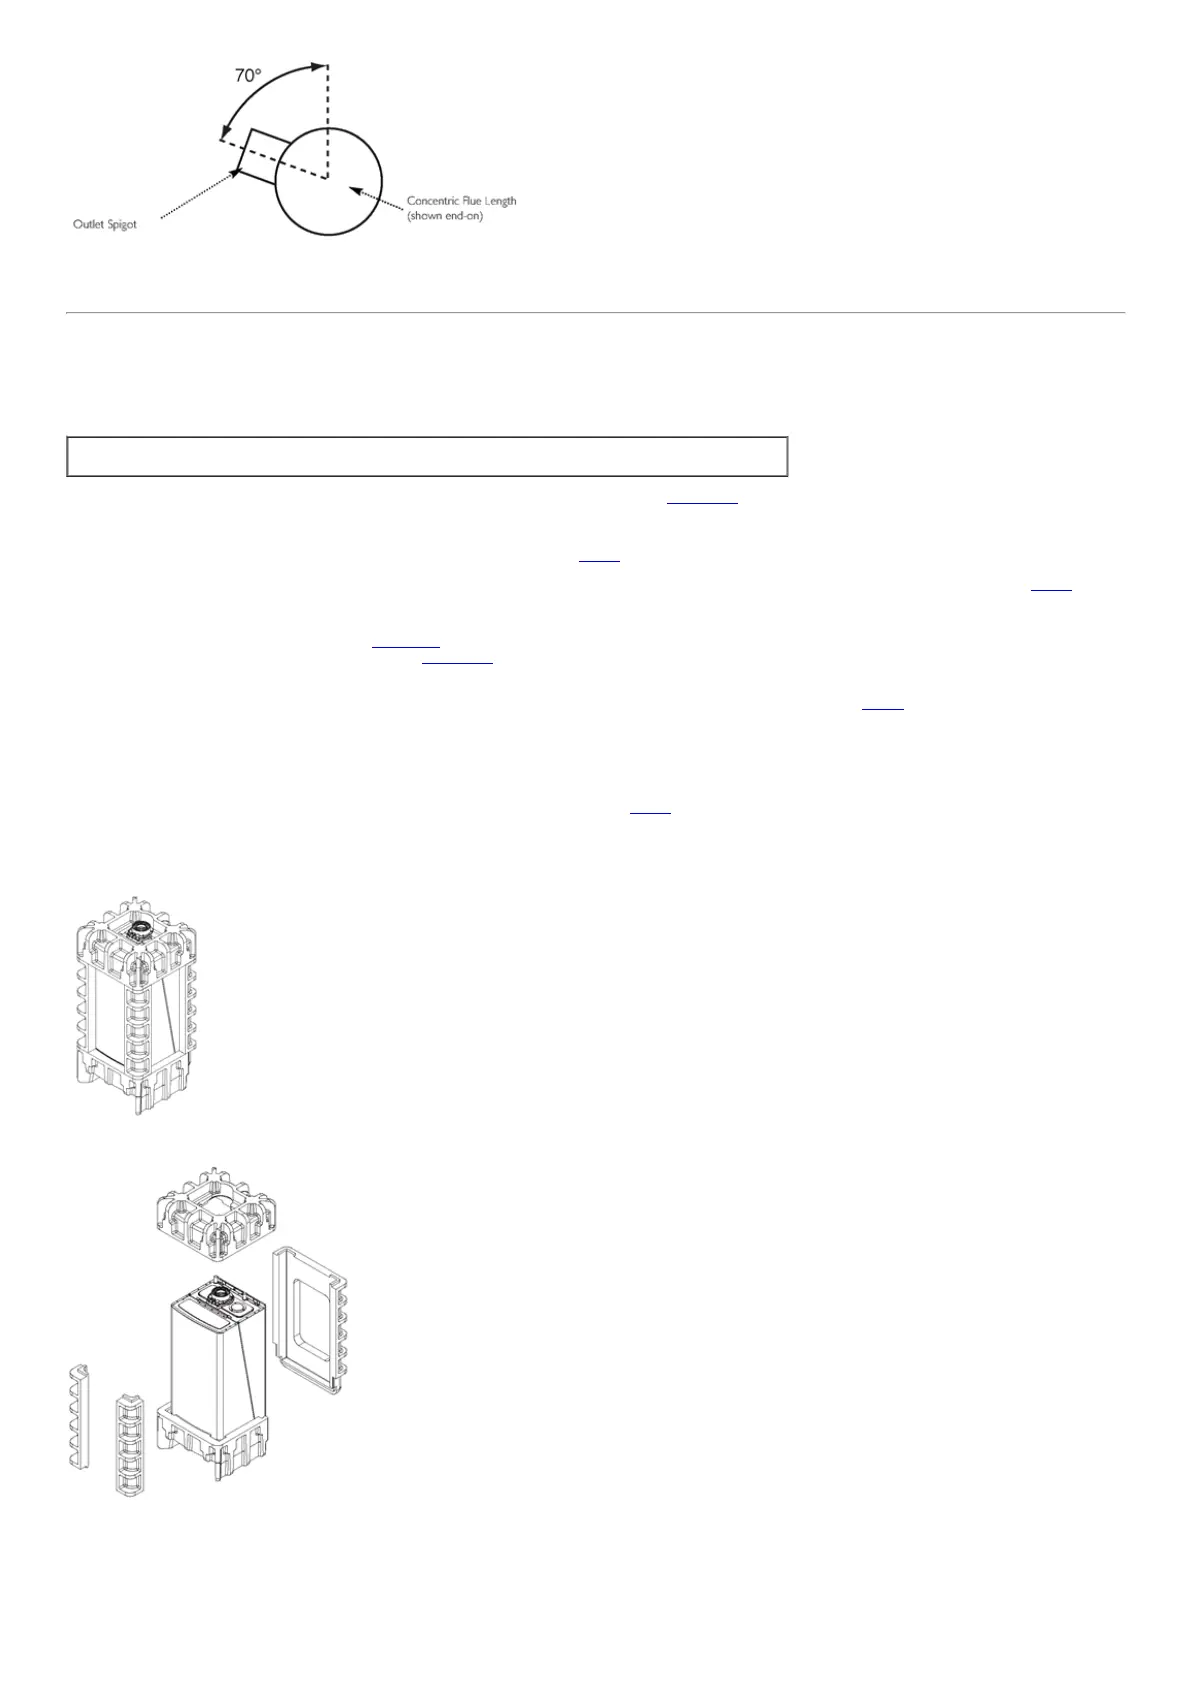
a)Removetheshrinkwrapandliteraturepack.
b)Removetheupperpackagingtoleavetheapplianceonthebasepackaging(Fig.23).
c)Removethebackplatefromtheappliancebyremovingthe2securingscrewsandundothe2fixingnutsonthetopofthepanelusinga10mmspanner(Fig.24).
d)Takecare:Thebackpanelcanfallsuddenlyonrelease.
1.Afterconsideringthesiterequirements(seeSection7.0)positionthefixingtemplateonthewallensuringitislevelbothhorizontallyandvertically.Ensurethatthereis
adequateclearancefortheliftingequipment(seeSection7.2).
2.MarkthepositionofthesixmostsuitablefixingholesforthewallplatepositionsB+C(asmarkedonthetemplate).Wherepossiblemarkthepositionofthecentretop
fixingpositionA(markedontemplate).
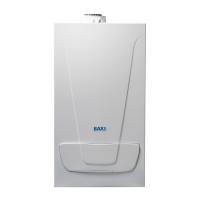
3.Markthepositionofthecentreofthefluehole(rearexit)usingthepapertemplatesupplied.Forsideflueexit,markasshown(Fig.25).
4.Ifrequired,markthepositionofthegasandwaterpipes.
Removethetemplate.
5.Cuttheholefortheflue(minimumdiameter116mm,aminimumhorizontalholeof116mmwillgivethecorrectclearanceforthefluetorunattherequiredangle).
6.Drillthesinglehole(10mmdiameterforwallplugsprovided)aspreviouslymarkedandpositionthebackplateonthewallpositionAontemplate.Pushoneofthewall
plugssuppliedthroughtheplateandsecureittothewallwithoneofthe80mmscrews(Fig.26).IfisnotpossibletousePositionAuseoneoftheothersixpositions
markedB+C.
7.Checkthatthetopedgeishorizontalwithaspiritlevel.Retightenthescrew.Drilltheremaining6positionsatB+Candsecurethebackplatetothewall.
8.Forcorrectinstallationthebackplatemustbeabsolutelyflatandverticalcheckbeforemountingtheboiler.Ifthereisanyunevennessorthebackplateisnot
mountedintheverticalplaneusepackingtocorrectanyoutoftrue.
Fig.22
Fig.23
 Loading...