139
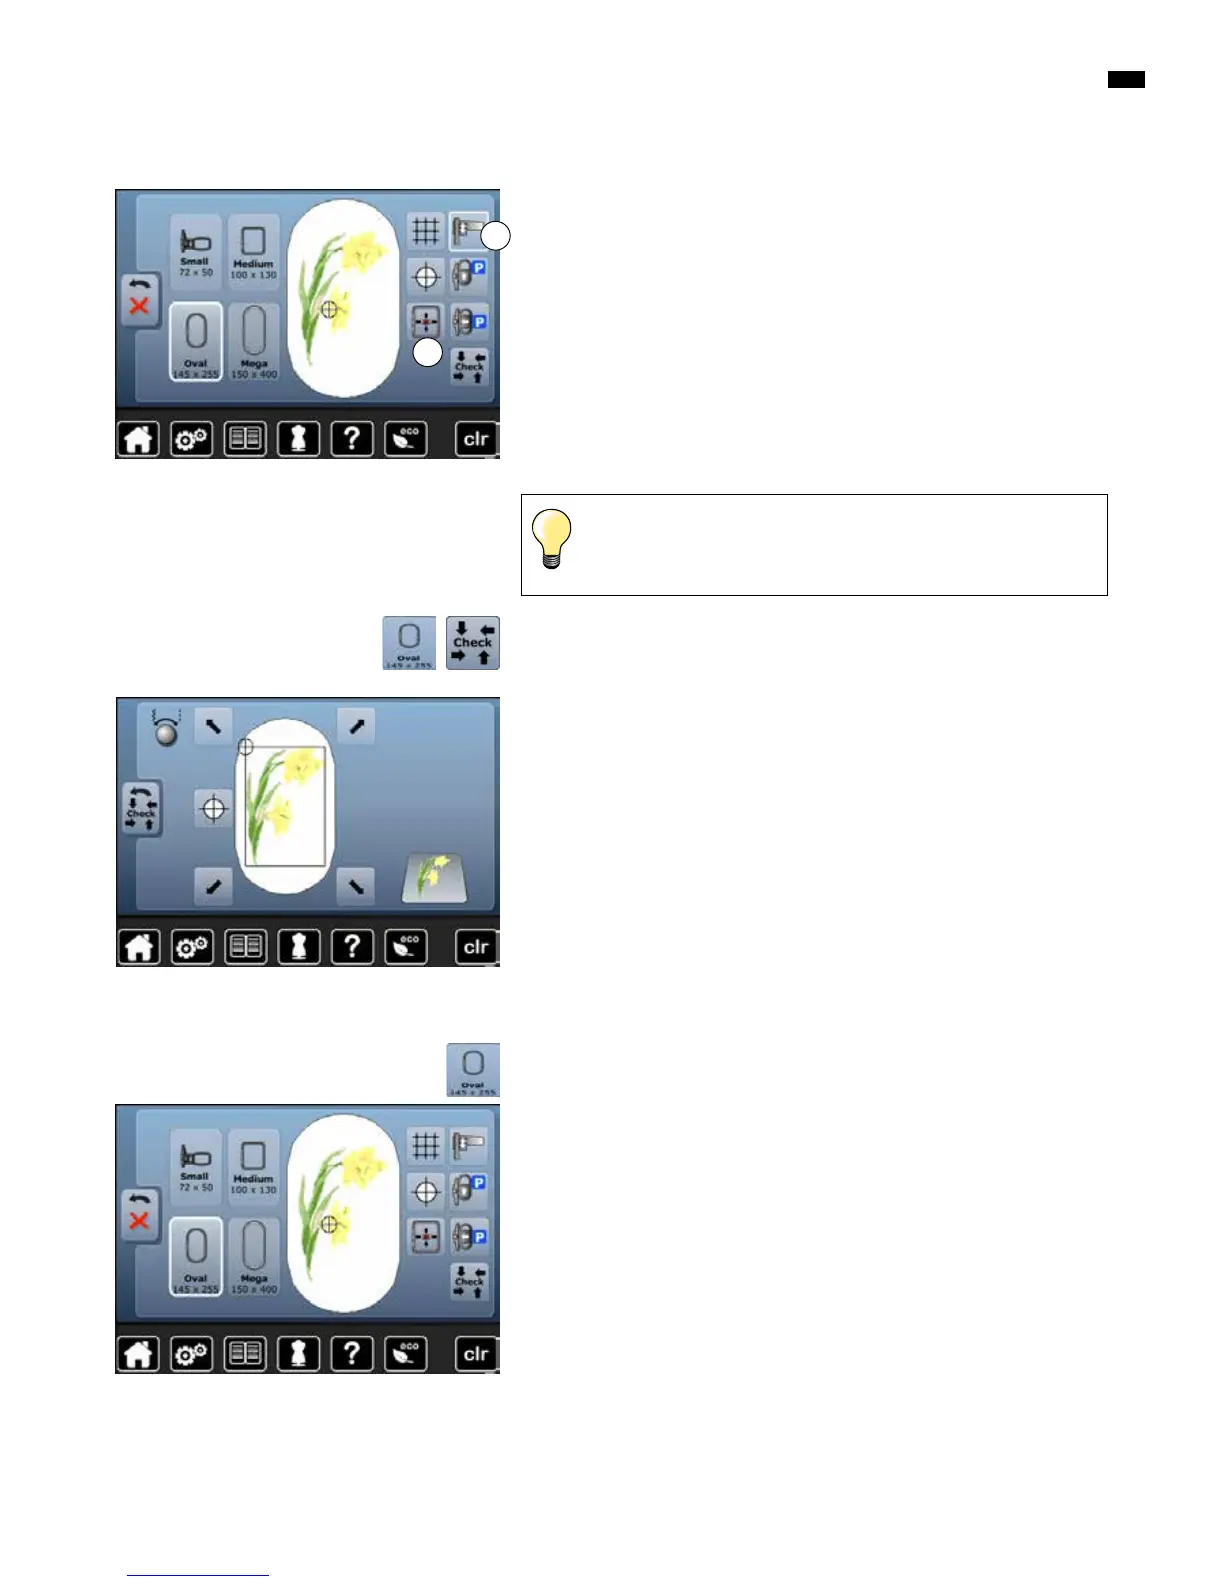
By using the touch pen any position within the motif can be selected directly in
the «Edit»-Display.
█
select and edit motif
█
calibrate module if necessary 1, see page 128
█
attach the respective hoop
The «Motif center» icon must be deactivated in order to utilize Absolute check.
█
check the embroidery motif within the hoop using the touch screen pen in
the «Edit»-Display
█
select any point in the motif with the touch pen
►
the cursor (marking the needle position) moves to the selected area
►
if the icon «Virtual positioning» 2 is activated (yellow-framed), the hoop is
moved to position the needle over the selected area
█
the icon «Virtual Positioning» appears only after the hoop has been read by
the «Check»-function (touch «Check»-icon)
Absolute embroidery check
If the thread breaks, the touch pen can also be placed on the area of
the Display where the thread broke. The hoop moves to that area.
For best embroidery results always use the smallest hoop possible for the
motif.
█
select desired hoop
►
the selected hoop is highlighted in white
█
touch «Back»-icon
►
the Display is closed
►
the motif appears in the desired hoop
█
select «Select hoop»-icon
Select Hoop
Motifs
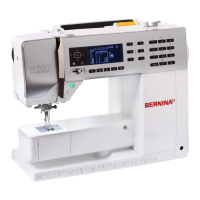
Checking the motif size
The «Check»-function reads the attached hoop size and stitching area:
█
select the four corners using the arrow icons
█
touch «Motif center»-icon
►
the needle moves to the center position of the motif
█
touch «Back»-icon
►
the Display is closed
►
if no hoop or a too small hoop was attached, an error message will appear
█
touch «Select hoop»-icon
█
touch «Check»-icon
►
the hoop size is read = the hoop moves
1
2