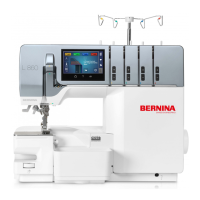
Changing the presser foot
Make sure that the needle is in the highest position.
⦁
Raise the presser foot.
⦁
Press the presser foot release lever (4) to release the presser foot and remove it.
⦁
To attach the foot, place it under the shaft.
⦁
The groove in the shaft must line up exactly with the presser foot pin (5).
⦁
Lower the shank and the presser foot engages.
As soon as the presser foot is lifted, the thread tension discs release auto-
matically and allow safe threading.
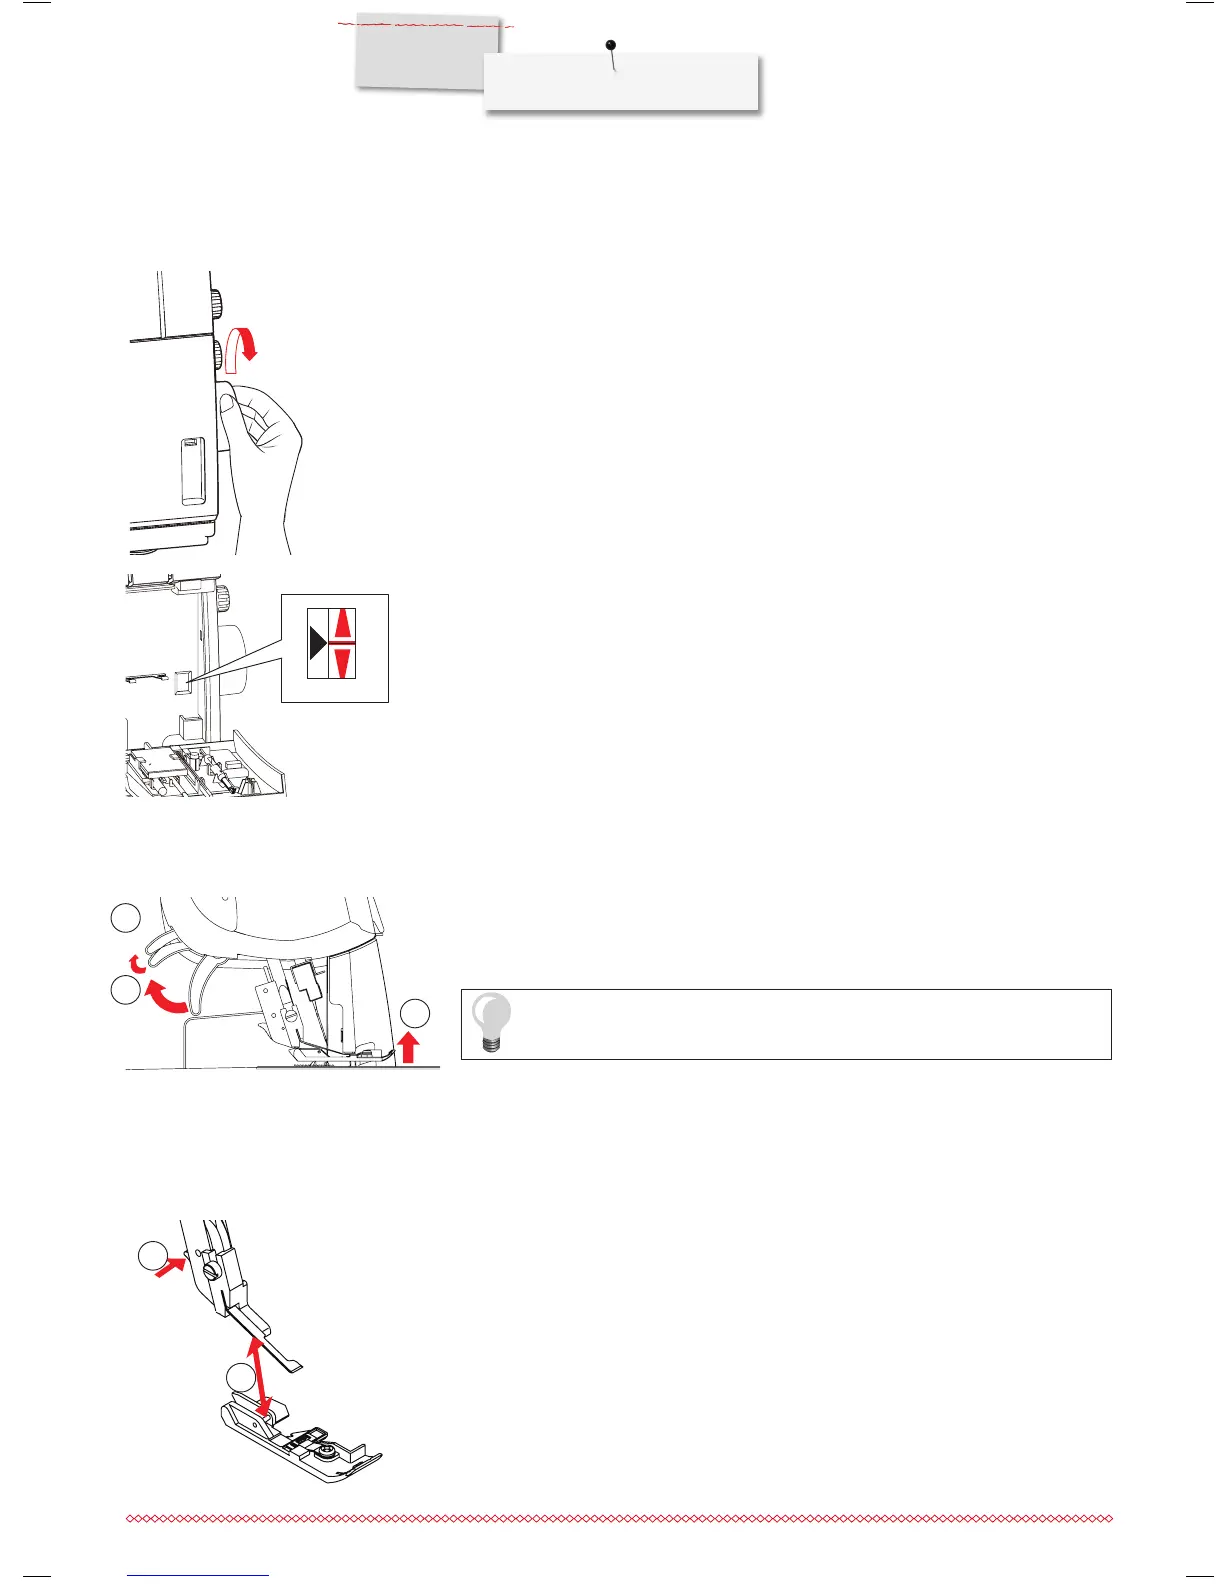
Handwheel and handwheel position indicator window
⦁
The handwheel turns counter-clockwise.
⦁
Open the looper cover to check the handwheel position indicator. Then set the hand-
wheel to threading position.
►
With the L 460, the needle stops at threading position automatically after sewing.
⦁
The needle and the looper are at the threading position (high), when the red bar on
the handwheel is aligned with the black triangle in the handwheel position indicator.
Two step presser foot lifter with front foot lift
⦁
To raise the presser foot, push up the presser foot lifter until it engages (1).
⦁
Press the presser foot lifter even further (2) for an extra raise of the presser foot and
to lift the tip (front foot lift).
2
5
3
1
4
1 Lifter position 1
2 Lifter position 2
3 Front foot lift