⦁
Switch the machine off (power switch "0").
⦁
align the thread guide parallel to the Thread Stand.
⦁
Open the looper cover.
⦁
If wanted, open the sewing table and deactivate the knife by pushing in and turning
the knife acivating knob until it clicks in.
⦁
Raise the needles: Turn the handwheel counter-clockwise until the red mark is cen-
tered in the handwheel position indicator window. With the L 460, the handwheel stops
automatically in this position after sewing.
⦁
Set mtc to its neutral position.
⦁
Raise the presser foot. The thread tension is released.
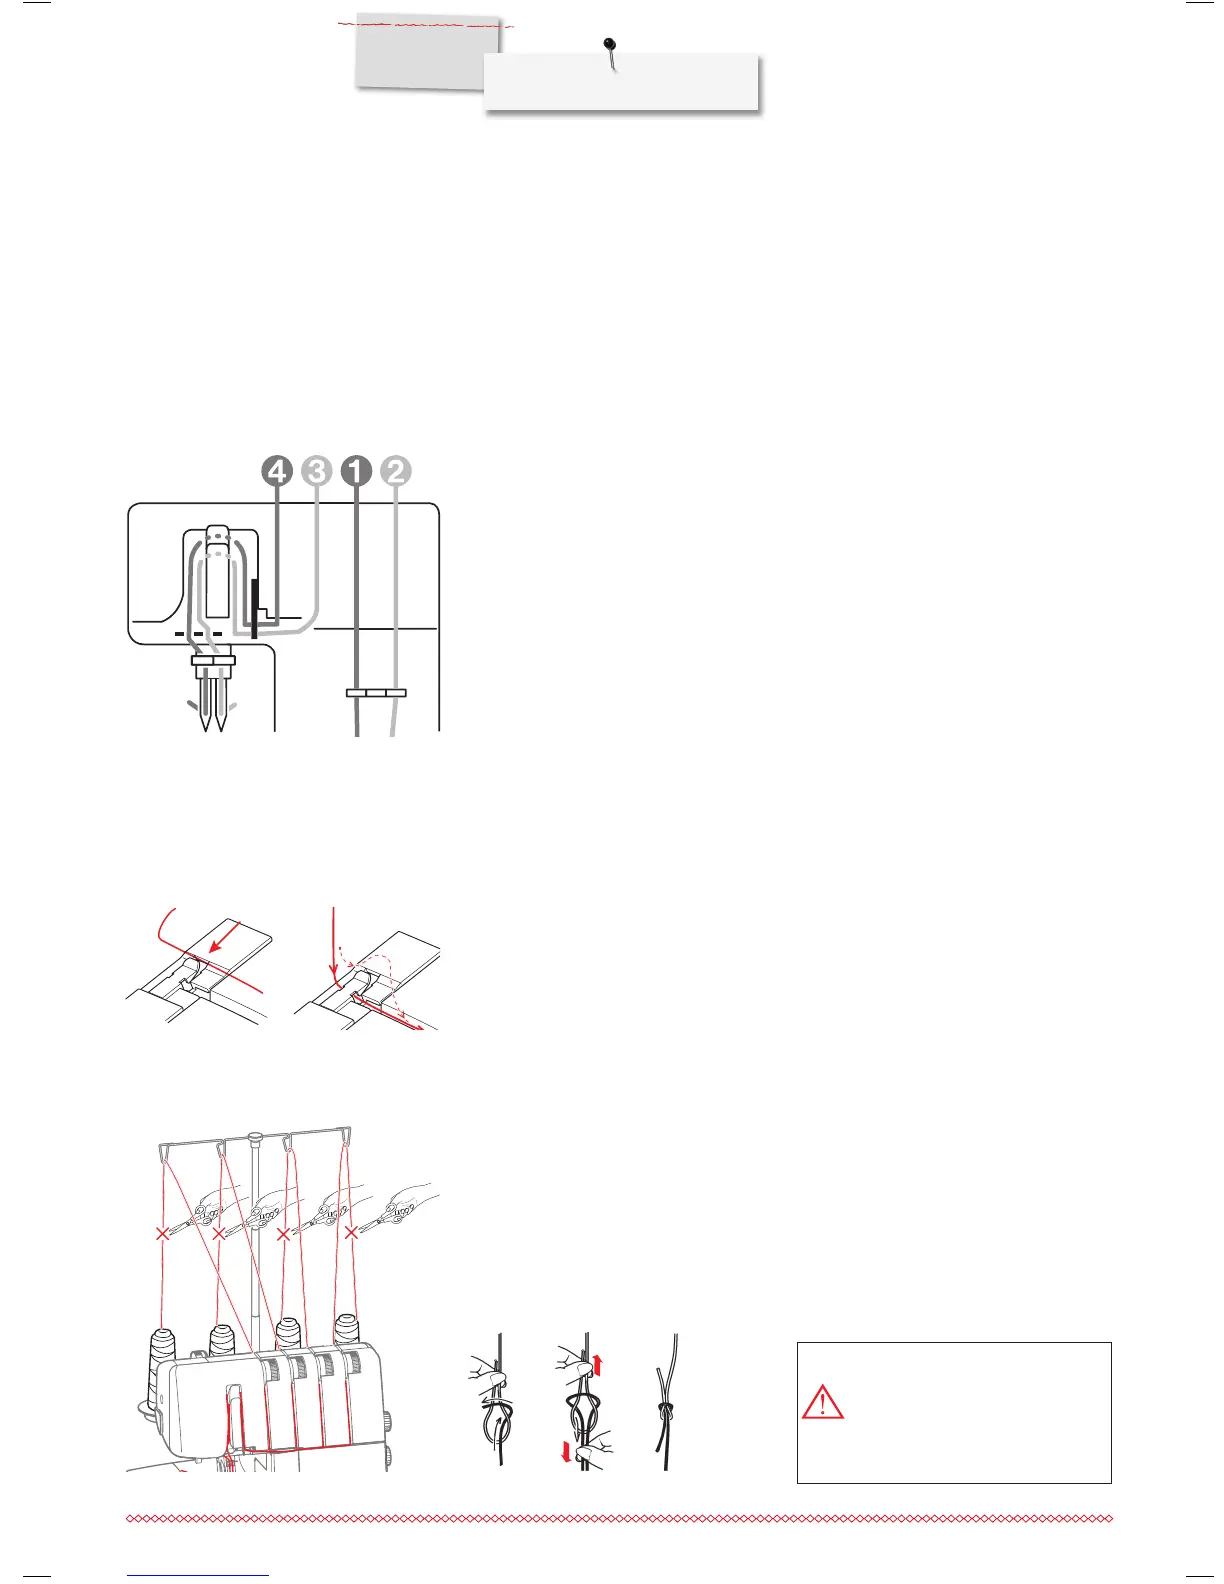
Thread the machine carefully and in the sequence as indicated on the following pages.
To achieve a good sewing result, it is important that you follow the sequence as described
and as indicated on the Threading Chart (color dots 1 – 4) in the machine.
Threading aids
⦁
Colored Stitch Charts in the appendix of this manual.
⦁
Color-coded thread paths on the machine.
⦁
Threading Chart in the machine.
⦁
Threading accessories.
After threading
⦁
Re-activate the knife (if deactivated).
⦁
Close the sewing table and the looper cover.
⦁
Switch the machine on.
⦁
Lower the presser foot.
Threading - General information
Thread pretension
Threading preparation
The thread pretensions are on the top of the machine. They are color-coded and simple
to thread. Hold the thread with both hands and slip into the appropriate guide from the right
side. Then gently pull towards the front, making sure the thread is firmly locked in the
pretension hooks.
Replacing thread spools
⦁
Cut off the existing threads near the spools and replace the cones.
⦁
Tie ends to new spools.
⦁
Raise the presser foot to release the tensions.
⦁
Cut the needle threads above the needle eyes and pull the needle threads carefully
through.
⦁
Pull the thread chain carefully so that the looper threads are pulled until the new colour
has passed through the looper eyes.
⦁
At the end, re-thread the needle eyes and lower the presser foot.
Needles could be damaged
when trying to pull the knots
through the needle eyes.