IX. MAINTENANCE AND SERVICE- cont.
44
4444
44
B
BB
B-
--
- PERFORMANCE CHECKS
PERFORMANCE CHECKS PERFORMANCE CHECKS
PERFORMANCE CHECKS
WARNING: If the CROSSVENT fails any of the following performance checks,
remove the unit from patient service and submit for maintenance.
1
11
1-
--
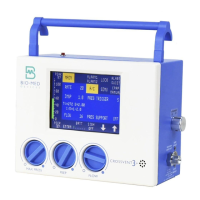
- SETUP MENU
SETUP MENU SETUP MENU
SETUP MENU
Turn on the unit and press the SETUP key.
OXYGEN SENSOR CALIBR
OXYGEN SENSOR CALIBROXYGEN SENSOR CALIBR
OXYGEN SENSOR CALIBRATION
ATIONATION
ATION
NOTE: Due to the fact that O2 sensors sometimes change output over time once exposed to atmosphere, a
calibration should be performed once a month in order to assure optimal accuracy. When the sensor is consumed
and does not calibrate properly, it should be discarded and a new sensor installed and calibrated.
With the O
2
Sensor cable plugged into the side of the CROSSVENT and the sensor open to atmosphere (not
in the circuit tee), press the OXYGEN key.
Wait 3-4 minutes and then press the 21% key. When the 21% is calibrated, it will return to the OXYGEN
menu and the 21% key will be green.
Connect the oxygen sensor tee to the patient connector on the side of the Crossvent and to it connect a
breathing circuit with a test lung.
With the O
2
sensor cable still plugged into the ventilator, install the O
2
sensor into the tee.
Apply 100% oxygen to the ventilator input and set 20 cmH
2
O of PEEP and 5 LPM flow.
Wait 3-4 minutes and then push the 100% key. When the 100% is calibrated, it will return to the OXYGEN
menu and the 100% key will be green.
You may now check the O
2
% readings in the Alarm Menu using a calibrated O
2
blender or Test Setup.
LEAK TEST
LEAK TESTLEAK TEST
LEAK TEST
(This tests the integrity of the patient circuit and its connections)
Connect the patient circuit along with a test lung to the Crossvent.
Set the Max Pressure to its maximum setting.
Set the flow control to 10 LPM. Press enter.
The Crossvent will pressurize the system and indicate “TESTING”, followed by either “PASSED” or
“FAILED” depending on the results. If it fails the test, check the patient circuit and all connections, and
retest.
2
22
2-
--
- CALIBRATION (CAL) MENU
CALIBRATION (CAL) MENU CALIBRATION (CAL) MENU
CALIBRATION (CAL) MENU
If in the SETUP Menu, press the CAL key, otherwise turn the unit off and back on and press SETUP and
then the CAL menu key.
KEYS
KEYSKEYS
KEYS
Press KEYS. Press on the display in various locations. Each time it is pressed in a different location, the
coordinates displayed should change. If any location pressed fails this test, submit for service. Push CAL
MENU to return to the CAL Menu.
DISPLAY
DISPLAYDISPLAY
DISPLAY
Press the DISPLAY key. The display will illuminate allowing you to check for missing pixels. Some
randomly missing pixels is considered acceptable.
FLOW
FLOW FLOW
FLOW VERIFICATION
VERIFICATIONVERIFICATION
VERIFICATION
NOTE: For greatest accuracy, verify flow using a 60% O2 gas supply, (100% O
2
with Entrainment on if
installed) making certain that the pressure to the CROSSVENT inlet remains within specified pressure limits
(31-75 psi; 303.6 – 517.4 kPa) at all flows.
Remove the exhalation valve from the patient hose. Turn the Max Pressure knob fully clockwise. Make
certain that the proximal airway pressure line and the pneumotach (if so equipped) are connected. Connect
the patient hose to a certified flow measurement instrument. In the Cal menu, select VALVES and turn on
Valve “A”.
With the supply pressure maintained as defined in the preceding NOTE, turn the Flow Knob to its
maximum setting and verify the flow indicated by the test instrument is within 108 - 132 LPM.
After verifying the maximum flow, adjust the flow knob to various flow levels, some high and some low, and
verify that the flow displayed in this menu is within ±10% of the actual flow as indicated by the test
instrument.
If the Crossvent is equipped with entrainment, turn it on and repeat these steps, paying heed to the NOTE
above.