IX. MAINTENANCE AND SERVICE- cont.
66
6666
66
H
HH
H-
--
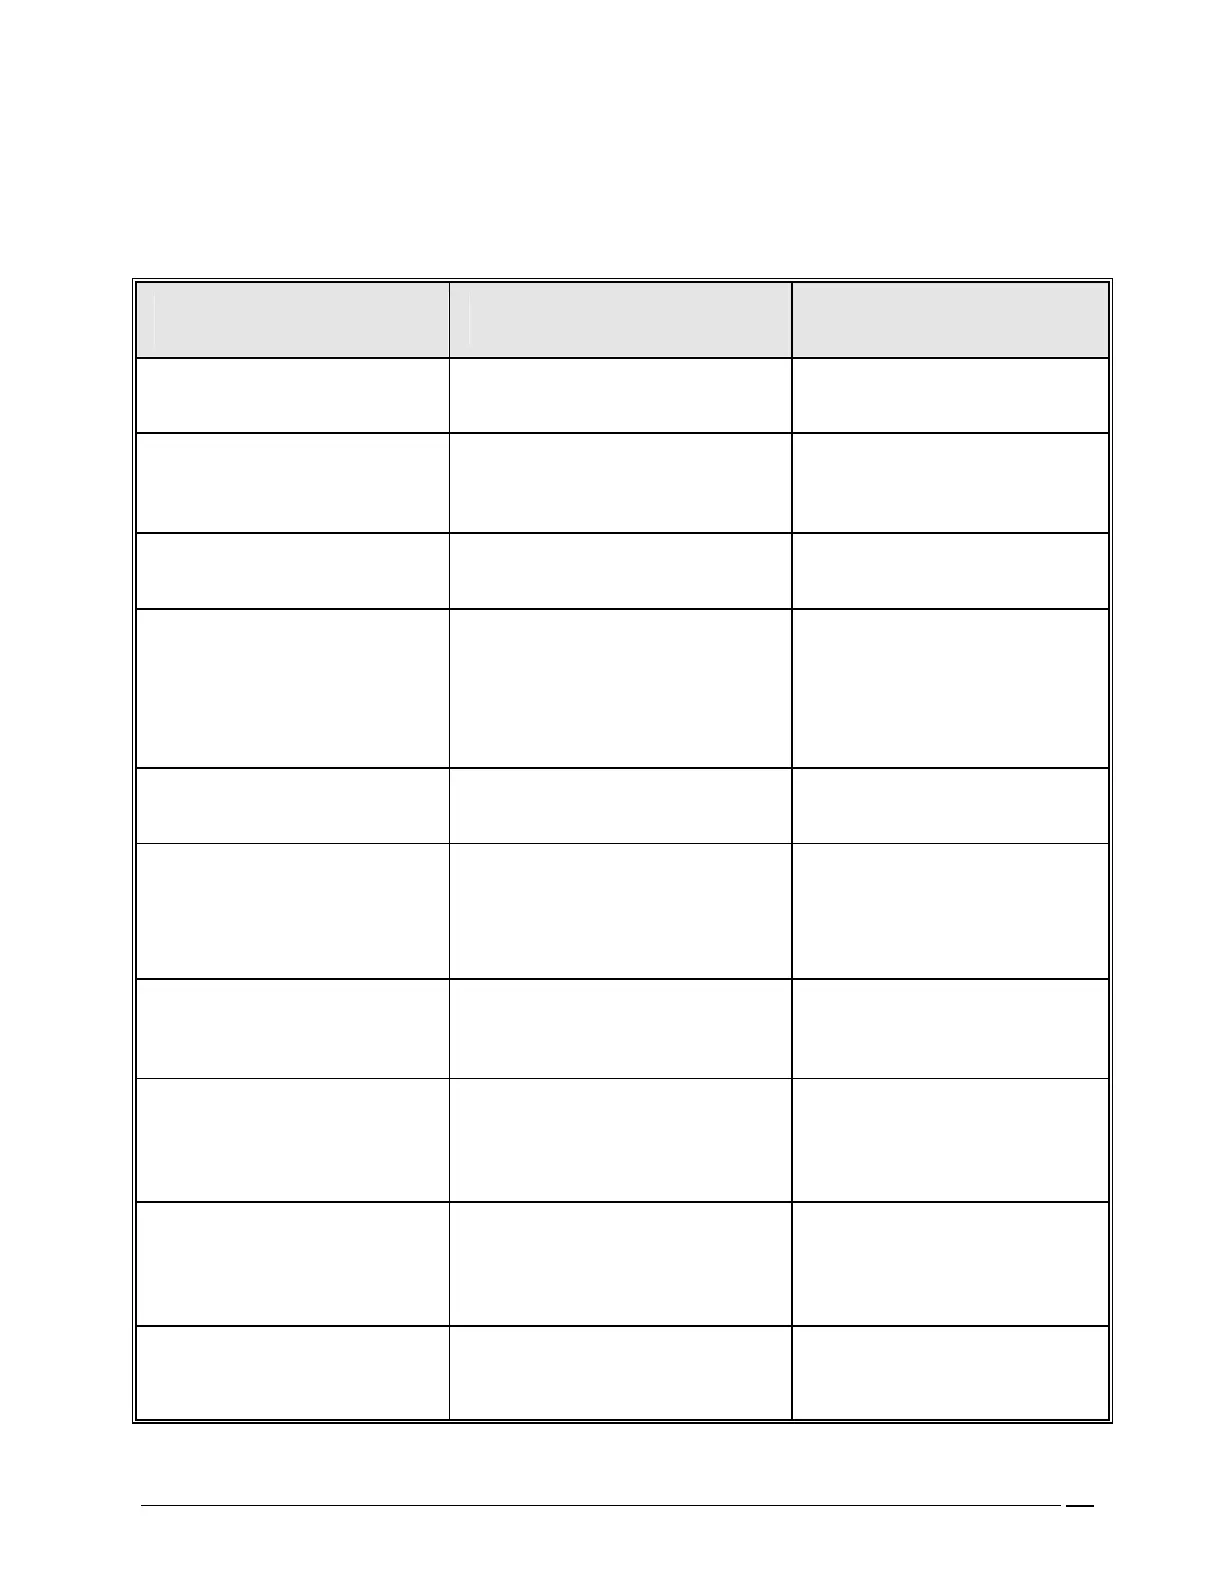
- TECHNICAL TROUBLESHOOTING CHART
TECHNICAL TROUBLESHOOTING CHART TECHNICAL TROUBLESHOOTING CHART
TECHNICAL TROUBLESHOOTING CHART
NOTE: A performance test should always be completed before proceeding with repairs.
CAUTION: Always follow proper static grounding procedures when removing or replacing
electronic parts, LCD assembly, etc.
SYMPTOM
POSSIBLE CAUSE
CORRECTIVE ACTION
Audible alarm with no visible
indication
Hardware Failure Refer to Appendix E
Auto cycling of the ventilator.
Pressure out of calibration.
Pressure Trigger set too low.
Re-cal pressure.
Increase Pressure Trigger
setting.
Battery low audible and visual
alarm.
Low battery.
Charge battery.
Battery will not charge.
External power ok.
Battery open.
Battery internal fuse open due to
heat or short
Battery cable open
D101, D104, DC101 open
Replace battery.
Allow to cool or replace battery
Repair cable.
Replace defective part
No battery operation.
Battery not charged.
D103 or DC103 open.
Charge battery.
Replace D103 or DC103.
External power failure alarm –
“BATT” flashing.
Loss of external power.
AC adaptor defective.
Fuse F101 open.
Defective D101, D104, DC101
Check input mains.
Replace ac adaptor.
Change fuse F101.
Replace defective part
Ventilator will not power up
from external power. Battery
operation ok.
Fuse F101 open.
AC adaptor defective.
D101, DC101 or D104 open.
Replace F101.
Replace AC adaptor.
Replace defective part.
Ventilator fails key test. All
other functions normal.
Defective touchscreen.
Bad IC401.
Poor Connection at JTS
Replace touchscreen.
Replace IC401.
Reconnect JTS or return to
factory.
Ventilator fails display test.
Poor connection at JLCD.
Defective LCD.
Defective IC403.
Reconnect JLCD
Replace LCD.
Replace IC403.
No Display
Bad connection at JLCD or JBL
Defective LCD
Defective IC403 or Inverter
Correct connection
Replace LCD
Replace defective part