IX. MAINTENANCE AND SERVICE- cont.
58
5858
58
f. Adjust the PEEP Knob until 15 cmH
2
O is observed on the analog gauge. All flow readings should
be taken with this backpressure. Readjust as necessary as each flow value is set. At the higher
flows, this pressure may go above 15 cmH
2
O and you may not be able to adjust it down. This is
acceptable.
g. Adjust the flow knob and observe the flow as indicated on the test instrument. It should be within
10% of the displayed flow on the Crossvent where it indicates “FLOW”. If not within specification,
refer to Troubleshooting in the following section before proceeding to calibration.
IF IT FAILS THE ABOVE TEST, CALIBRATE AS FOLLOWS:
h. Setup same as above.
i. Adjust the flow knob until the actual measured flow, as indicated on the test instrument, is equal to
5 lpm. Then compare this actual measured flow to the flow value indicated in the upper portion of
the Crossvent display. If the flow as indicated by the Crossvent is within ±10% of the actual flow,
in this case 4.5 – 5.5 lpm, proceed with the next flow point in the table. If it is not within the 10%
limits, press the “5” key in the table corresponding to the actual flow. The displayed flow on the
Crossvent should now display 5 lpm. The flow knob is now calibrated to the actual flow for that
setting. Repeat for all other flow points while holding a PEEP of 15 cmH
2
O as described
previously.
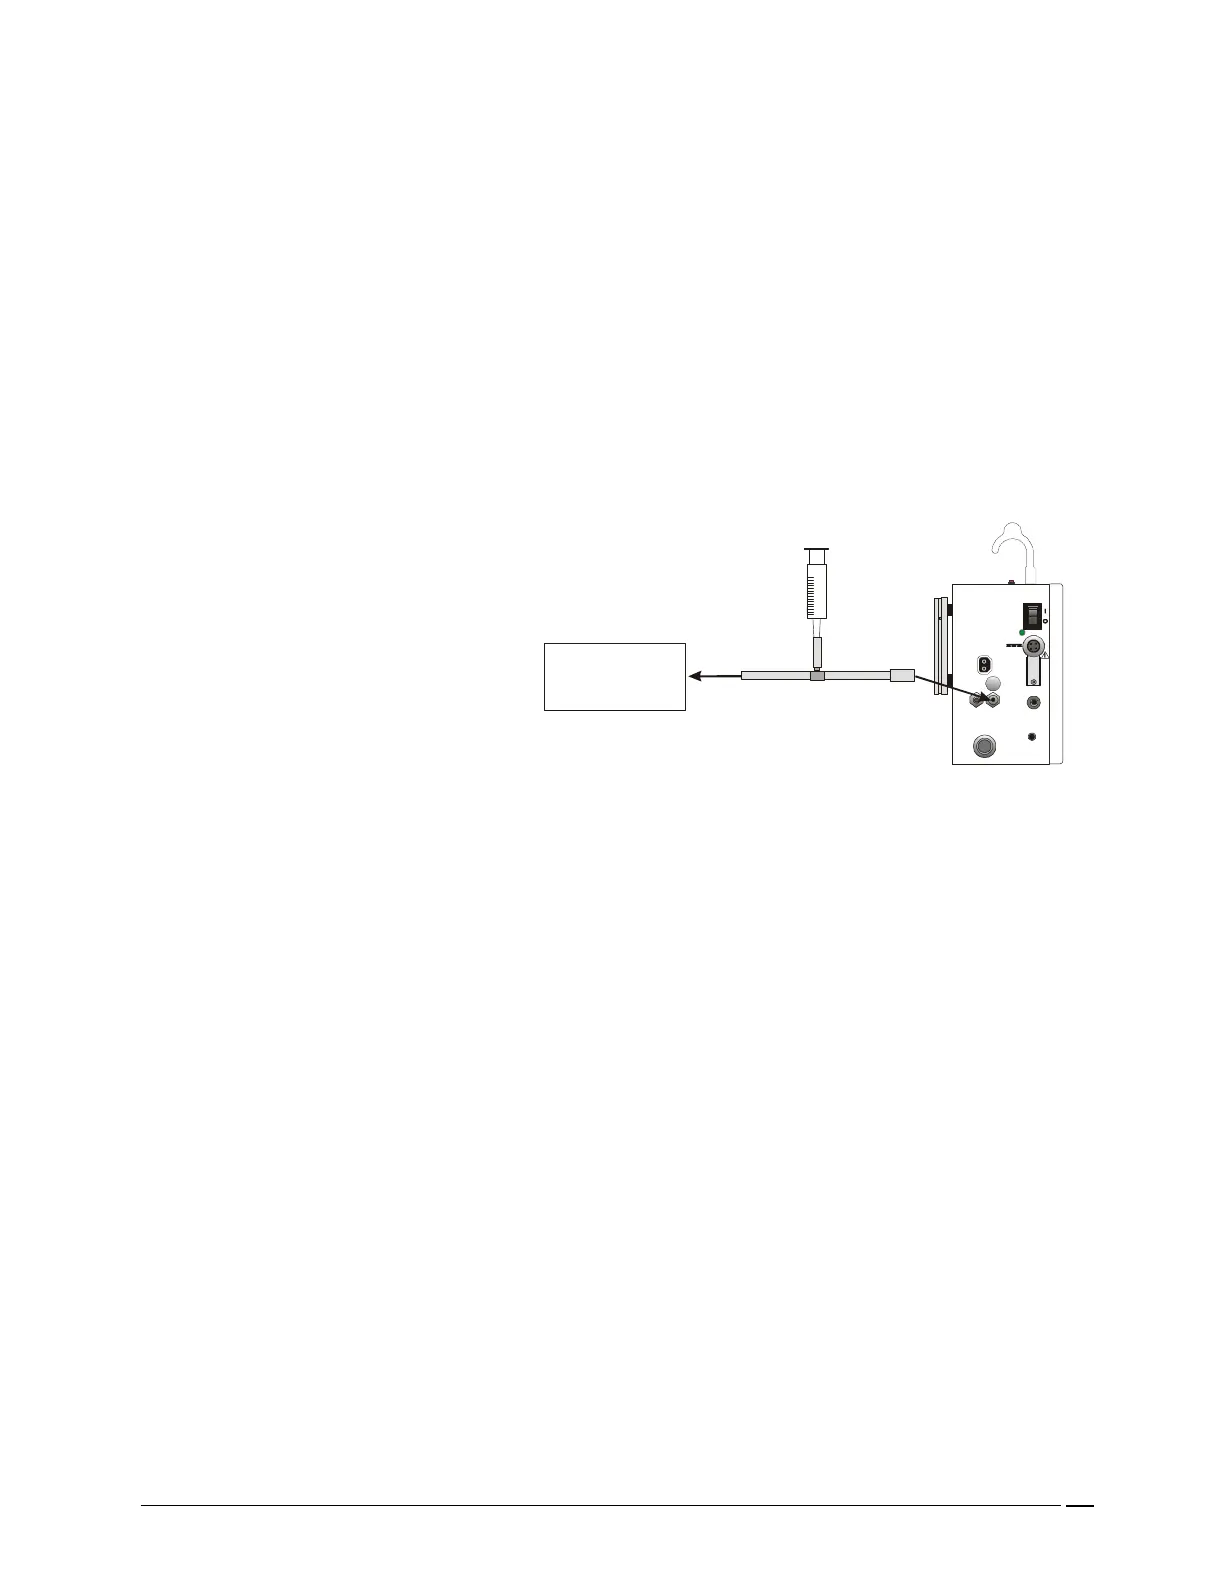
15. PRESSURE CALIBRATION
TO TEST:
a. Tee a 10-25 ml syringe (or similar)
into a tube that connects the
airway pressure fitting on the
Crossvent to a low pressure test
device.
b. Turn on the Crossvent.
c. While pushing in and varying the
plunger on the syringe, observe the
pressure bar graph and PEAK
reading above the graph.
d. The readings on the display should
be within 3% of the readings on the
test instrument. If not within
specification, refer to Troubleshooting in the following section before proceeding to calibration.
IF IT FAILS THE ABOVE TEST, CALIBRATE AS FOLLOWS:
e. Turn the unit on and press SETUP and then the CAL MENU key.
f. Press the PRESSURE key and enter the authorization code.
g. With the airway pressure connector on the side of the unit open to atmosphere (zero pressure),
press the key labeled ZERO.
h. Set up as in step a.
i. Apply 100 cmH
2
O pressure to the airway pressure connector and press the 100 cmH
2
O key.
FIG. 14- PRESSURE CALIBRATION
Low Pressure
Test Instrument
POWER
ON
OFF
EXH
VALVE
AIRWAY
PRESSURE
NEBULIZER
PATIENT
ALARM
RESET
O
2
FLOW SENS OR
CHARGING