Biomagnetic Separation - Magnetic Bead Assays| 57
The magnet should be stored in a cool, dry environment and should be cleaned with
a damp cloth and mild detergent when exposed to harsh solvents. Do not autoclave.
To install the magnet in the proper orientation:
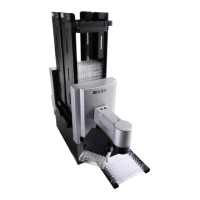
l Flat magnet: place in the plate carrier so the text on the side of the magnet is
readable;
l Ring magnet: place in the plate carrier with the small round magnets visible,
facing upwards.
Realign the BioStack with the Magnet Installed
Using the magnet increases the effective height of the carrier surface (generally by at
least 1 mm). This shift in the plate position requires a comparable adjustment to the
BioStack’s gripper movement. Realign the BioStack before using it with the magnetic
bead assays.
Refer to the BioStack Operator’s Manual for detailed instructions of the alignment
procedure. To help get you started:
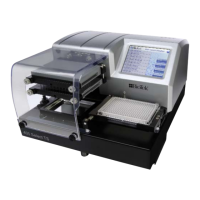
1. Place the magnet in the carrier and a microplate on top of it.
2. Launch the BioStack Alignment Utility:
LHC Touch screen
Tools> BioStack Utilities> Alignment Utility Instrument>Next> BioStack
3. HOME the BioStack and Begin Realignment.
4. Lower the claw until a 0.050” (1.3 mm) gap between the bottom of the plate and
the top of the gripper fingers is achieved and save the gripper position.
5. Put the microplate in the input stack and Verify the alignment.
Remember to realign the BioStack for non-bead assays, when applicable.
Perform Magnetic Bead Assays
For the best results when performing biomagnetic separation assays:
l Use the Manifold Stop Screw Adjustment Kit on page 62, if necessary.
l Realign the BioStack with the Magnet Installed on page 57
l Change the Magnet Height Offset on page 60
l Optimize Magnetic Bead Protocols on the next page
BioTek Instruments, Inc.
 Loading...