22 BA-106/1EA M53.10XX
7.1 - Maintenance
7 - Maintenance and service
• Disconnect the electrical power from the machine.
• Set power switch to OFF
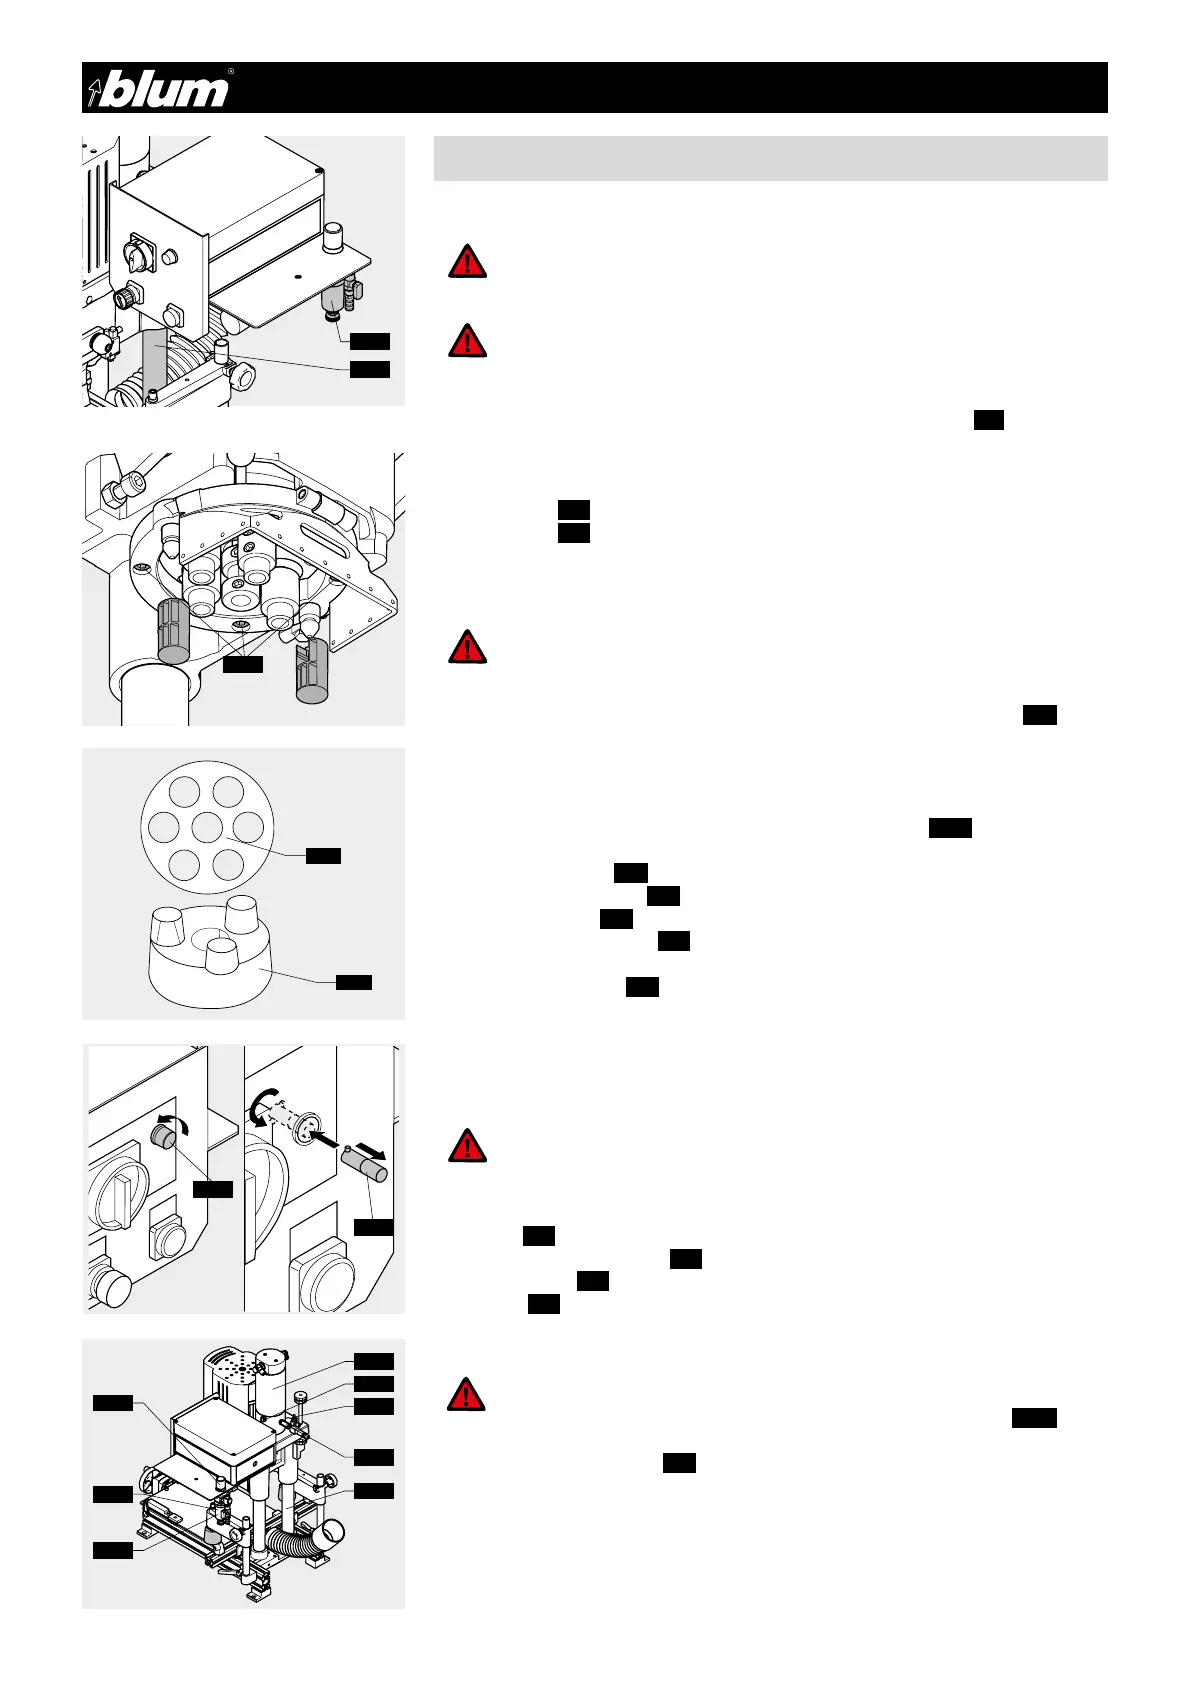
• Remove (7.7 ) light bulb cover. (unscrew)
• Remove defective light bulb ( 7. 8). (Press and turn counter clockwise)
• Install new bulb (7.8). (Press and turn clockwise)
• Reattach ( 7.7) light bulb cover.
7.1.4) Releasing cylinder air pressure
• Dust and chips should be removed from the machine on a regular basis
• Before using the machine, you should always check the air filter unit (7.1) for water
which may accumulate there. Empty the unit if necessary.
• Before every use of the machine, check the pneumatic lines and electrical lines for
damage.
• The columns ( 7. 2) are maintenance free and should not be oiled
• The columns ( 7. 2) must be cleaned regularly with a dry cloth to remove dust.
(Do not use cleaners or solvents)
ATTENTION:
Disconnect electrical and pneumatic power from machine before per-
forming any maintenance operation.
ATTENTION:
Disconnect electrical and pneumatic power from machine before per-
forming any maintenance operation.
ATTENTION:
Disconnect electrical and pneumatic power from machine before per-
forming any maintenance operation.
ATTENTION:
Air pressure remains in cylinder after pneumatic power is disconnected.
Be aware, when this action is taken the boring head will drop (4.23).Keep
hands clear.
ATTENTION:
The cylinder remains pressurized after pnematic power is disconnected
from machine. To release cylinder, see section 7.1.4 for cylinder depres-
surization instructions.
7.1.1) Maintenance
7.1.2) Damaged clutch
The clutch is damaged if:
• The drill bit is jammed in the work piece but the motor fan wheel continues (2.9)
to turn.
• Set power switch to OFF
• Disconnect electrical and pneumatic connections to the machine
• Remove drill bits
• Remove the 4 bolts that hold safety shield to gearbox housing (4.24)
• Move safety shield to one side then while holding internal gearbox, pull out boring
head securing knob. (4.5) This will allow the internal gearbox to come down and out.
• Remove dampening ring ( 7. 5)
• Remove old clutch (7.6)
• Attach replacement clutch (7.6) on to the spindle. (ensure correct positioning of clutch
and spindle)
• Insert dampening ring ( 7.5)
• Preposition clutch base for alignment with motor
• Slide gear box up into housing
• Ensure clutch reengages
• Reinstall safety shield
7.1.3) Replacing the light bulb
• Use the cylinder vent valve ( 7. 9) to release air pressure from the cylinder.
7. 6
7. 5
4.24
 Loading...