10.1.4 Thermal Print Head Replacement
Below reviews how to replace the thermal print head in your printer. Different type of print heads is used due
to manufacture date, dots per inch (DPI) and size. A DPI of a printer may be determined by taking a look at
the Width and DPI area of the printer’s serial number tag. See Print Head Guide.
The follow needs to be done with the printer powered off and unplugged from the AC source.
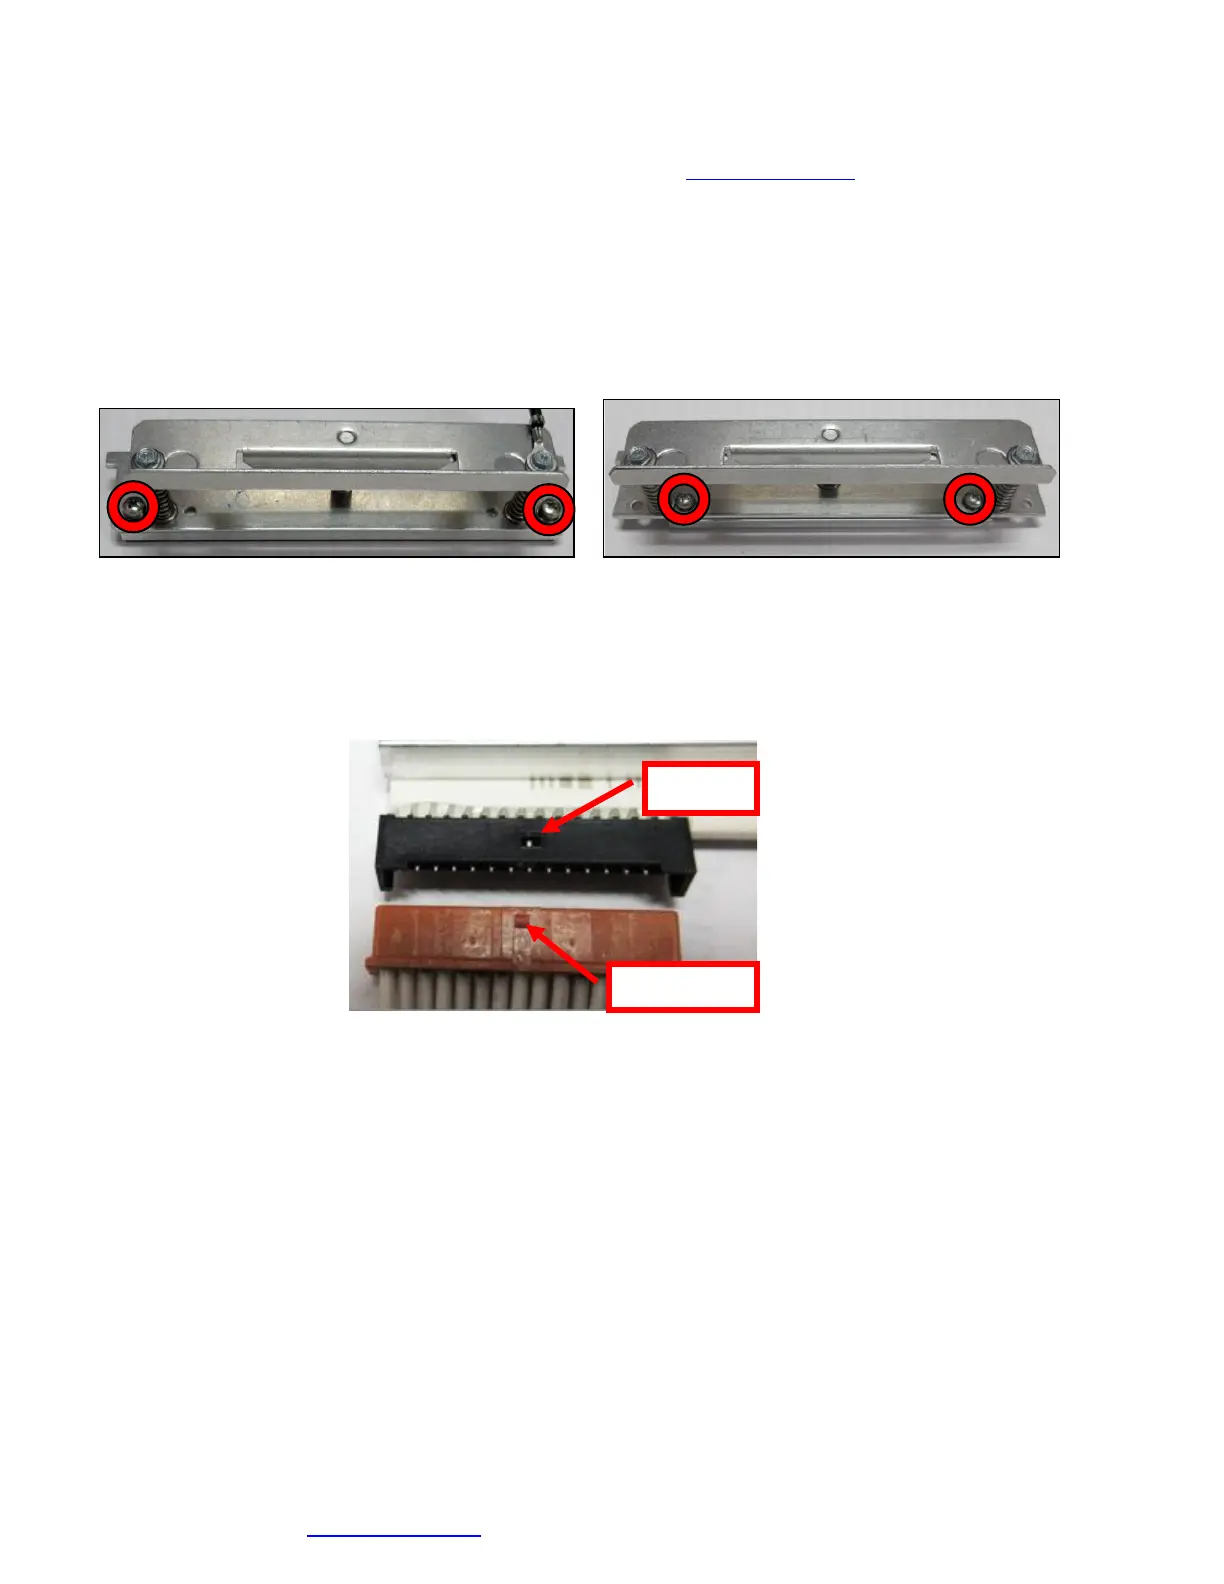
1. Remove the print head mounting plate from the printer as shown in previous section dependent on the
type of printer and head mounting plate the printer has.
2. Once the head plate has been removed; loosen the two Philip head screws until the thermal print head
disengages from the head plate. Take care not to lose the screw.
3. Gently unplug the cable from the old print head and plug it into the new print head. If your print head
has two cables then this should be done one cable at a time so not to mix them up. The cables are
keyed (see examples below). The keyed position must be lined up while plugging the cable into the
print head. You should not have to use excessive force to do this.
4. Install the print head back onto the print head mounting plate.
5. Install the head mounting plate/ thermal head back into the printer.
Click here to return to > Table of Contents