26
6.1.2 Swivel-arm-mounted AC generators with direct drive
i For testing swivel-arm-mounted AC generators it is necessary
to use a special clamping device (included in delivery). For
test speeds up to 6000 rpm it is possible to use direct drive
for medium-size and small generators.
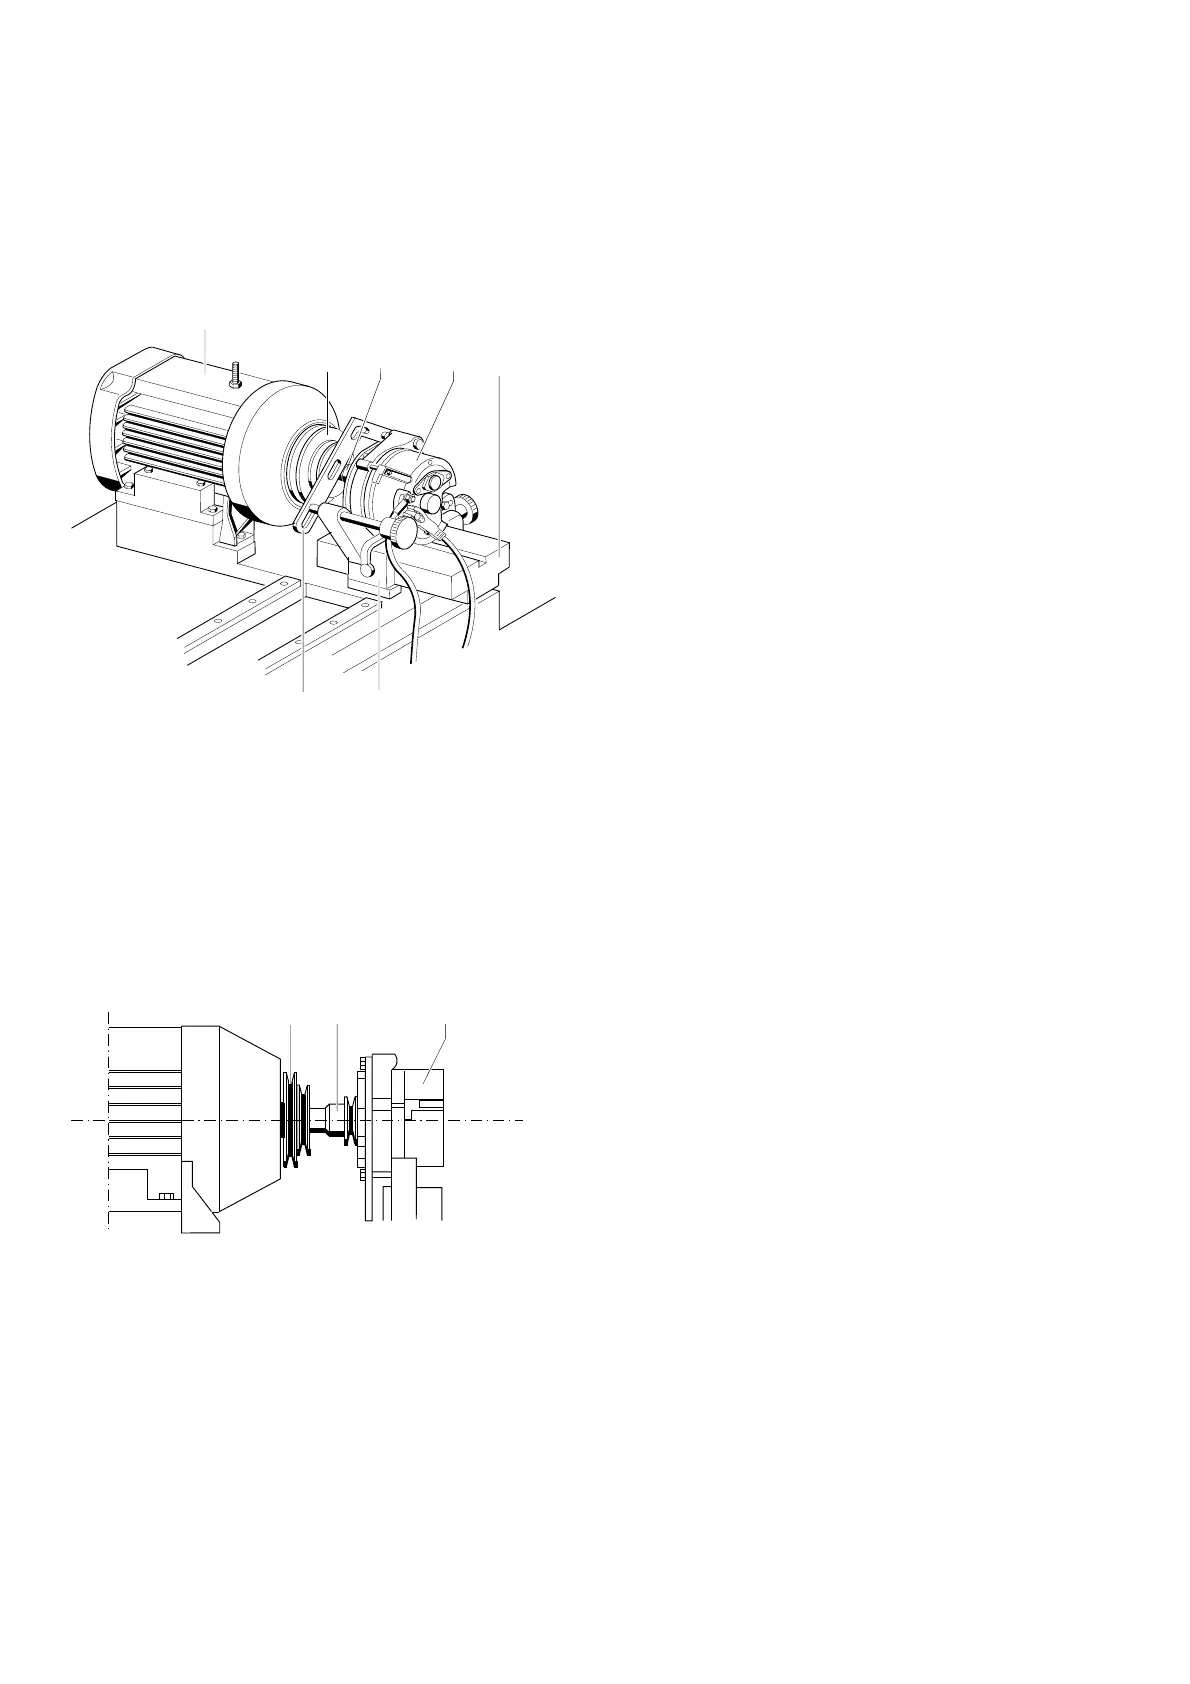
Fig. 8Fig. 8
Fig. 8Fig. 8
Fig. 8: Clamping of swivel-arm-mounted AC generators with direct drive
- Slide clamping device (4/10) onto guideway of mounting
table (4/6).
- Lightly screw the swivel arm slot (4/11) on the clamping device
(4/10) to the generator (4/5).
- Fit a coupling half with appropriate socket wrench (4/3) to the
drive pulley of the drive motor (4/2).
Fig. 9Fig. 9
Fig. 9Fig. 9
Fig. 9: Connection of coupling half to drive pulley
- Set the height of the mounting table (4/6) and connect the
generator (4/5) to the drive (4/1).
- Close protective cover.
- Switch on main switch (36).
Indicator lamp (36) lights up.
- Actuate MOTOR push-button switch (35).
Indicator lamp (35) lights up.
- Set rotational-speed selector switch (32) to the >0< position.
- Select rotational speed with RPM push-button switch (33).
LED lights up.
- Set selector switch left/right (33) to desired direction of
rotation.
LED lights up.
- Actuate RUN push-button switch (33).
LED lights up.
- Start up the drive motor by turning the speed control (32).
i The drive motor does not start when the speed control is
not in the >0< position.
Optical and acoustic indicators ensue.
! Drive generator only at approx. 50 -100 rpm and use the
handwheel (3) to adjust height until coupling noises are
eliminated and the generator is running smoothly.
- Tighten swivel arm screws (4/11) and clamping device (4/10)
and lock handwheel (3).
- Actuate MOTOR push-button switch (35).
Indicator lamp (35) off!
The drive motor is now switched off.
For electrical connection, see section 6.2.
4/2
4/3 4/5
458717P
458716P
4/1
4/5
4/6
4/104/11
4/3
4/2