6 720 800 095 (2014/05)Therm 6000S
Maintenance | 35
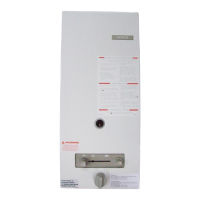
Remove the three screws from the control unit (Fig. 49 and
Fig. 50, [2]).
Fig. 49
Remove the six screws from the back cover of the control
unit, see Fig. 50, [2].
Fig. 50 Fuses position
After checking the fuses, reinstall all parts in reverse order.
9.3 Startup after maintenance
Check all water and gas joints.
Read chapter 4 "Operating instructions" and/or chapter 8
"Installation instructions".
Check gas pressure (burner pressure).
Make sure combustion cover is securely fastened.
Ensure the exhaust vent adaptor is properly sealed.
Check for gas leakage.
Check for water
leakage.
6720608920-38.1Av
2
1
3
6720608158-78.1AL
 Loading...