CAP. 8 - COMMISSIONING 36 / 77 ENGLISH
M
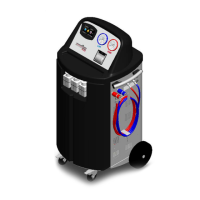
ULTIGAS 8500 PLUS
Set the quantity of gas to fill (at least 3 kg) and follow the guided procedure shown on the display.
Check that the equipment hoses are not connected and positioned in the hose winder. Start the
procedure that initially implies the creation of vacuum in the internal tank. This phase will take 15
minutes and will act on the whole equipment.
Only when the message appears asking to connect the recharge tank, connect the supplied HP
quick coupler (coulour red) in case of R134a or the LP quick coupler, in case of R1234yf, of the unit
to an external refrigerant gas tank using the supplied adaptor.
Open the coupler by turning the knob clockwise. Open the valve on the external tank.
Just right before reaching the planned quantity of refrigerant, the unit will stop and ask the user to
close the external refrigerant tank. Then, the device will continue the recovery from the hoses and
ends when these are empty. Hence, it is necessary to open the LP quick-coupler and disconnect it
from the external tank. Thanks to the ECO-LOCK function, the refrigerant - usually kept between the
cylinder fitting and the hose quick-coupler until the end of the process - will not be released in the
environment.
There may be two types of source tanks: with plunger and without plunger.
Tanks with plunger shall remain upright to be able to transfer liquid refrigerant; for this type of tanks
connect to the L (liquid) coupler.
Tanks without plunger have only one valve, so they must be turned upside down to transfer the
liquid refrigerant.
The LP gauge indicates the pressure inside the external tank.
After some minutes the unit will automatically end the function.
At the end the weight of the charged refrigerant will be displayed.
8.2 NEW OIL BOTTLE FILLING
The new oil bottle is on the left – looking at the unit from the front side.
To fill it, it has to be extracted from its housing by means of the quick coupler on the top of the
bottle; slightly press downward the coupler ring nut to extract it.
Fill the bottle by paying special attention to the “oil care” valve.
This valve is made of a silicon polymer membrane; it compensates pressure variations within the
bottle and stops humid air infeed inside thus preserving the new oil inside.