Step
2. Attach the Reference Clamp Universal to the head holder ①, and secure it by tightening
the clamp handle ② until it is closed.
3. Attach the unsterile Standard Cranial Reference Array (4 marker sphere) ⑤ to the
clamp connector ④, and secure it with the fixation nut ⑥.
4. Adjust the array to the required position and secure it in this position, by tightening the
handles ③.
NOTE: To remove the unsterile array, loosen the handles, open the fixation nut and lift the
array off.
How to Attach the Sterile Array
Figure 20
Step
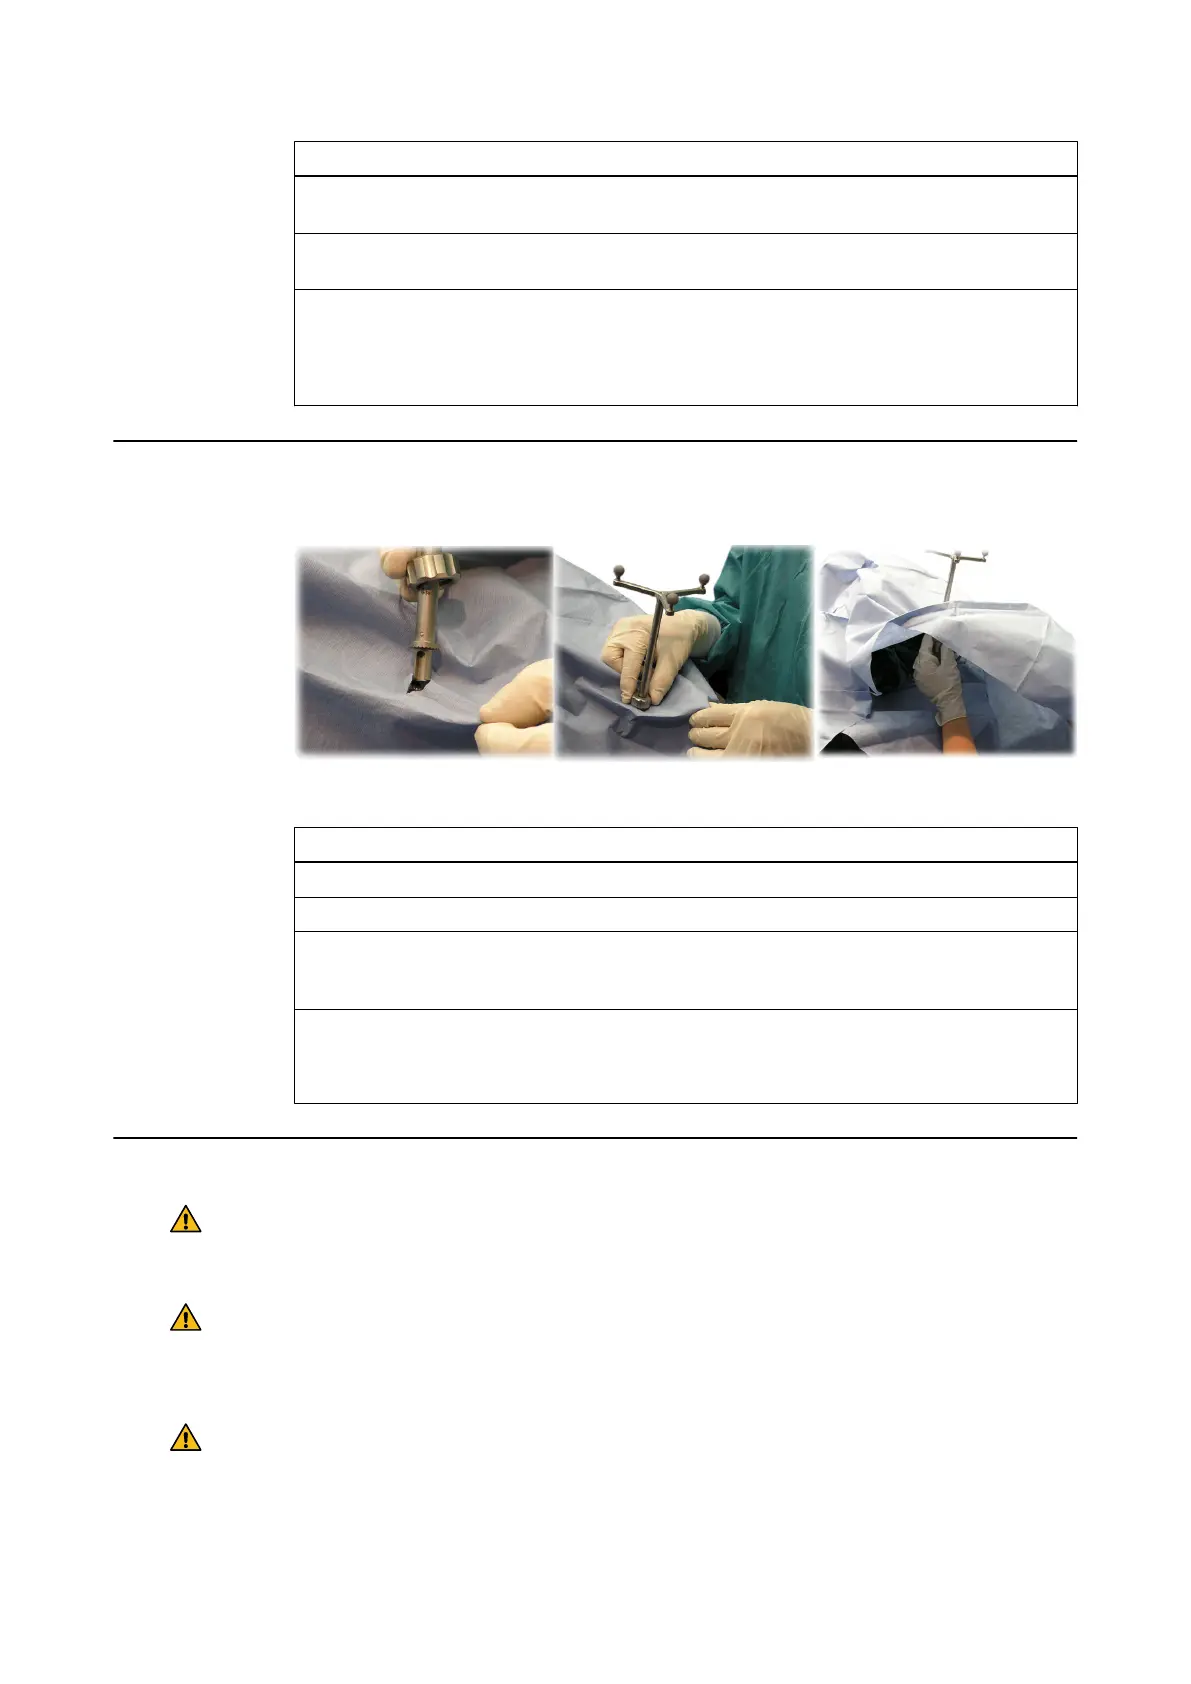
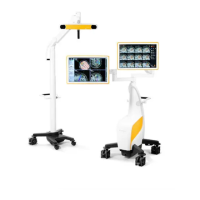
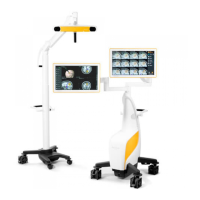
1. Carefully cut the drape to provide access for attaching the sterile reference array ①.
2. Guide the fixation nut of the reference array through the drape ②.
3. A non-sterile assistant should now mount the reference array to the Reference Clamp
Universal and secure it tightly with the handles and fixation nut from underneath the
drape ③.
4. Attach the drape to the reference array (below the fixation nut) using the sterile tape.
NOTE: To remove the sterile array, detach the tape, loosen the handles, open the fixation
nut and lift the array off.
Patient Registration
Warning
Make sure that all screws of the Reference Clamp Universal are tightly closed before
beginning registration.
Warning
Make sure that the Reference Clamp Universal is tightly attached to the head holder before
beginning registration. Any movement of the Reference Clamp Universal independent from
a movement of the patient’s head causes inaccuracy and is a hazard to the patient.
Warning
Do not unscrew any Reference Clamp Universal screws after registration. Only the fixation
nut can be unscrewed to exchange the Standard Cranial Reference Array.
Reference Clamp Universal
58 Instrument User Guide Rev. 2.6 Cranial/ENT Optical Tracking