13
- Please always remove the back-up battery if the device is not going to be used for a while. Please keep
in mind that even when the device is not in use, certain settings, such as the clock, alert settings and
records in its memory, will still drain the back-up battery.
3.3.2 SETUP DISPLAY CONSOLE
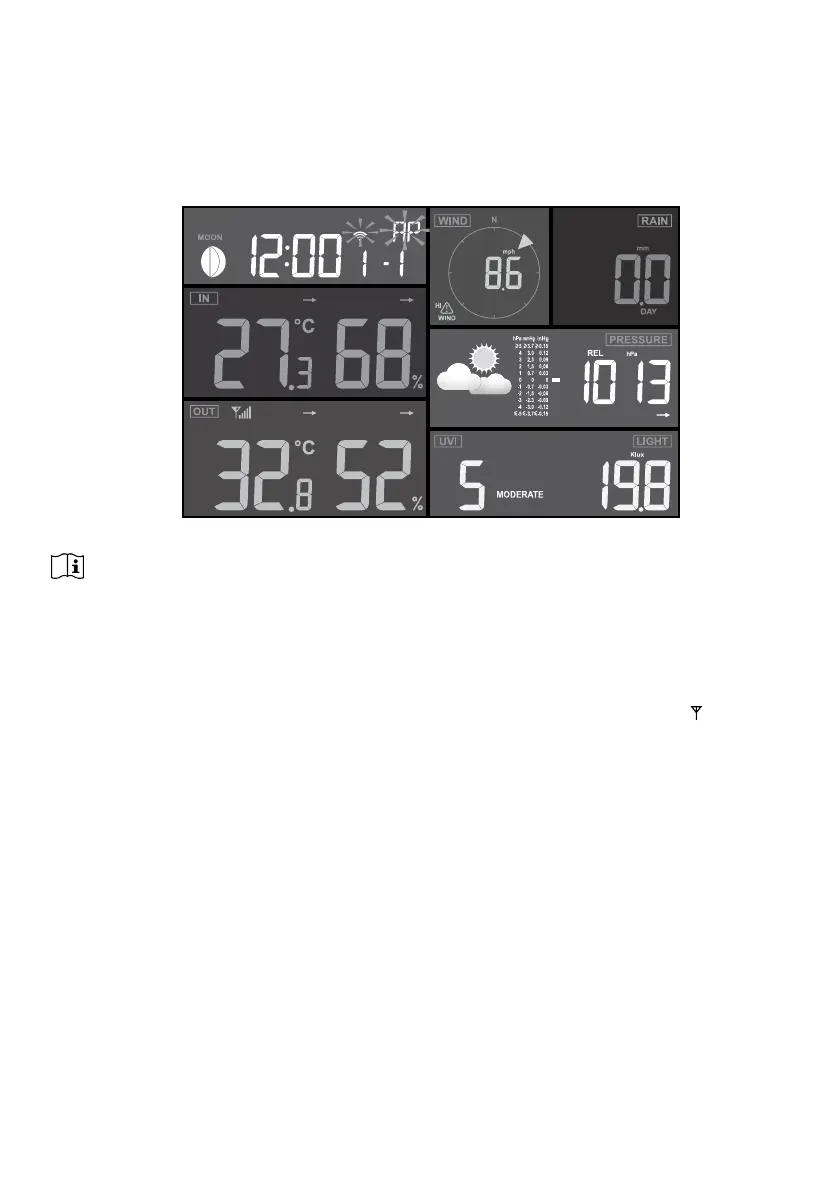
1. Once the console power up, all the segments of the LCD will be shown.
2. The console will automatically start AP mode and show the "AP" icon on the screen, you
can follow the Section 5 to setup the WI-FI connection.
Start up screen (with 7-in-1 sensor connected)
NOTE:
If no display appears when power up the console, you can press [ RESET ] key by using a pointed object.
If this process still not work, you can remove the backup battery and unplug the adapter then re-power up
the console again.
3.3.3 SYNCHRONIZING WIRELESS 7-IN-1 SENSOR ARRAY
Immediately after power up the console, while still in synchronization mode, the 7-in-1 sensor
can be paired to the console automatically (as indicated by the ashing antenna
). User may
also manually restart the synchronization mode by pressing the [ SENSOR / WI-FI ] key. Once
they are paired up, the sensor signal strength indicator and weather reading will appear on your
console display.
3.3.4 DATA CLEARING
During installation of the wireless 7-in-1 sensor, the sensors were likely to be triggered,
resulting in erroneous rainfall and wind measurements. After the installation, user may clear
out all the erroneous data from the display console. Simply press the [ RESET ] key once to
re-start the console.



 To Next Page