6. Replacing Parts
6-1-29. Wiper Motor
Required Tool
Phillips screwdriver
Disassembling
1. Remove the Maintenance Unit. (Refer to “6-1-16. Assembling / Disassembling of the Maintenance Unit”.)
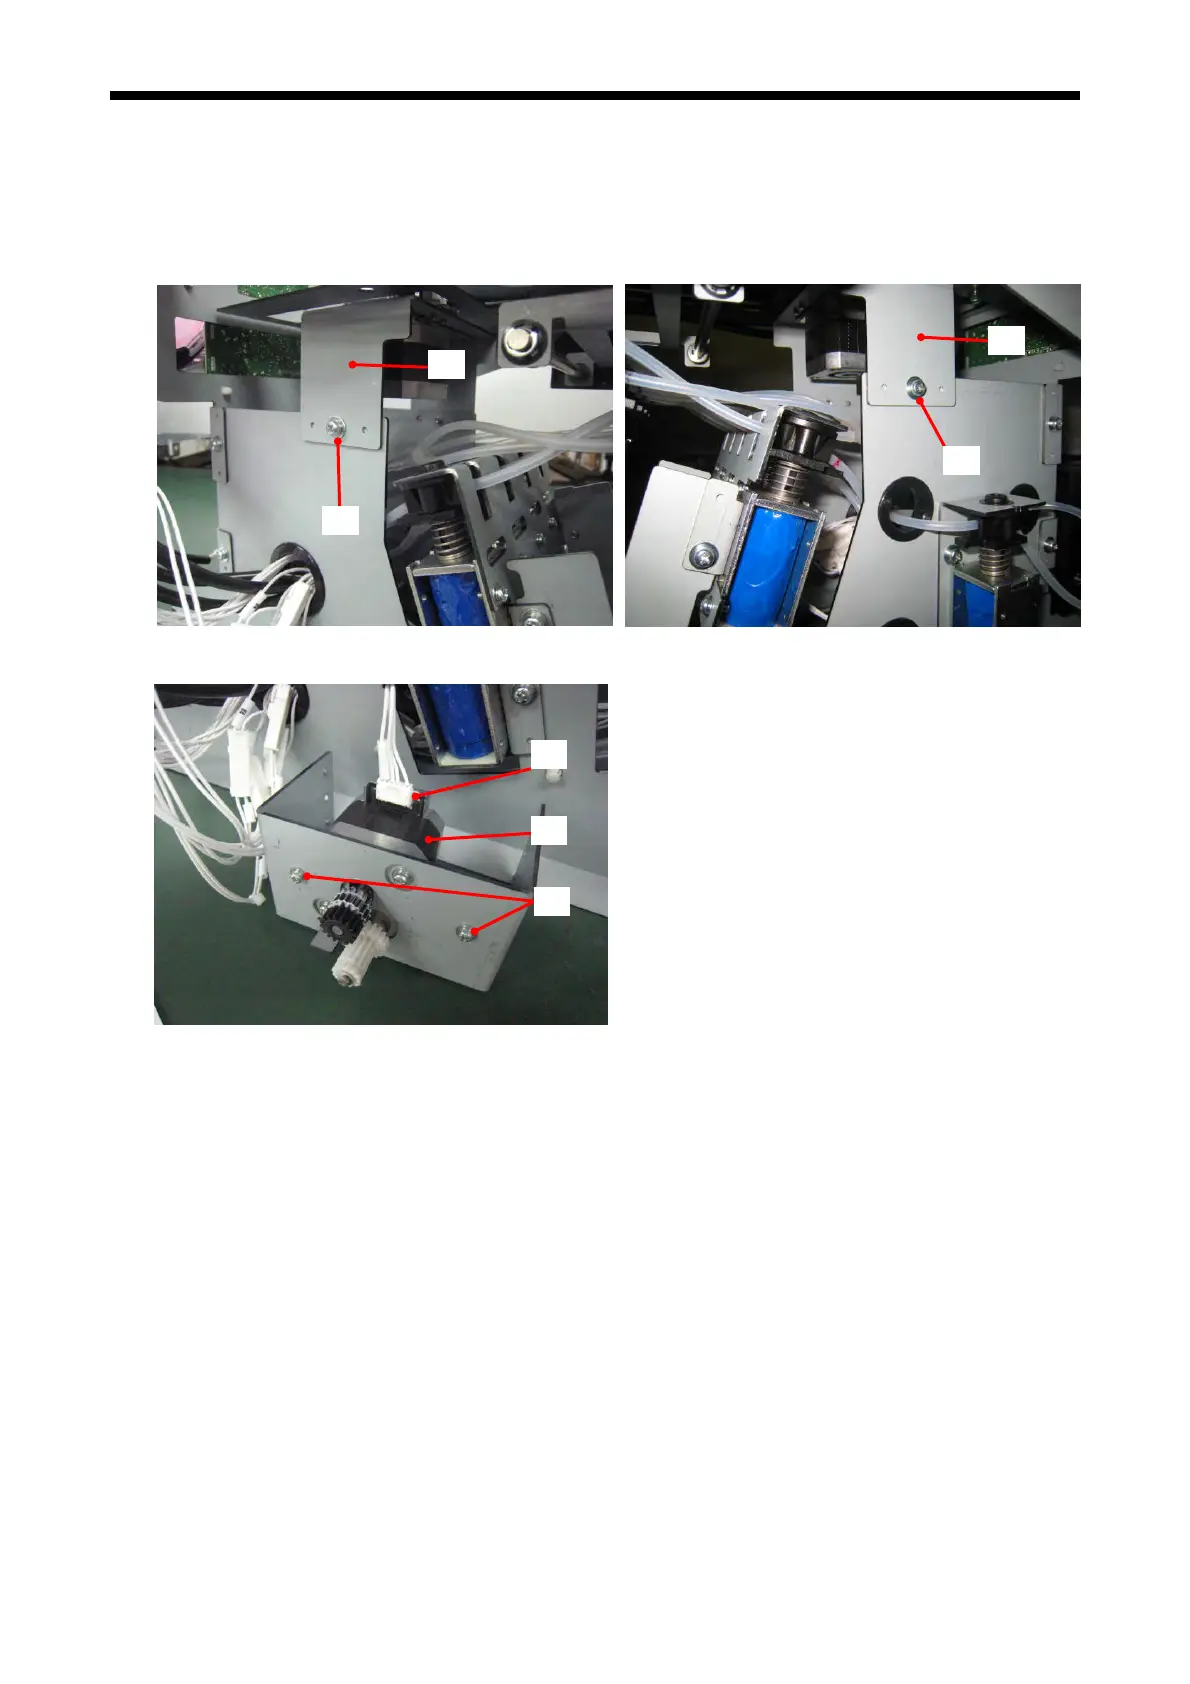
2. Remove the screws (2) that fix the W Motor Base Lower (1)
(2)
(1)
(2)
(1)
3.
Remove the
Connector (3) and two screws (4).
(5)
(4)
(3)
Replac
emen
t & Assembling
1. Mount temporarily the new W Motor Base Unit Assy (5) to the W Motor Base Lower (1) with the two
screws (4), and connect the Connector (3).
2. Fix the W Motor Base Lower (1). (Refer to the step 3 and 4 in “6-1-28. Adjusting the position of Wiper
Blades”.)
3. Tighten the screws (4) at the position where the clearance of the Gears is evenly located, by moving the
W Motor Base Unit Assy (5) horizontally.
Reconfirmation
1. Turn ON the printer and select [ Output Check ] > [ Wiper Test ] in the Advanced Menu. (Refer to “3-1-3.
How to go to Advanced Menu” and “3-1-5-3. Output Check”.)
2. Move the Carriage out of the Maintenance Unit by hand when the Caps are down, and confirm that the
Wiper should move [ to Center ] or [ to Both Ends ] properly.
3. Push the Stop Button to move the Carriage to the home position and turn OFF the printer.
GT-3 Series
205

 Loading...


