6. Replacing Parts
6-2-22. FFC
Disassembling
1. Remove the AC Cord and open the Cover UB.
2. Remove the Cover DR (right side). (Refer to “6-1-2. Assembling/Disassembling of the Covers”.)
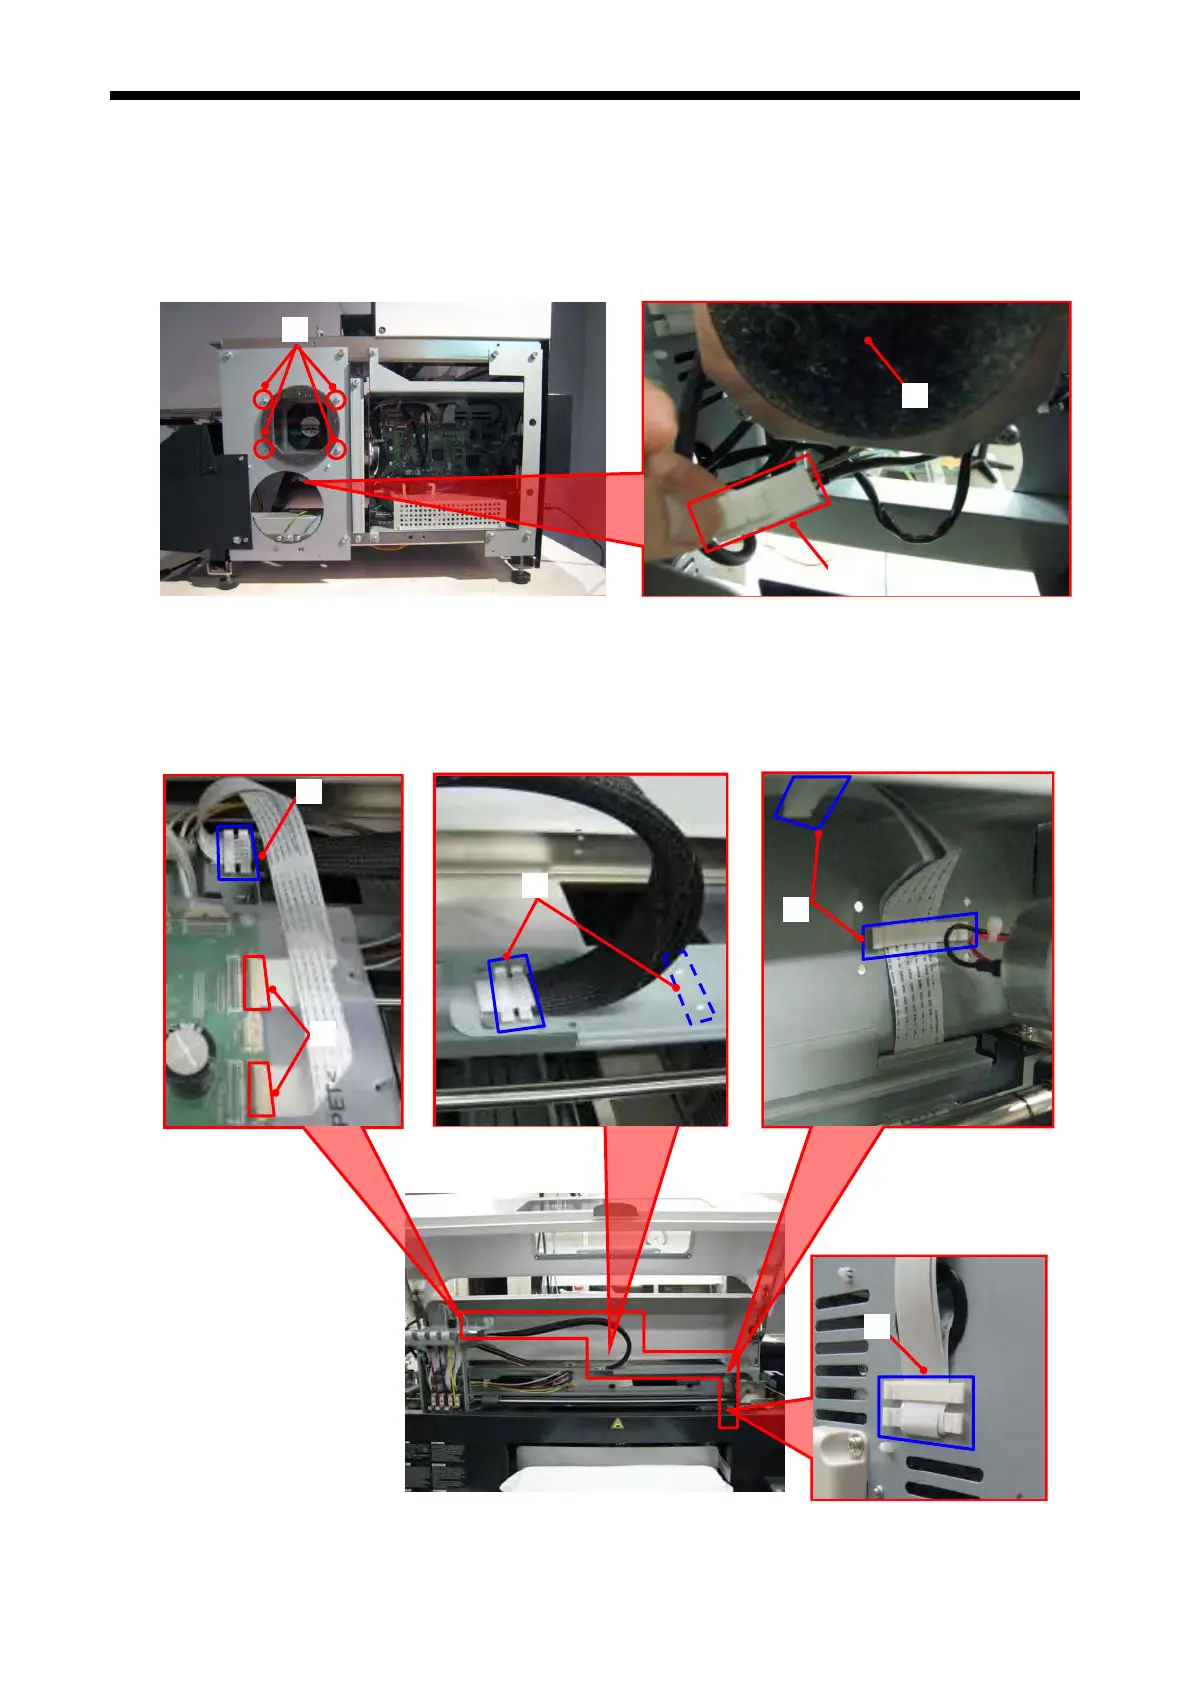
<Note> The operation will be easier to remove the four Screws (1) and the Connector (2), and the
Exhaust Fan (3) beforehand.
(1)
(3)
(2)
3.
Remove the t
wo FFC Connectors (4) that are connected to Carriage PCB Assy.
Remove the FFC Cable by removing all the nine Clamps (5) for fixing the FFC.
<Note>
Refer to the page “How to connect/disconnect the FFC Connector” in “6-2-18. Carriage PCB Assy” when
you handle FFC Connectors.
GT-3 Series
343
(5)
(5)
(5)
(4)
(5)

 Loading...


