2. Setting up GT-3 Series
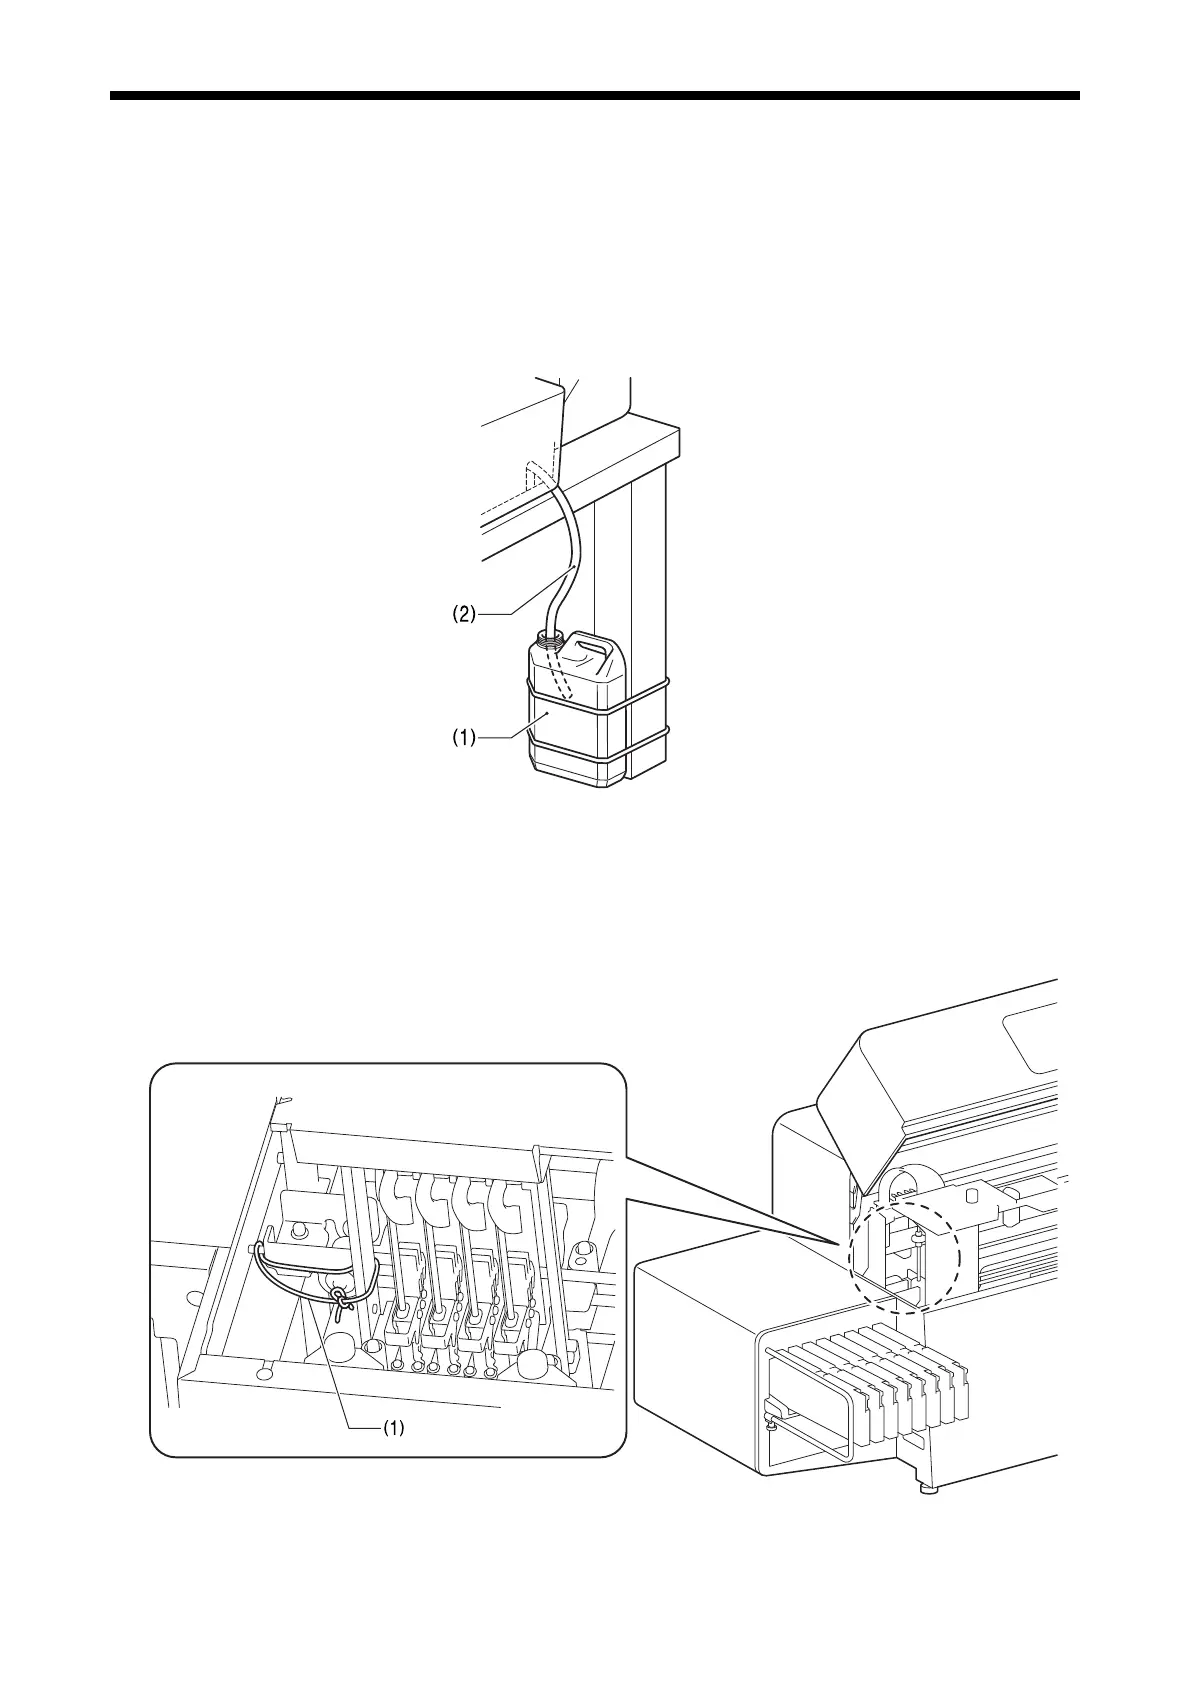
2-2-3. Installing Waste Ink Tank
Before turning ON the printer, be sure to fix the Waste Ink Tank (1) to the table with the two straps, etc.
After fixing it with the straps, insert the Waste Ink Tube (2) into the Waste Ink Tank (1).
<Important!>
・
Be sure to insert the tube at a level so that it is not completely submerged in the waste ink.
・Be sure that the tube should not fold or bend.
Failure to follow the precautions above can negatively impact the printing quality by causing an increase in the
internal tube pressure. Sometimes the waste ink may overflow inside of the printer by restricting the waste ink
flow.
0162
2-2-4. Removing protection materials
Make sure to remove protection materials before starting your printer.
<Strap Removal>
Remove the strap (1) that fixes the Carriage.
0163
Cut or unite the strap.
16
GT-3 Series

 Loading...


