7 | Cleaning and servicing BÜCHI Labortechnik AG
50/65 Operation Manual Vacuum Pump V-600
7.2.5 Replacing connecting tubes
The V-600 has a total of four connecting tubes on the pump heads, see Chapter
"Step 1: Removing connecting components", page44.
Replacing pump-head connecting tube
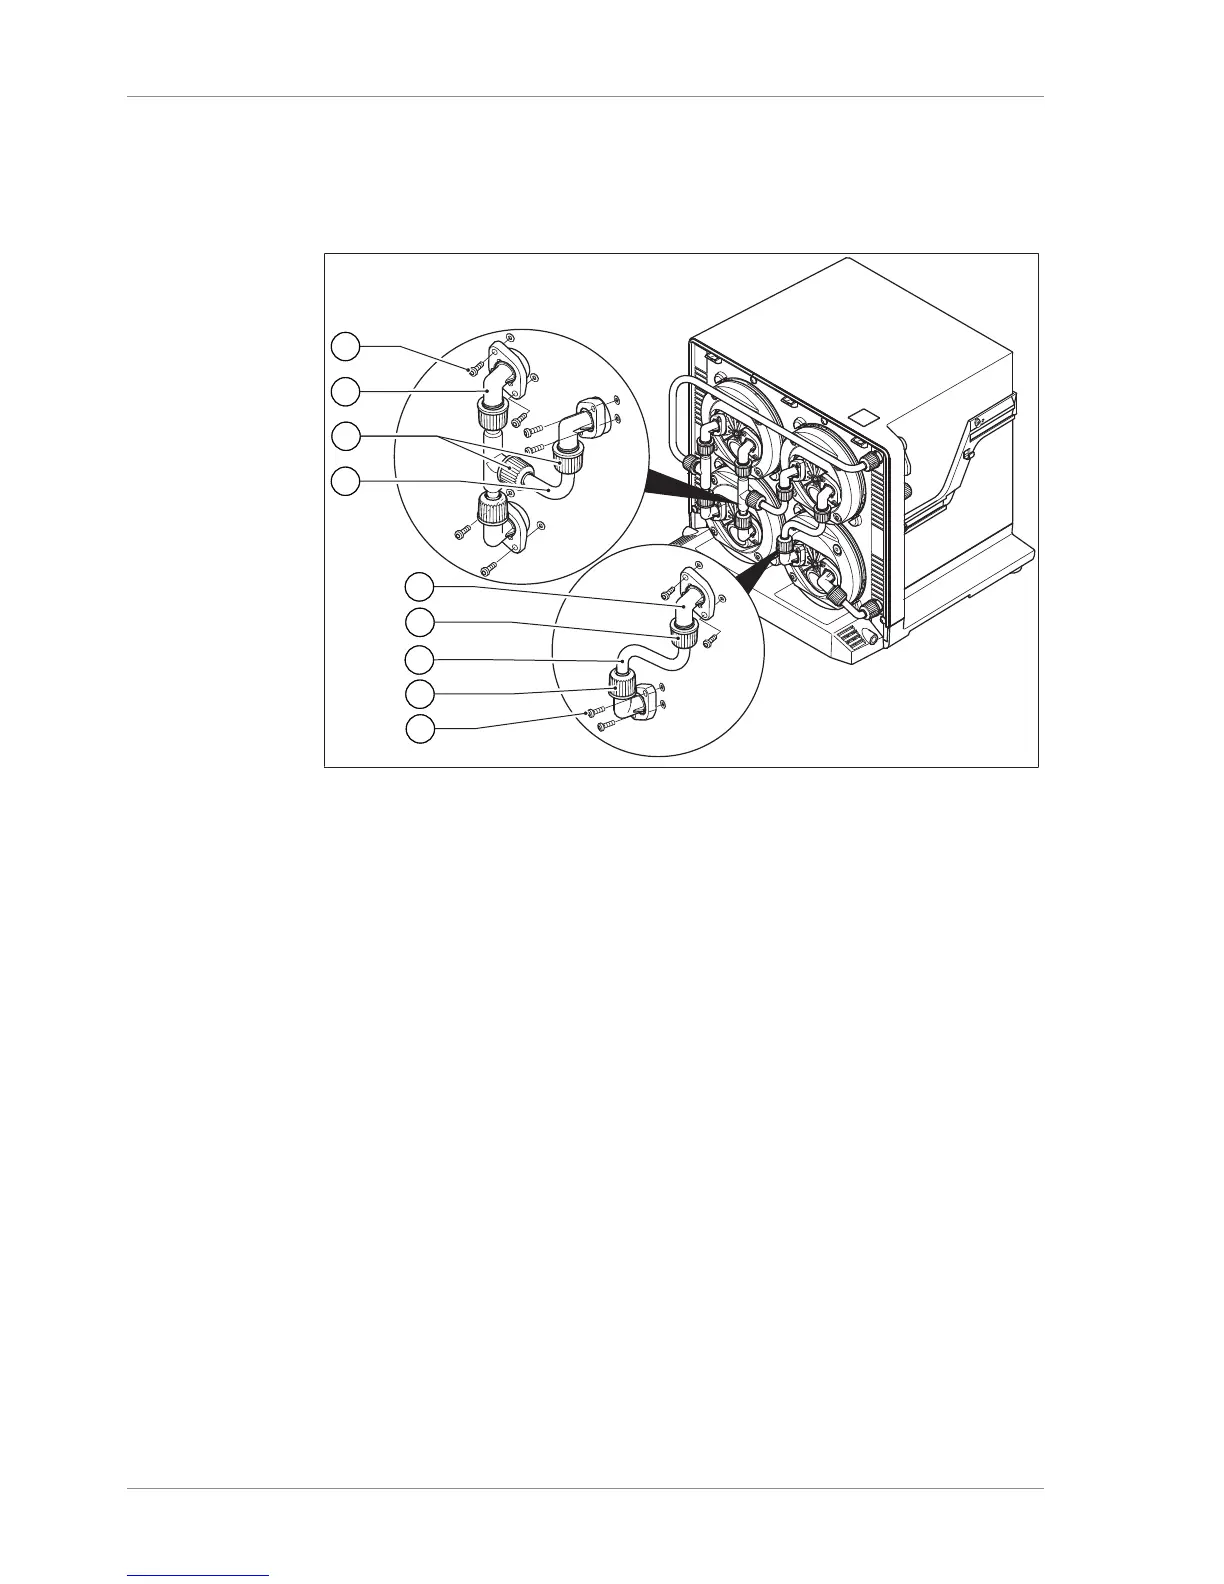
Fig.31: Pump-head connecting tube in V-600
1 Fixing screws for elbow connector 3 GL14 union nut
2 Elbow connector 4 Pump-head connecting tube
Tools required:
Torx key Tx10
u Remove the casing front, see Chapter7.2.2 "Dismantling and reassembling pump
head", page43.
u Unscrew the fixing screws (1) from the elbow connectors (2).
u Remove the elbow connectors together with the connecting component.
u Unscrew and pull back the GL14 union nut (3) on each end of the pump-head con-
necting tube (4).
u Pull the ends of the tubes out of the elbow connectors.
u Pull the GL14 union nuts off the connecting tube and dispose of the old connecting
tube.
u Loosely fit two new union nuts with tube seals on the connectors, see Chap-
ter7.2.8 "Fitting GL14 union nut with tube seal", page55. NOTICE!If incorrectly
fitted, the tube seals may be damaged.
u Insert new connecting tube into the elbow connectors, taking care not to damage
the tube seals when doing so.
u Fit the elbow connectors together with connecting components onto the ports in
the pump heads and screw in place.
u Tighten the two union nuts.
u Refit casing front.