2-36 2003 Buell P3: Chassis
HOME
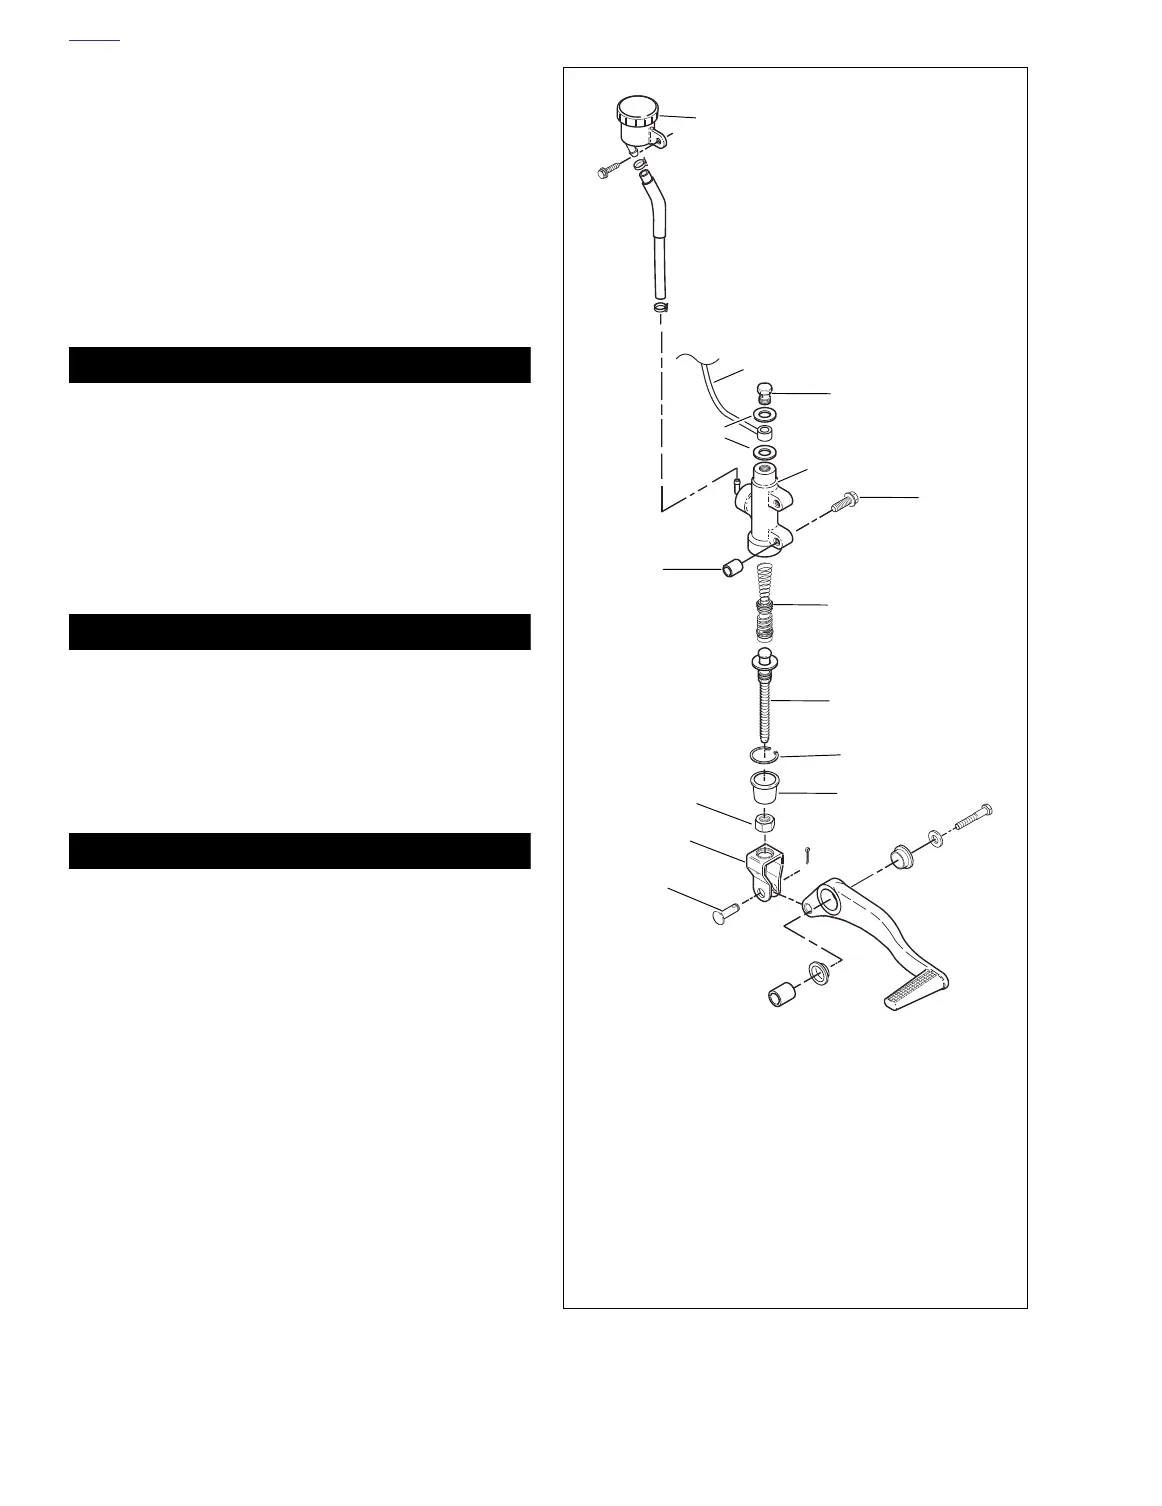
3. See Figure 2-53. Connect brake line (2) to master cylin-
der (5) with two new banjo washers (4) and banjo bolt (3)
(metric). Tighten to 16-20 ft-lbs (22-27 Nm).
4. Install push rod (9) by screwing push rod into clevis (13).
NOTE
Brake pedal height should be set so top surface of brake
pedal is even with the top surface of the foot peg.
5. See Figure 2-52. Set brake pedal height.
a. Loosen locknut (6).
b. Turn rod adjuster (5) to obtain correct position.
c. Tighten locknut (6).
11WARNING1WARNING
Verify proper operation of the master cylinder relief port.
A plugged or covered relief port can cause brake drag or
lockup, which could result in loss of vehicle control and
death or serious injury
6. Add brake fluid and bleed brake system.
7. With motorcycle in a level position, check that brake fluid
is between the upper and lower marks on reservoir. Add
D.O.T. 4 BRAKE FLUID if necessary. Be sure gasket
and cap on reservoir fit securely.
11WARNING1WARNING
Check for proper brake lamp operation before riding
motorcycle. Visibility is a major concern for motorcy-
clists. Failure to have proper brake lamp could result in
death or serious injury.
8. Turn ignition key switch to IGN. Apply rear brake pedal to
test brake lamp operation. Turn ignition key switch to
LOCK.
11WARNING1WARNING
Always test motorcycle brakes at low speed after servic-
ing or bleeding system. If brakes are not operating prop-
erly, or braking efficiency is poor, testing at high speeds
could result in death or serious injury.
Figure 2-53. Rear Master Cylinder Assembly
3
4
8
10
9
11
12
13
1
a0123a2x
1. Remote reservoir
2. Brake line
3. Banjo bolt (metric)
4. Banjo washers (2)
5. Master cylinder
6. Screw (2) (metric
7. Spacer (2)
8. Piston assembly
9. Push rod
10. Snap ring
11. Rubber boot
12. Locknut
13. Clevis
14. Clevis pin
2
5
6
14
7