Assembly & Operation Manual
BVM © 2009 K5300-Current_manual-090808.doc Page 18 12/2/2009
FLAP SERVOS
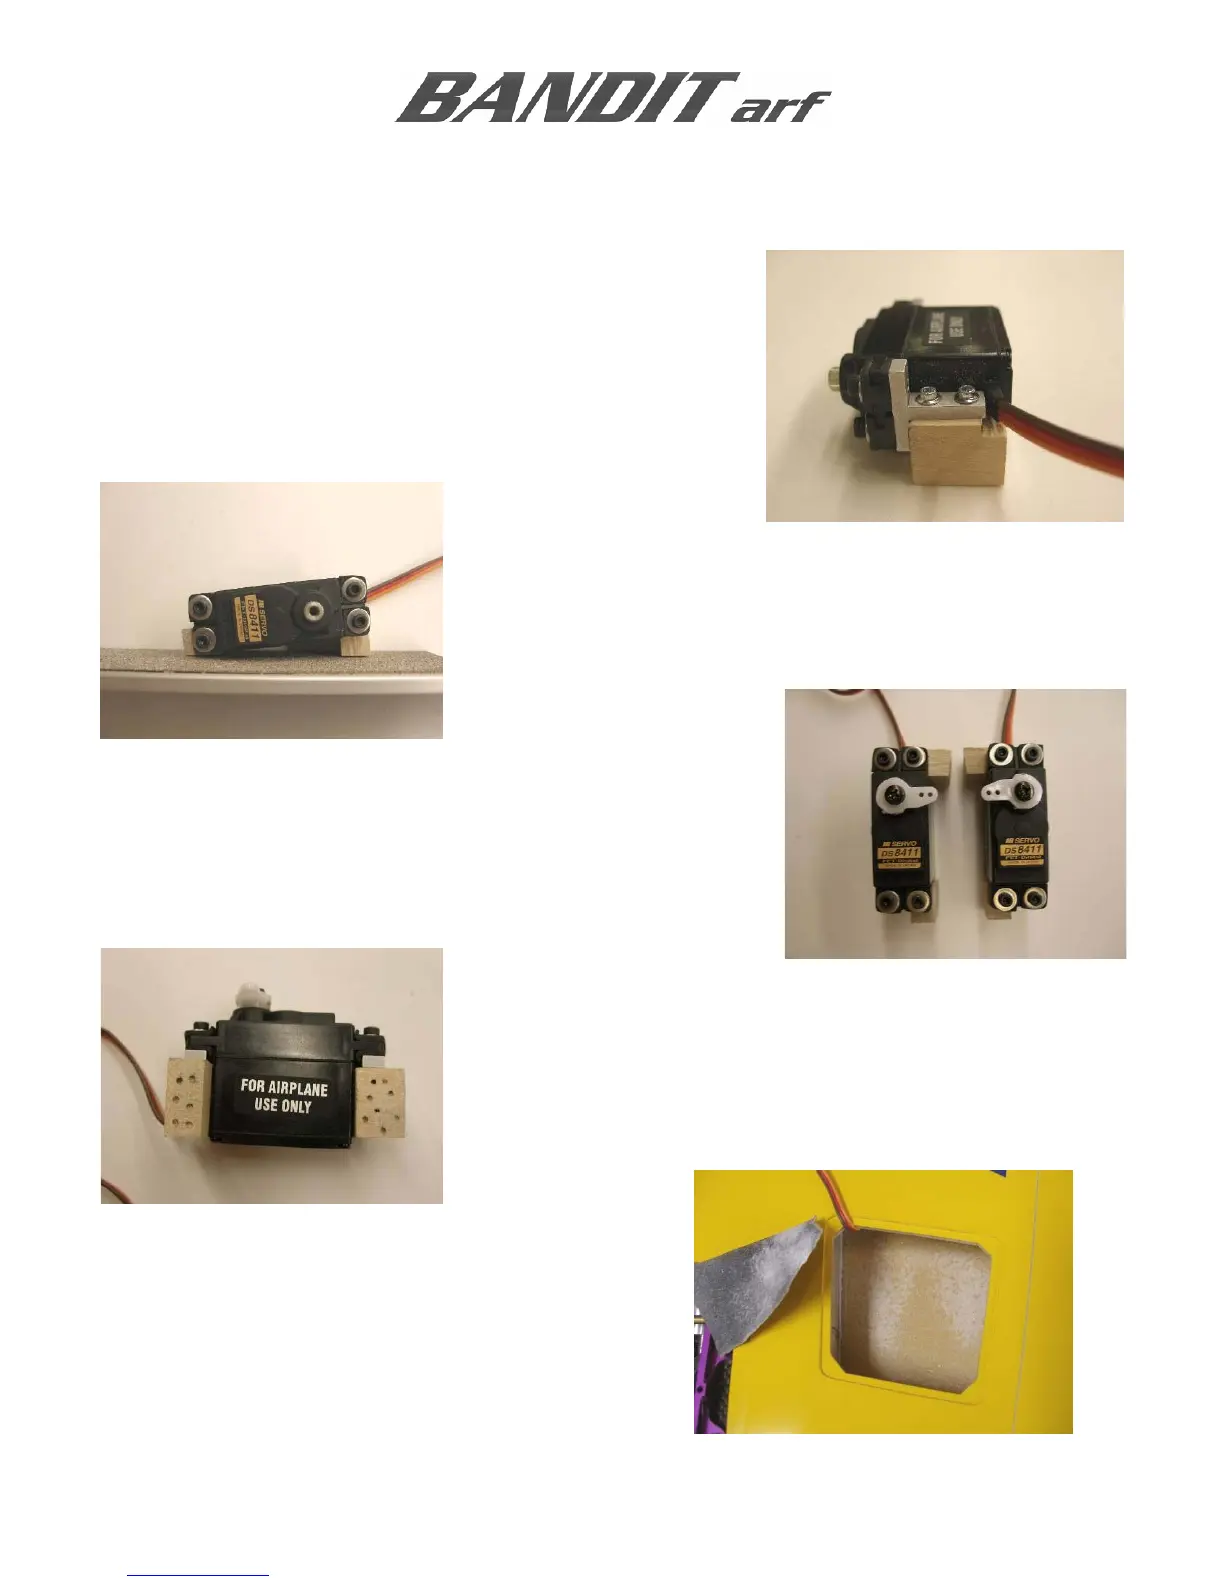
Assemble the servo to the aluminum servo mounts as shown
using (4) 4-40 bolts and #4 washers. Use one drop of thread
locker to prevent loosening.
Use (4) #2 servo screws to attach the servo mount to the
maple blocks. Notice that there is one tall block and one short
block. The tall block goes on the servo output side and is the
front block. Make a small notch to clear the servo wire.
Sand the maple blocks as shown to allow proper seating. The
servo will be mounted in the pocket such that the servo is near
flush with the bottom wing skin.
Use a JR Matchmaker or a radio system to center the flap
servos and install trimmed four-way arms; the clevis will use the
outside hole of the short arm. The linkage system is designed
such that the servo arms are centered, while the flap is in or
near the mid position.
Drill random 1/16” holes in the maple blocks for better glue
adhesion.
Use #80 grit to sand the wing skin in preparation for
the flap servo mounting blocks.



 To Next Page