3. Select the Finish Time at which the unit will switch to the normal power RF Settings ⇒
Power.
4. Current Time is the system time. This is displayed here as a reference for selecting the
start and finish times. It can also be adjusted if required.
5. Set Enable to Enabled. The power Scheduler is now running.
7.2 Audio Settings
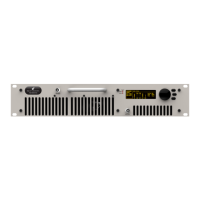
BW Broadcast’s range of award winning DSPX audio processors has become known for their
features, performance and value for money. Integrated within all V2 Transmitters is the 4-
band DSPXmini FM SE. The analogue and digital inputs (XLRs) are connected to the proces-
sor.
Set up:
1. Select MPX source as required. Set to Internal if the analog or digital inputs (XLRs) are
used or external if the ”MPX in” BNC socket is used (e.g.: to connect an external audio
processor).
When set to Internal, the built-in audio processor will be used. In this case:
1. Set the Audio Input to Analog or Digital.
2. Set the required Processing preset.
3. Select the desired Pre-emphasis characteristic (off, 50us (for EU) or 75us (for Americas))
4. Select the Audio Mode (Stereo, Mono L+R, Mono L, Mono R, Swap L/R). Selecting mono
disables the stereo pilot and subcarrier.
7.3 Triggers
Figure 7.1: Alarms and Triggers Port
V2 Transmitters have a comprehensive monitoring
and control system consisting of 3 alarms and 4 trig-
gers. Pin 2 of the connector is hardwired to RF mute.
Connecting this pin to ground will mute the transmit-
ter. The alarms and triggers port can also be used to
control the unit through a telemetry interface system.
Trigger pins are designed to work with relay contacts
to ground or 5 V drivers able to sink 15 mA (per trigger
pin).
33