DC10 E, DC20 E
DISASSEMBLING
48
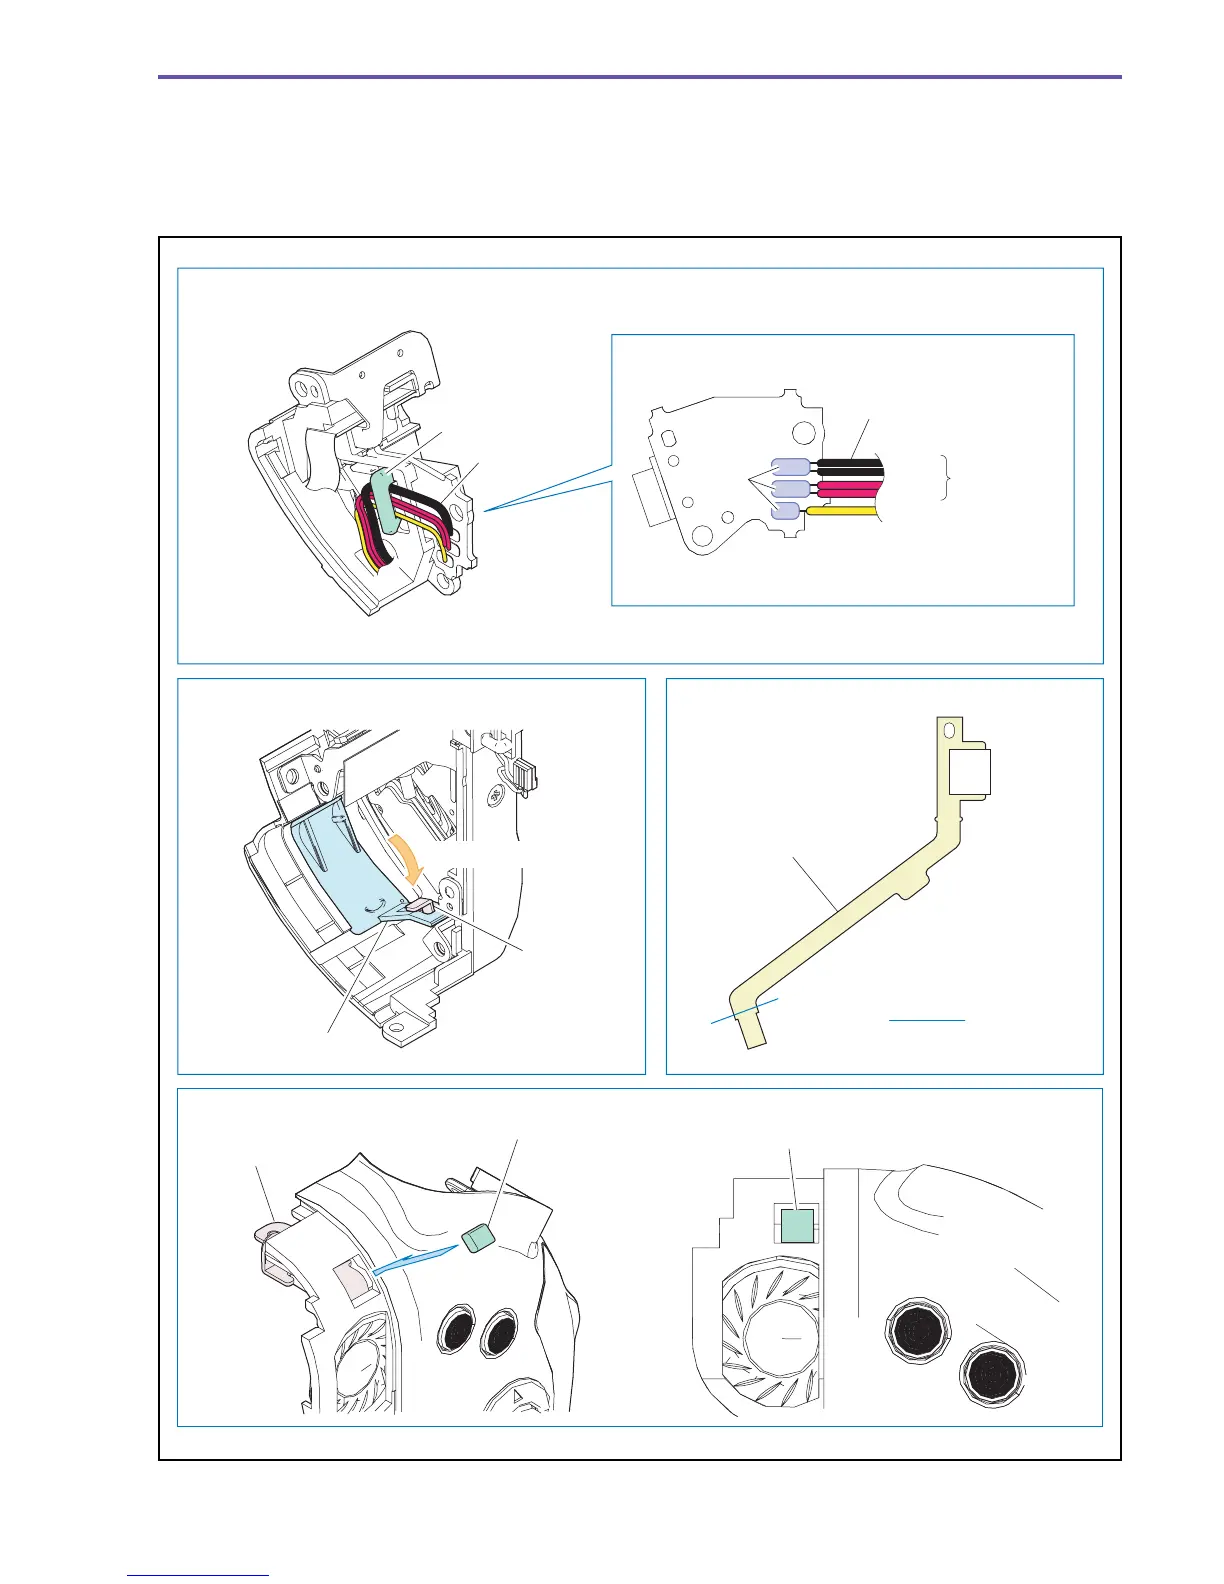
<Note on Reassembling>
(1) Attach the DC Wire and the DC JACK PCB as shown in the figure below.
(2) Attach the Jack Cover as shown in the figure below.
(3) Before using the USB FPC supplied as a service part, provide preliminary folding at the position indicated in the figure below.
(4) Attach the Right Side Gasket onto the Key Flame.
Fig. 45
Note on Reassembling (1)
Note on Reassembling (2) Note on Reassembling (3)
Note on Reassembling (4)
Right Side Gasket
Hook
Mount the DC Wire by passing it through the hook.
Solder two
wires each
together.
DC Wire
DC Wire
DC JACK PCB
Black
Red
Yellow
Jack Cover
Key Frame
USB FPC
Insert into hole
Folding in a
crest form
Solder α
Key Frame
Right Side Gasket