DC10 E, DC20 E
DISASSEMBLING
38
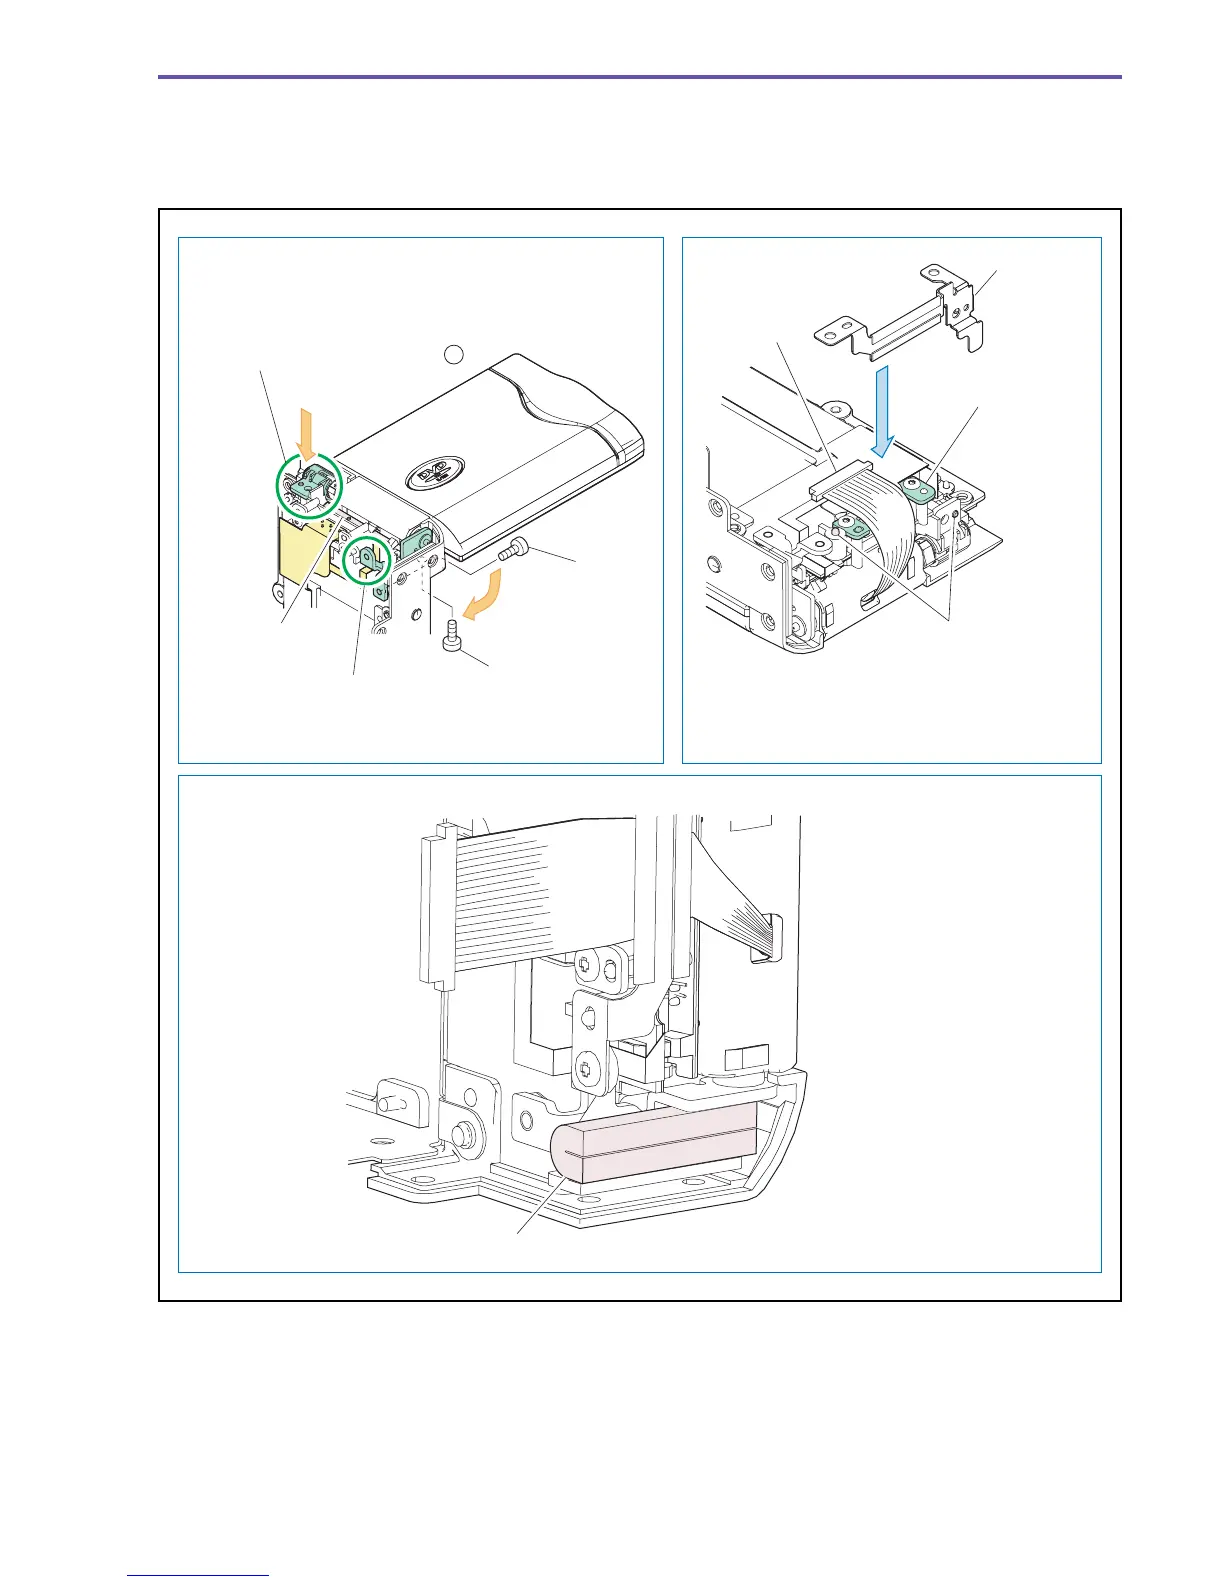
<Note on Reassembling>
(1) Attach the LCD Ass'y as shown in the figure below.
(2) Attach the Hinge Plate as shown in the figure below.
(3) Attach the Right Sponge as shown in the figure below.
Fig. 35
Note on Reassembling (1) Note on Reassembling (2)
Note on Reassembling (3)
Hinge Gap Cover
Hinge Plate
Close
Pass the flexible cable through
under the lower plate.
While folding the Right Sponge
as indicated in the figure, attach
it at the position shown in the
figure.
Right Sponge
Battery Terminal
LCD Hinge
Cable
With the LCD Ass'y closed, pass the LCD
Hinge Cable through the Battery Terminal,
and attach the Hinge Plate so that its holes
are aligned with the dowels.
Dowels
(3)
(3)
Attach the LCD Ass'y and while
holding the upper section of the
Hinge, attach two screws
(3) - k .