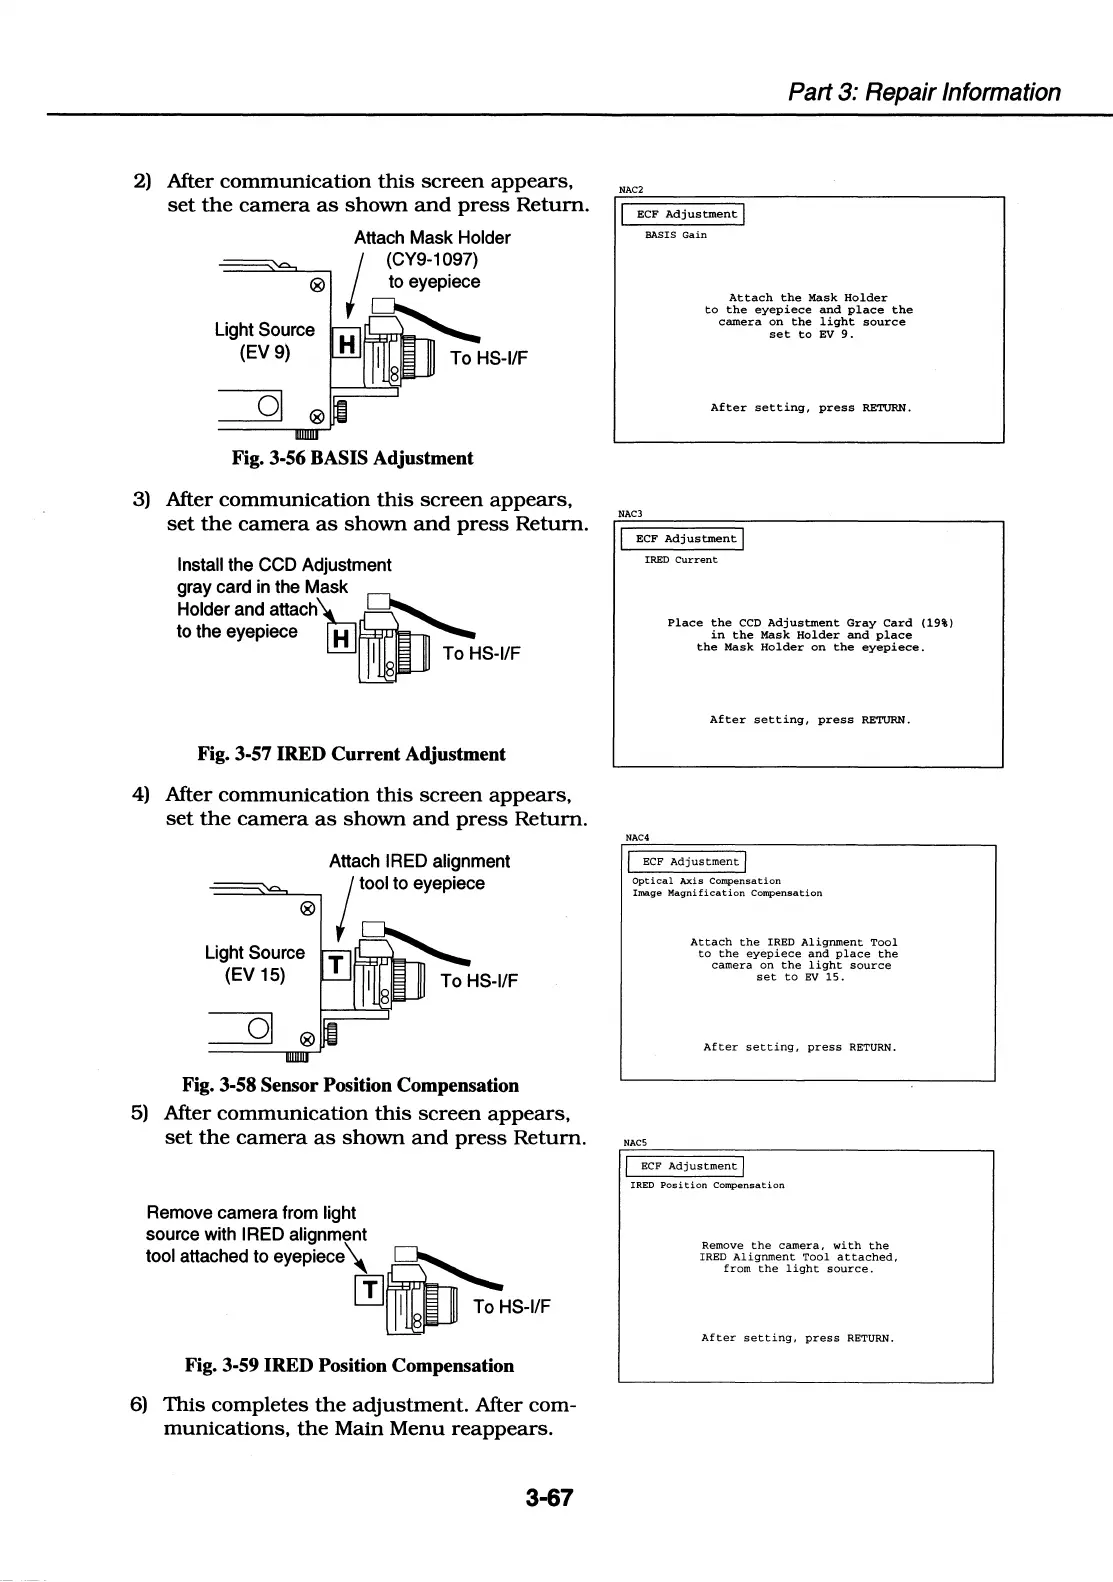
2)
After
communication
this
screen
appears,
set
the
camera
as
shown
and
press
Return.
Attach Mask Holder
(CY9-1097)
® to eyepiece
Light Source
(EV 9)
I----'-'--'=;'
To
HS-1/F
Fig. 3-56 BASIS Adjustment
3)
After
communication
this
screen
appears,
set
the
camera
as
shown
and
press
Return.
Install the CCD Adjustment
gray card in the Mask
Holder
and_attachTuJDJ
to the eyepiece H
~
~
I To
HS-1/F
8
Fig. 3-57 IRED Current Adjustment
4)
After
communication
this
screen
appears,
set
the
camera
as
shown
and
press
Return.
Light Source
(EV 15)
Attach IRED alignment
tool to eyepiece
To
HS-1/F
Fig. 3-58 Sensor Position Compensation
5)
After
communication
this
screen
appears,
set
the
camera
as
shown
and
press
Return.
Remove camera from light
source with IRED alignment
tool attached to
eyepiece\
~
m!DJ
To
HS-1/F
Fig. 3-59 IRED Position Compensation
6)
This
completes
the
adjustment.
After com-
munications,
the
Main
Menu
reappears.
3-67
Part 3: Repair Information
NAC2
ECF
Adjustment
I
BASIS
Gain
NAC3
Attach
the
Mask
Holder
to
the
eyepiece
and
place
the
camera
on
the
light
source
set
to
EV
9.
After
setting,
press
RETURN.
ECF
Adjustment
I
IRED
Current
NAC4
Place
the
CCD
Adjustment
Gray
Card
(19%)
in
the
Mask
Holder
and
place
the
Mask
Holder
on
the
eyepiece.
After
setting,
press
RETURN.
/
ECF
Adjustment/
Optical
Axis
Compensation
Image
Magnification
Compensation
NACS
Attach
the
IRED
Alignment
Tool
to
the
eyepiece
and
place
the
camera
on
the
light
source
set
to
EV
15.
After
setting,
press
RETURN.
I
ECF
Adjustment
j
IRED
Position
Compensation
Remove
the
camera,
with
the
IRED
Alignment
Tool
attached,
from
the
light
source.
After
setting,
press
RETURN.