53
Using the Mode Dial
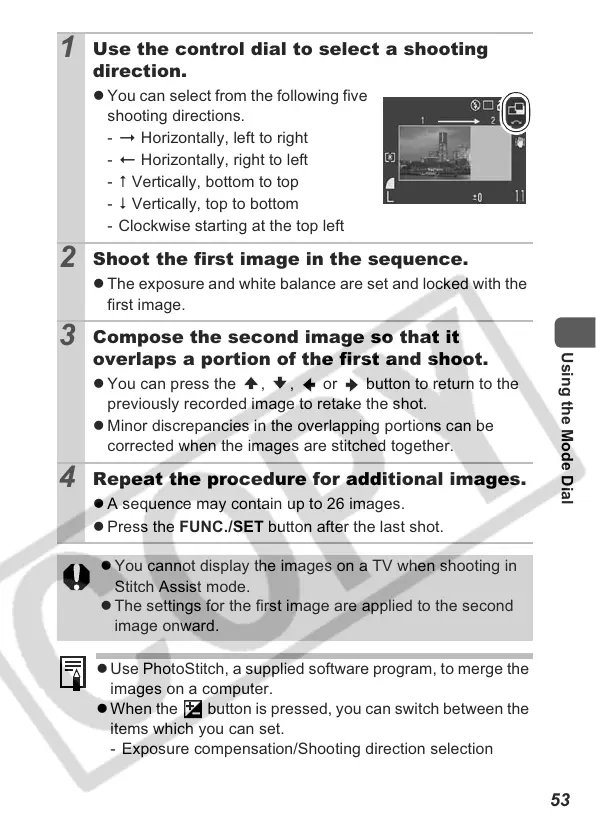
1
Use the control dial to select a shooting
direction.
z You can select from the following five
shooting directions.
-
Horizontally, left to right
-
Horizontally, right to left
- Vertically, bottom to top
- Vertically, top to bottom
- Clockwise starting at the top left
2
Shoot the first image in the sequence.
z The exposure and white balance are set and locked with the
first image.
3
Compose the second image so that it
overlaps a portion of the first and shoot.
z You can press the , , or button to return to the
previously recorded image to retake the shot.
z Minor discrepancies in the overlapping portions can be
corrected when the images are stitched together.
4
Repeat the procedure for additional images.
z A sequence may contain up to 26 images.
z Press the FUNC./SET button after the last shot.
z You cannot display the images on a TV when shooting in
Stitch Assist mode.
z The settings for the first image are applied to the second
image onward.
z Use PhotoStitch, a supplied software program, to merge the
images on a computer.
z When the button is pressed, you can switch between the
items which you can set.
- Exposure compensation/Shooting direction selection
 Loading...