15
•
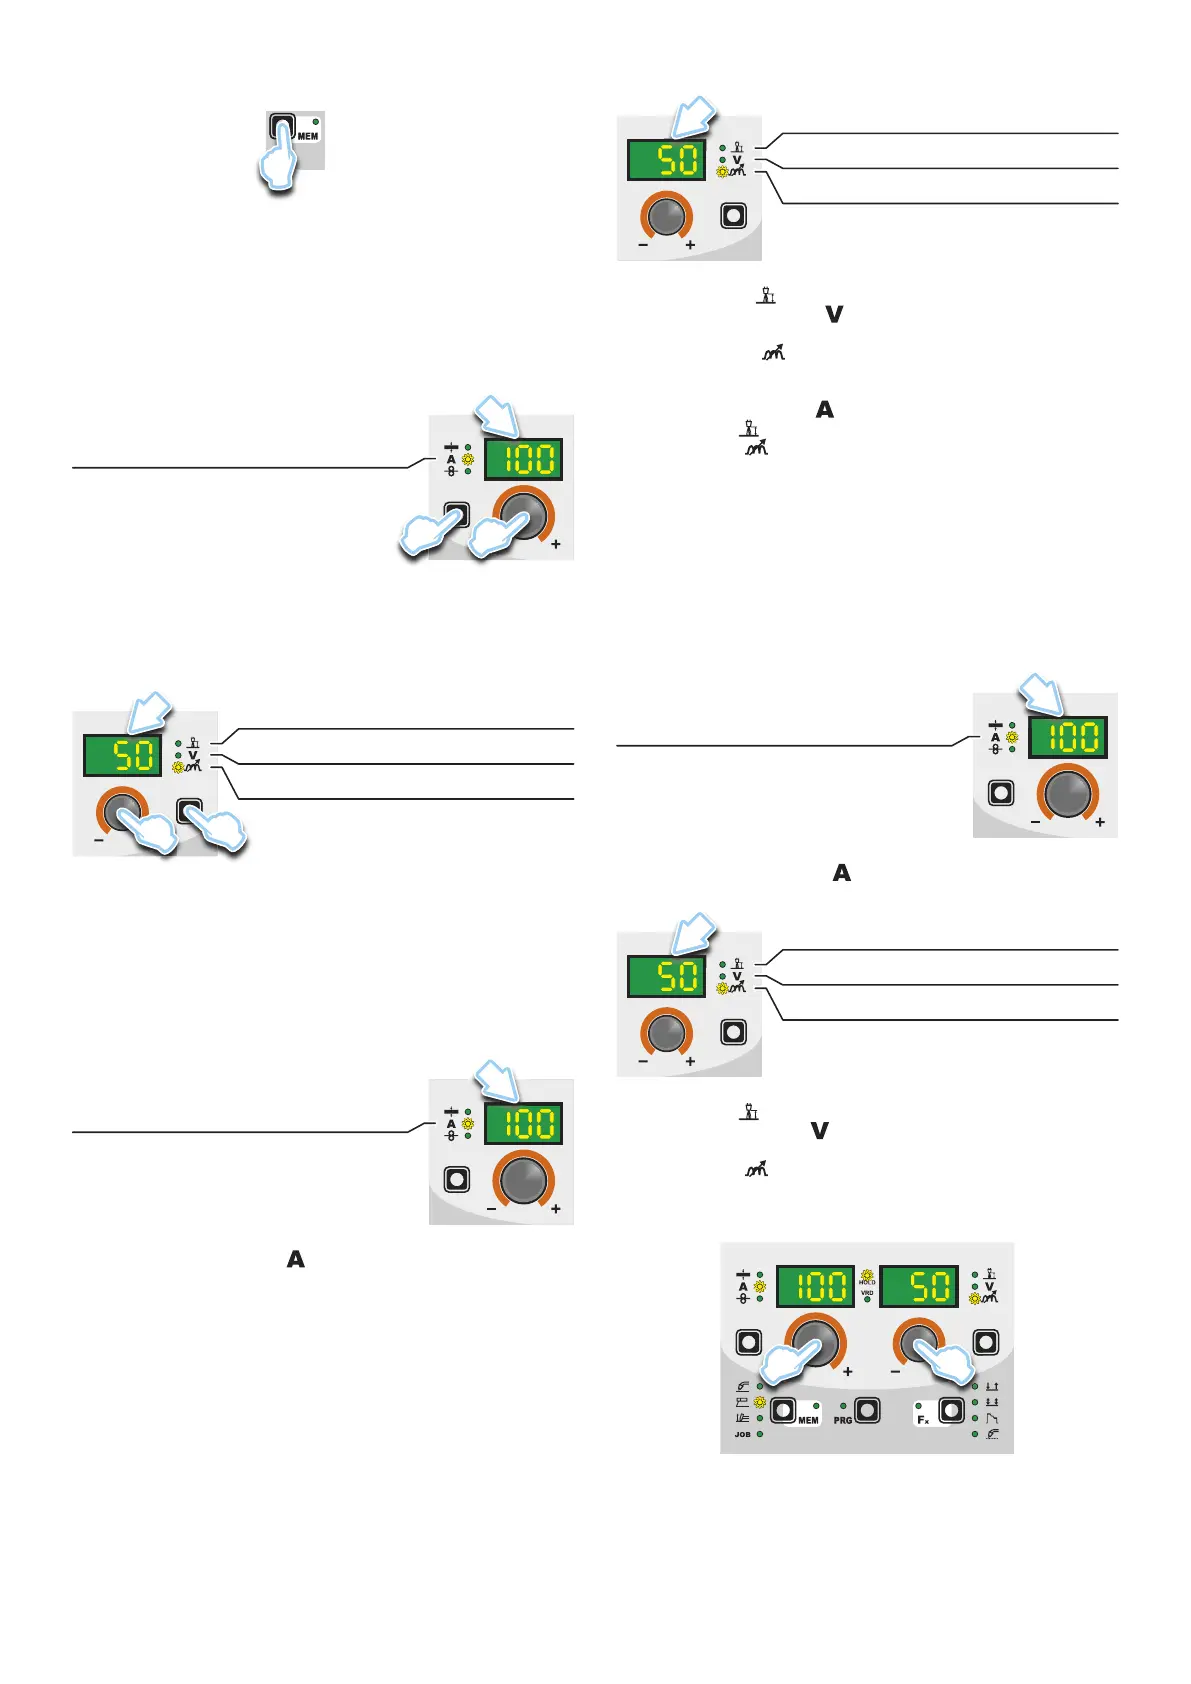
Hold the SAVE “MEM” key (T2) down for at least 2 consecu-
tive seconds.
T2
T ≥ 2 s
•
The program in use has now been completed successfully. To
confirmation the above, the control panel of the welder performs
a short operation of MACHINE CHECK (all of the LED stay lit
simultaneously so as to verify their actual operation), the gen-
erator itself starts, having memorised the new settings and is
again ready to weld.
4 - PRE-SETTING
Before welding it is possible to set the following parameters:
D1
T1
E1
WELDING CURRENT
Example: WELDING CURRENT
Press the PARAMETER SELECTION - A key (T1) until the LED
that corresponds to the WELDING CURRENT switches on. Turn
the ENCODER - A knob (E1) to change the value shown on the
PARAMETER DISPLAY - A screen (D1).
D2
T4
E2
ARC FORCE
WELDING VOLTAGE
HOT START
Example: ARC FORCE
Press the PARAMETER SELECTION - V key (T4) until the LED
that corresponds to the ARC FORCE switches on. Turn the EN-
CODER - V knob (E2) to change the value shown on the PARAM-
ETER DISPLAY - V screen (D2).
5 - WELDING
During the welding the display shows:
• PARAMETER DISPLAY screen - A (D1)
D1
WELDING CURRENT
-
WELDING CURRENT ( ):the measured value of the current
of what is being welded.
• PARAMETER DISPLAY screen - V (D2)
D2
ARC FORCE
WELDING VOLTAGE
HOT START
- HOT START ( ): the value previously set.
-
WELDING VOLTAGE ( ): the measured value of the voltage
of what is being welded.
- ARC FORCE (
): the value previously set.
During the welding the operator can change the following param-
eters:
• WELDING CURRENT (
).
• HOT START (
).
• ARC FORCE (
).
• SPECIAL FUNCTIONS “Fx” - FIRST LEVEL MENU.
6 - HOLD
This function automatically starts itself at the conclusion of eve-
ry welding operation welding and it is indicated to the operator by
means of a flashing light of the HOLD FUNCTION LED for a spe-
cific amount of time. Once the welding has been terminated, for
about 15 seconds, both the DISPLAYS should show the same val-
ues of the parameters during the welding.
In this phase the displays show:
• PARAMETER DISPLAY screen - A (D1)
D1
WELDING CURRENT
- WELDING CURRENT ( ): the last current value measured.
• PARAMETER DISPLAY screen - V (D2)
D2
ARC FORCE
WELDING VOLTAGE
HOT START
• HOT START ( ): the value previously set.
• WELDING VOLTAGE (
): the measured value of the last volt-
age of what is being previously welded.
• ARC FORCE (
): the value previously set.
To interrupt the HOLD function and go back to the PRESETTING
phase before 15 seconds have passed, simply turn one of the two
ENCODER (E1-E2) knobs.
E2E1
The HOLD function can be terminated ahead of time even once
again starting the welding.
Once 15 seconds have passed (HOLD FUNCTION) the control
panel goes back to the PRESETTING phase.