18
JOB
1 - CREATING AND SAVING A JOB
This operation makes it possible to create and save welding set-
tings (points) that can be called up by the operator at any time.
The control panel provides the possibility of saving a total of 99
JOBS spread over all the welding processes. There are not lim-
its to the quantity or position of the points that can be saved for
each process!
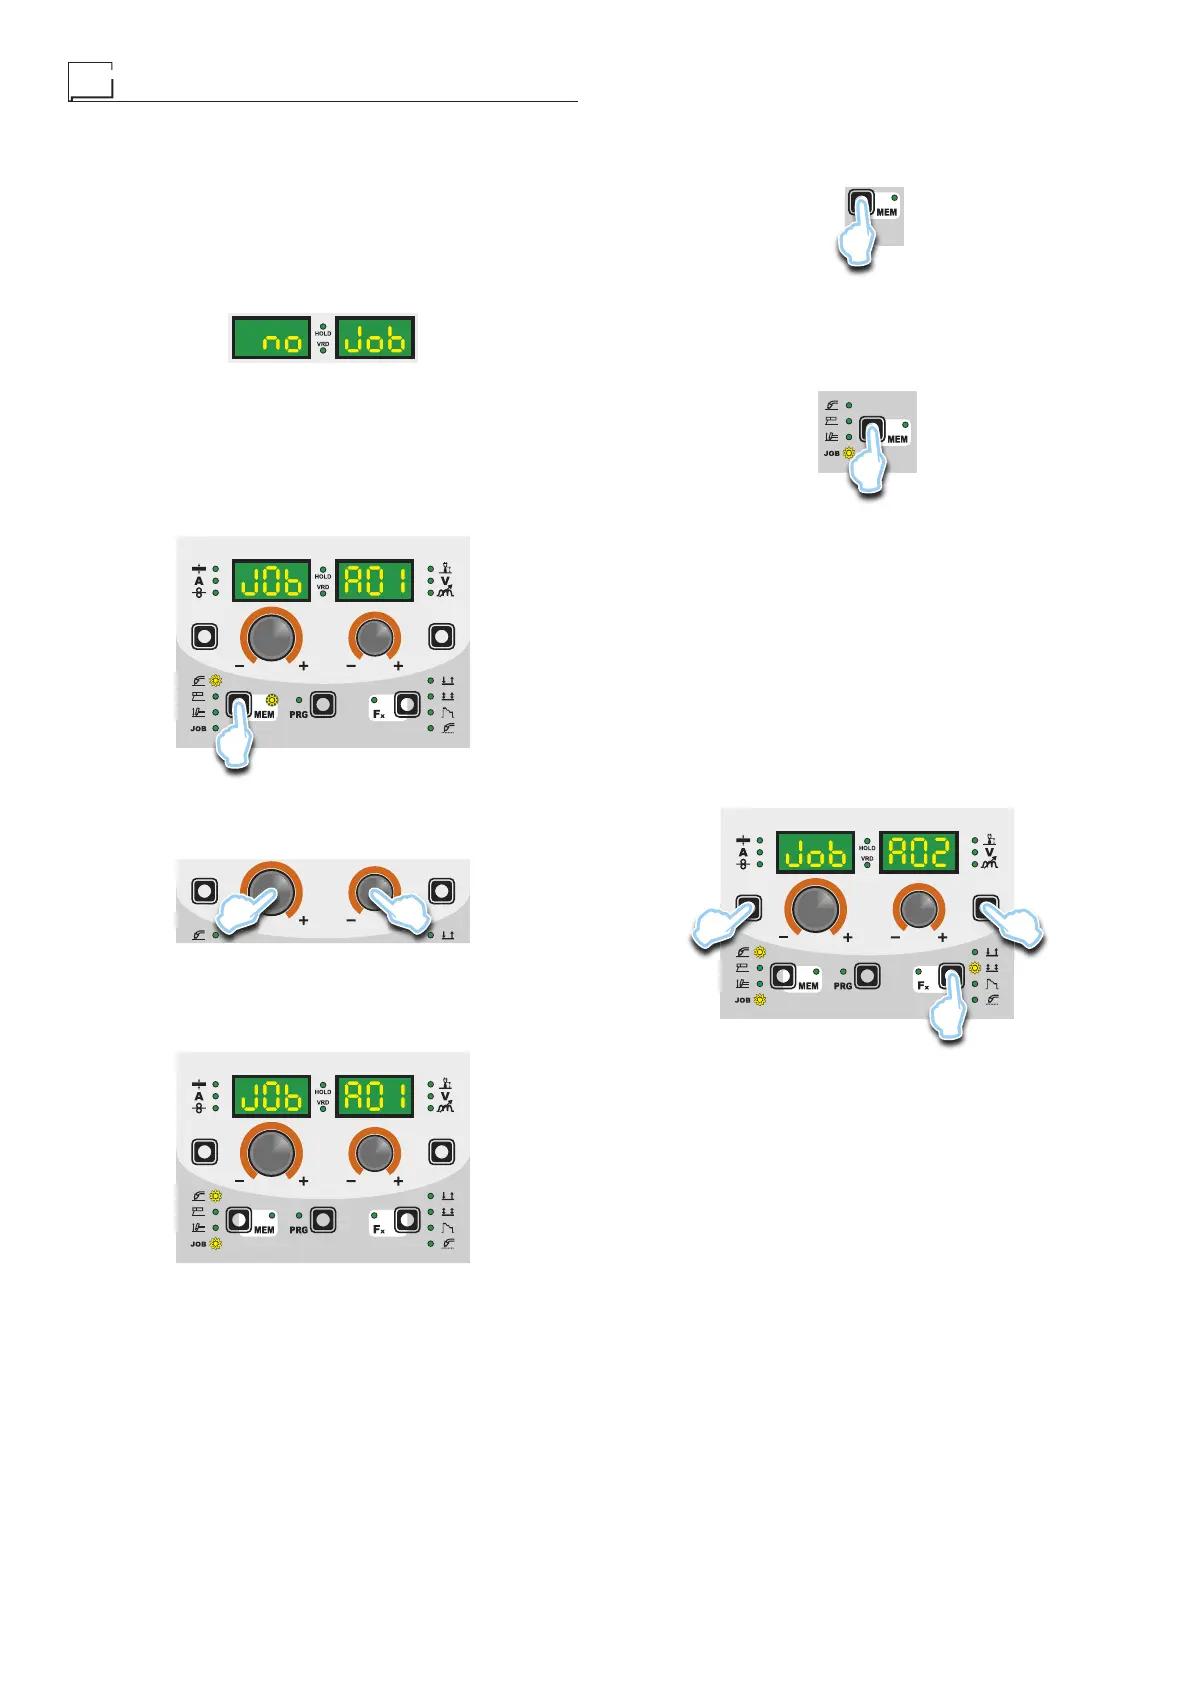
When it leaves the factory the welding machine does not have
any JOBS saved in it and so the operator will find the control pan-
el in this condition:
Having defined the parameters the operator needs to do their work
correctly, they can be saved by creating an AUTOMATIC WELD-
ING POINT (JOB), proceeding as follows:
1) Hold the SAVE “MEM” key (T2) down for at least 2 consec-
utive seconds until both displays show the flashing wording
that represent the first AUTOMATIC WELDING POINT (JOB)
free and/or available to the operator that can be used for sav-
ing the data (e.g.: A01).
T2
To be able to choose another automatic welding point (JOB)
that is free for saving the data, simply turn one of the two EN-
CODER (E1-E2) knobs until you reach the required point.
E2E1
WARNING: If all the automatic welding points (JOBS) are occu-
pied, the check automatically goes to the first automatic welding
point (JOB A01) as shown in the figure below).
2) Hold down the SAVE “MEM” (T2) Key down for at least 2 con-
secutive seconds to save JOB and automatically load the set-
tings / parameters (including special functions) for the JOB just
saved.
3) To exit the JOB, press and release the WELDING PROCESS
SELECTION key (T2).
T2
2-JOBSELECTION
Select the JOB, pressing and releasing, even various times if nec-
essary, the WELDING PROCESS SELECTION key (T2) until the
corresponding LED lights up.
T2
3 - PRE-SETTING / VIEWING MEMORISED JOB DATA
Since the parameters are memorised, within each JOB, viewa-
ble but not modifiable, the pre-setting phase does not exist, but
the operator can see and verify the settings, previously saved
and memorised, pressing and releasing the PARAMETER SE-
LECTION key - A (T1) or in alternative the PARAMETER SELEC-
TION key - V (T4).
The SPECIAL FUNCTIONS “Fx” Key (T3) contained within each
individual JOB can be viewed (but not modified) by simply keep-
ing the SPECIAL FUNCTIONS “Fx” key (T3) pressed for a dura-
tion of about 2 seconds.
The display of the parameters (special functions included) lasts
only a few seconds, then the panel shows, in an automatic way,
the previous working condition.
T4T1
T3
4 - WELDING
During the welding the display shows the values, if possible meas-
ured, of the active parameters, based on the type of welding pro-
cess, memorised within the selected JOB.
As already indicated, the parameters can be viewed by pressing
and releasing the PARAMETER SELECTION key - A (T1) or in al-
ternative the PARAMETER SELECTION key - V (T4), while the
SPECIAL FUNCTIONS “Fx” key (T3) contained within each indi-
vidual JOB can be viewed (but not modified) by simply keeping
the SPECIAL FUNCTIONS “Fx” key (T3) pressed for a duration
of about 3 seconds.