MODEL C2® PLUS & MODEL G™ PLUS with Proximity Sensor Feeding System Installing the Suspension System
MF2495A
13
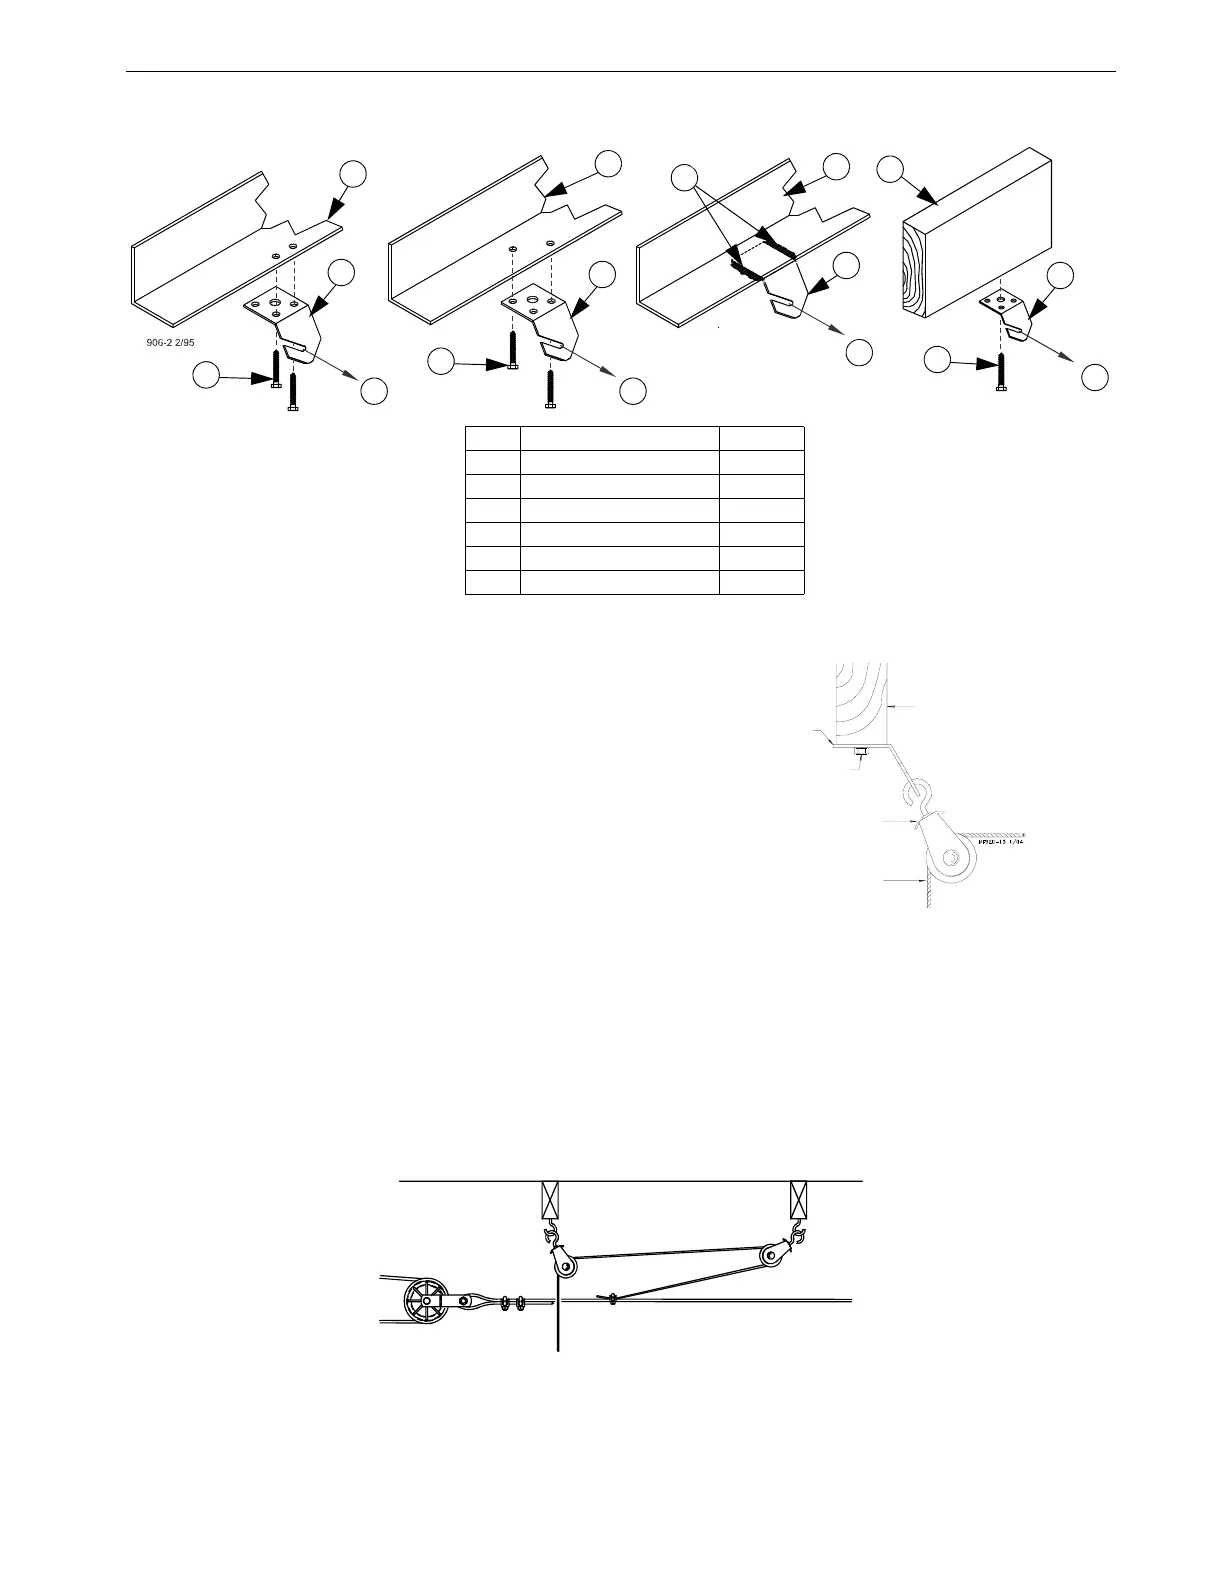
Ceiling Hook Installation
6.After securing the Ceiling Hook to the truss, slide the
hook of a Swivel Pulley into the slot, as shown in Figure
Figure 16..
Drop Installation
Refer to page 12 Figure 14.
1.Attach a 3004 Pulley to each hook.
2.Thread the end of the 3/32” or 1/8” cable through the pulley toward the winch. Clamp this end to the 3/16”
winch cable about 6" [150 mm] from the last pulley, using a 3/16” cable clamp. See applicable figure; Figure
14 or 17.
3.Allow enough cable length for installation of the Adjustment Leveler.
Sufficient cable is included to provide “throwbacks” on drops located beneath and near the winch. Figure 17
shows a “throwback” cable arrangement.
4.Begin installing suspension drops at the winch and proceed to the ends of the feeder line.
Keep the main cable tight between drops. It may be necessary to hang a weight on the end of the cable to
maintain tension on the line.
Item Description Part No.
1 Ceiling Hook 28550
2 Steel Truss --
3 Wood Truss
4 1/4-20 Lag Screw --
5 Cable Travel Direction --
6Weld --
Figure 15.Ceiling Hook Installation
4
2
2
5 5
5
5
4
6
3
4
2
1
1
1
1
Figure 16. Pulley Installation
Wood Truss
Ceiling Hook
1/4" Lag Bolt
Swivel Pulley
Drop Cable
Figure 17. "Throwback" cable arrangement