Maintenance MODEL C2® PLUS & MODEL G™ PLUS with Proximity Sensor Feeding System
38
MF2495A
Feeder Line
Keep anti-roost cables tightly stretched. This increases the effectiveness of the electro-guard anti-roost system and
keep the pans from being tilted when birds push against them.
Remove all feed from the feeder when there are no birds in the house and when the building is washed and
disinfected.
Turn the feeders off prior to removing the birds from the house. This will allow them to clean the feed out of the pans.
If the system is not to be used for an extended period of time, remove all the feed from the feeder lines and feeder
pans.
Disconnect power to the system to prevent accidentally starting the system.
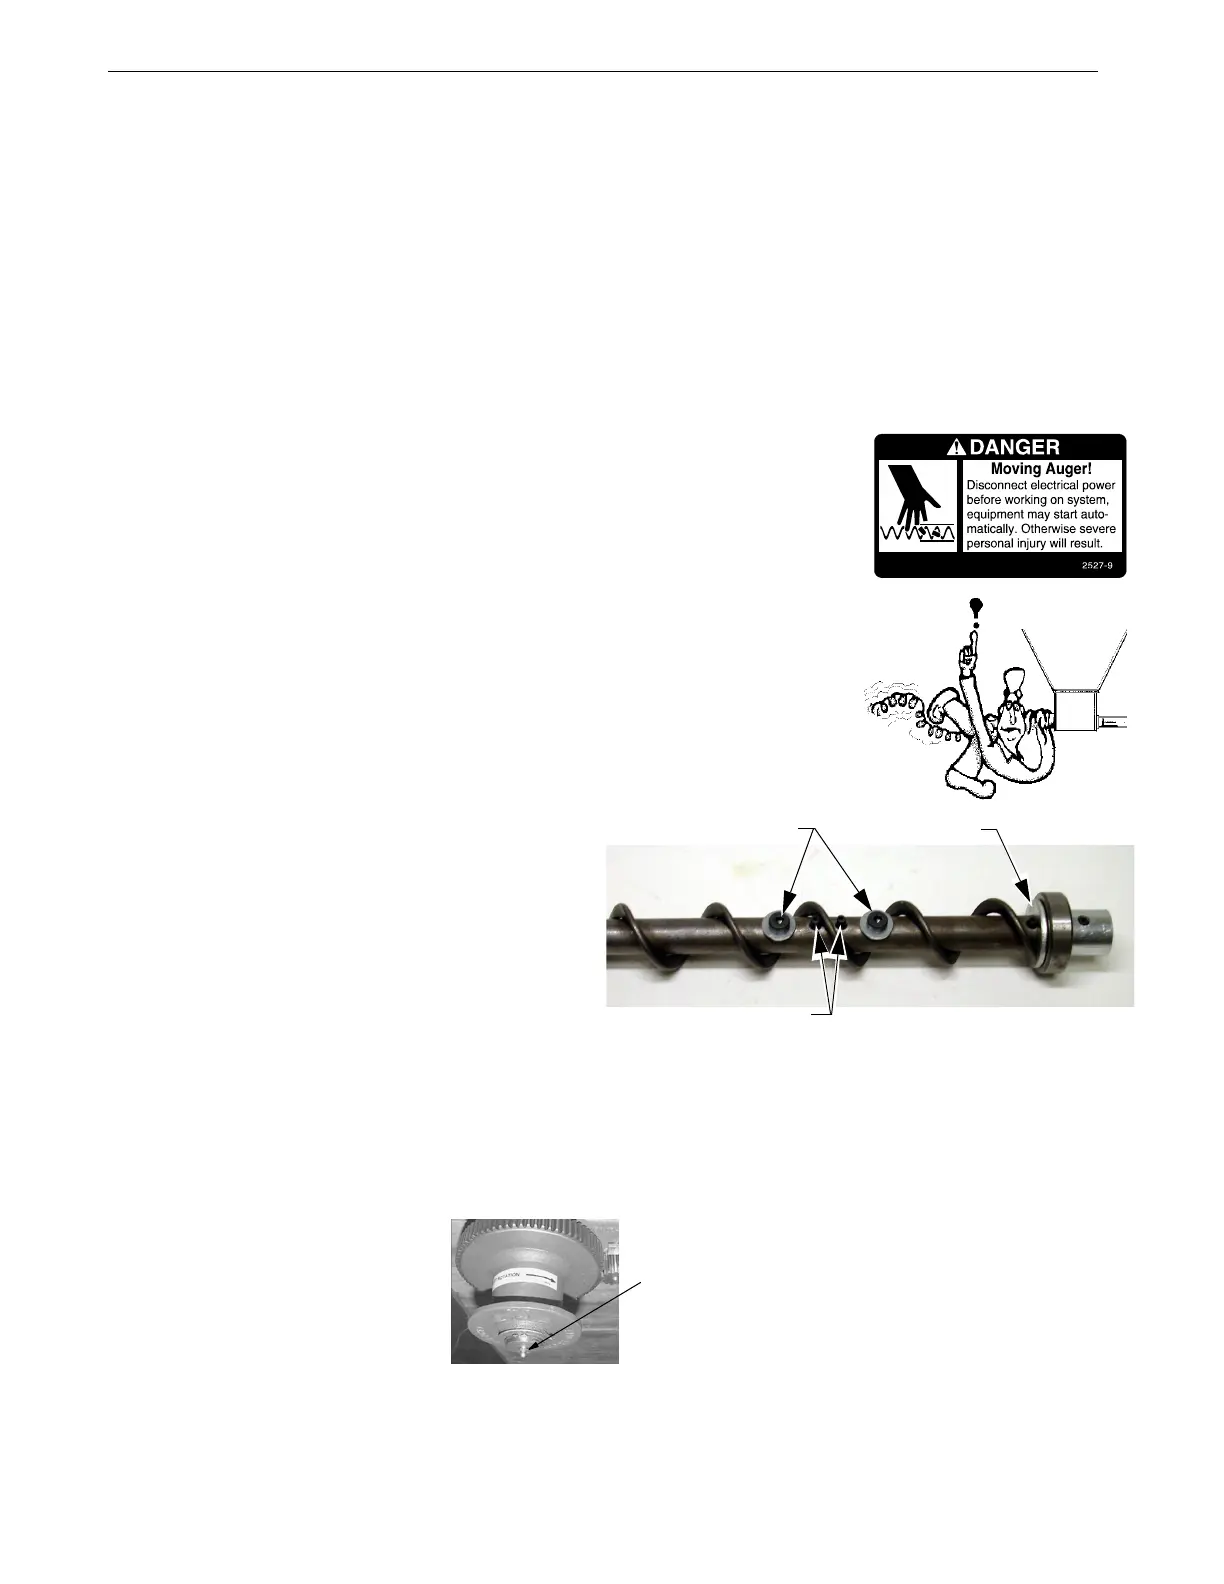
If the system must be disassembled, extreme caution must be used to prevent injury
from springing auger. Refer to Figure 59.
1.Disconnect power to the entire system.
2.Loosen the Tube Clamp on the bearing at the hopper end of the system.
Remove the Tube Clamp and Bearing Retainer.
3.Pull the Anchor and Bearing Assembly and approximately
18'' [45 cm] of auger out of the boot.
CAUTION: Stand clear...the auger may spring back into the tube.
BE CAREFUL WHEN WORKING WITH AUGER!
4.Place a clamp or locking plier securely on the auger to prevent it from
springing back into the auger boot.
5.Loosen the setscrew in the bearing assembly shaft and remove the Anchor
and Bearing Assembly from the auger.
To reinstall the Anchor and Bearing Assembly:
1.Insert the Anchor Assembly into the auger, guide
the tip of the auger between the two roll pins in
the center of the anchor. Continue to guide the
auger until the tip of the auger hits the flat
washer. Tighten the setscrews in the center of the
anchor until they touch See Figure 59.
2.Carefully remove the locking pliers while
holding onto the Anchor and Bearing Assembly
and auger securely.
Slowly ease the auger back into the tube. Use
caution. If the auger is allowed to spring back, the
bearing race may crack.
Install the Bearing Retainer and fasten with a tube clamp. Keep the Bearing Retainer flush with the end of the
anchor for safety.
Power Lift Winch Maintenance
Refer to Figure 60.
Grease the winch every 6 months
with 1 to 2 shots of common
industrial or automotive grease.
Remove any feed build-up in the
Safety Switch Boxes in the Control
Units.
It may be necessary to periodically retighten the shocker cable. Be sure to disconnect power to the shocker before
servicing the equipment.
Figure 59.Auger and Anchor Bearing Connection
Roll pins
Low head socket head screw
Flat washer
1)Grease the Power Lift Winch every 6 months with 1
to 2 shots of common industrial or automotive grease
DO NOT OVER GREASE THE POWER LIFT WINCH
1660-24 6/2001
Figure 60.Maintenance to the Power Lift Winch