Installation for Layer Cage Systems Only ULTRAFLO
®
Cage Feeding Systems for Brood Grow & Layer Installations
28
MC656P
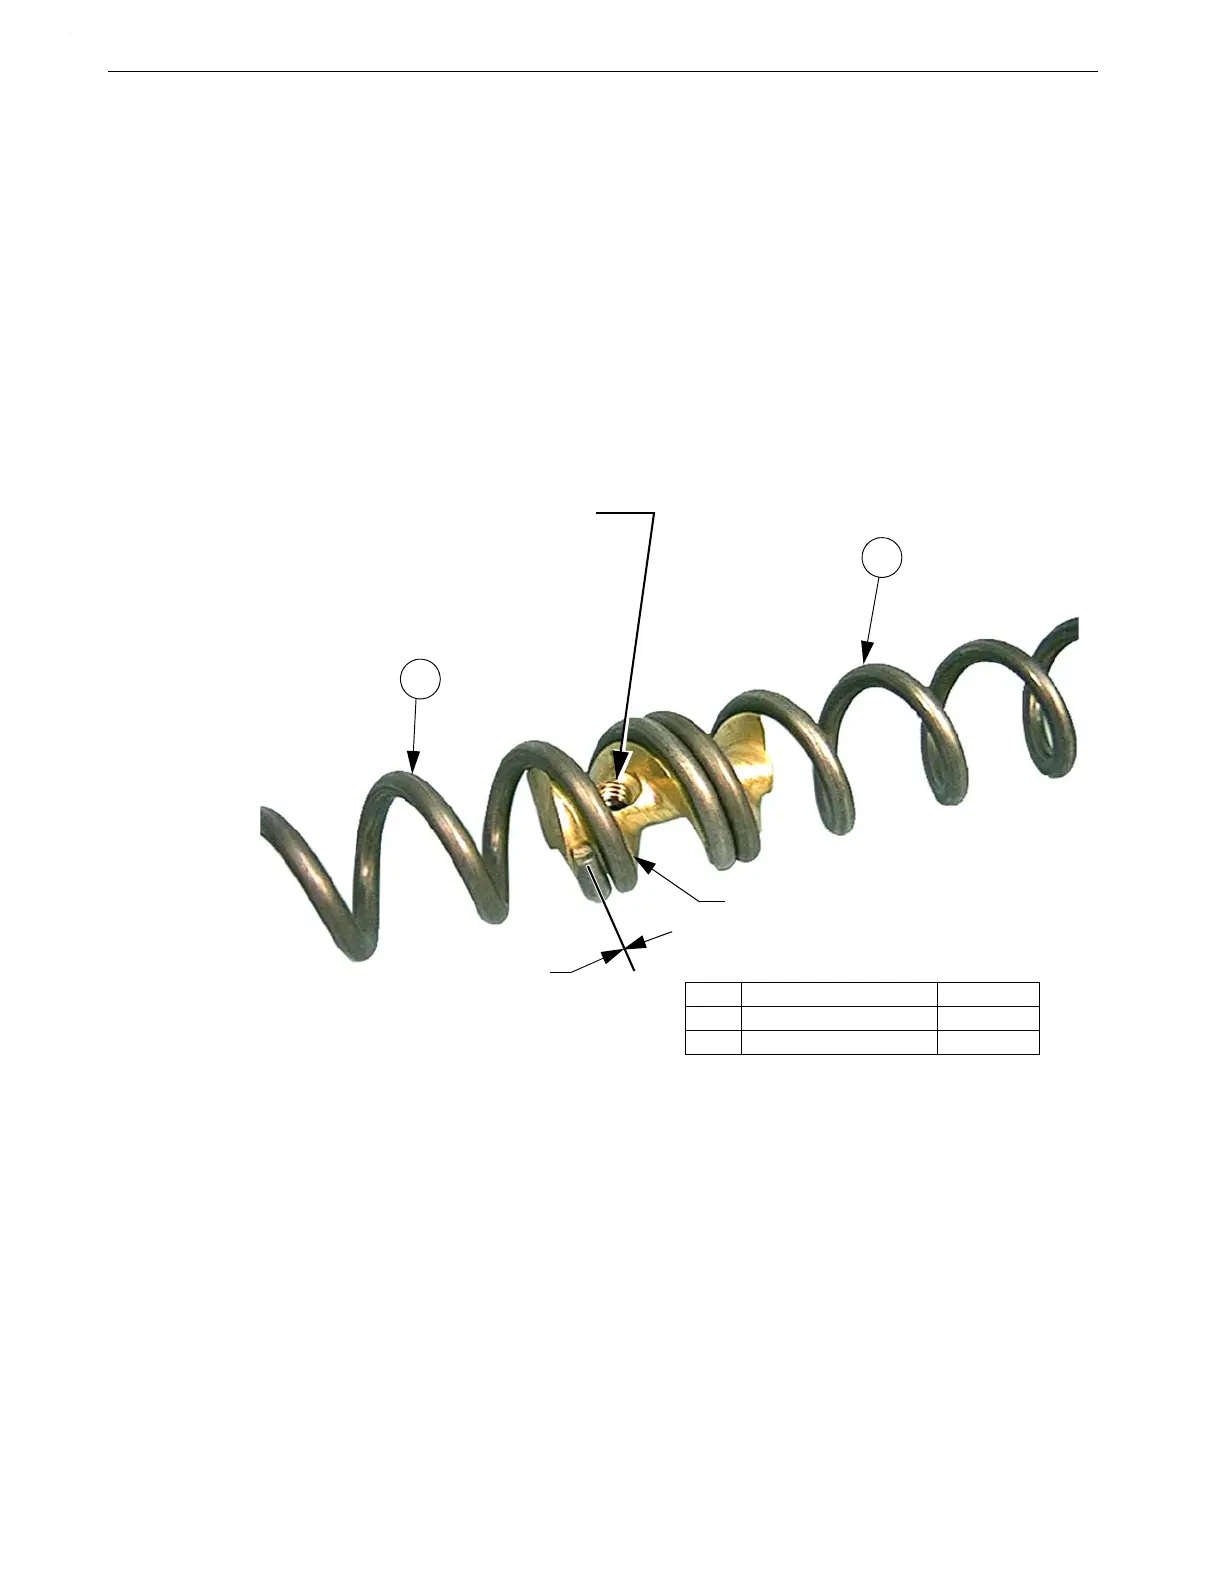
Auger Connector (50479) Installation
1.Screw the Auger Connector into one end of the Auger. Feed the Auger into second groove of
the Auger Connector (See Figure 36.).
2.Untwist the other end of the Auger 1-1/2 turns so that when it is threaded into the other end
of the Auger it will return to the relaxed state. Auger ends must be overlapped—Not Butted,
when threaded into the track of Connector.
3.Stretch the Auger and twist the Auger ends together. Both ends of the Auger should be even
with the end of the Connector, as shown below.
4.Tighten each Set Screw until it touches the Auger. Then tighten 1/2 turn. If Auger can be
unscrewed by hand then tighten an additional 1/4 turn. DO NOT TIGHTEN MORE THAN
3/4 TURN.
5.File both ends of the Auger so that they are the same diameter as the rest of the Auger.
6.File both ends of the Auger so that they are the same diameter as the rest of the Auger.
Key Description Part No.
1 Auger 50220-X
2 Auger Connector Brass 50479
Auger Connector
even with End of Auger
Important! Feed Auger into Second
groove of the Auger Connector as shown.
(Both Ends of each Auger)
1
1
Figure 36.Auger Connector Installation
Be careful not to over-tighten the Set
Screws and deform the Auger. Over
tightening the Set Screws may cause
the Auger to jam in the Power Units.
 Loading...
