Freeze-dryer Alpha 1-4 LDplus
Freeze-dryer Alpha 2-4 LDplus
Version 11/2006, Rev. 2.2 of 17/10/2016 • sb
Translation of the original operating manual
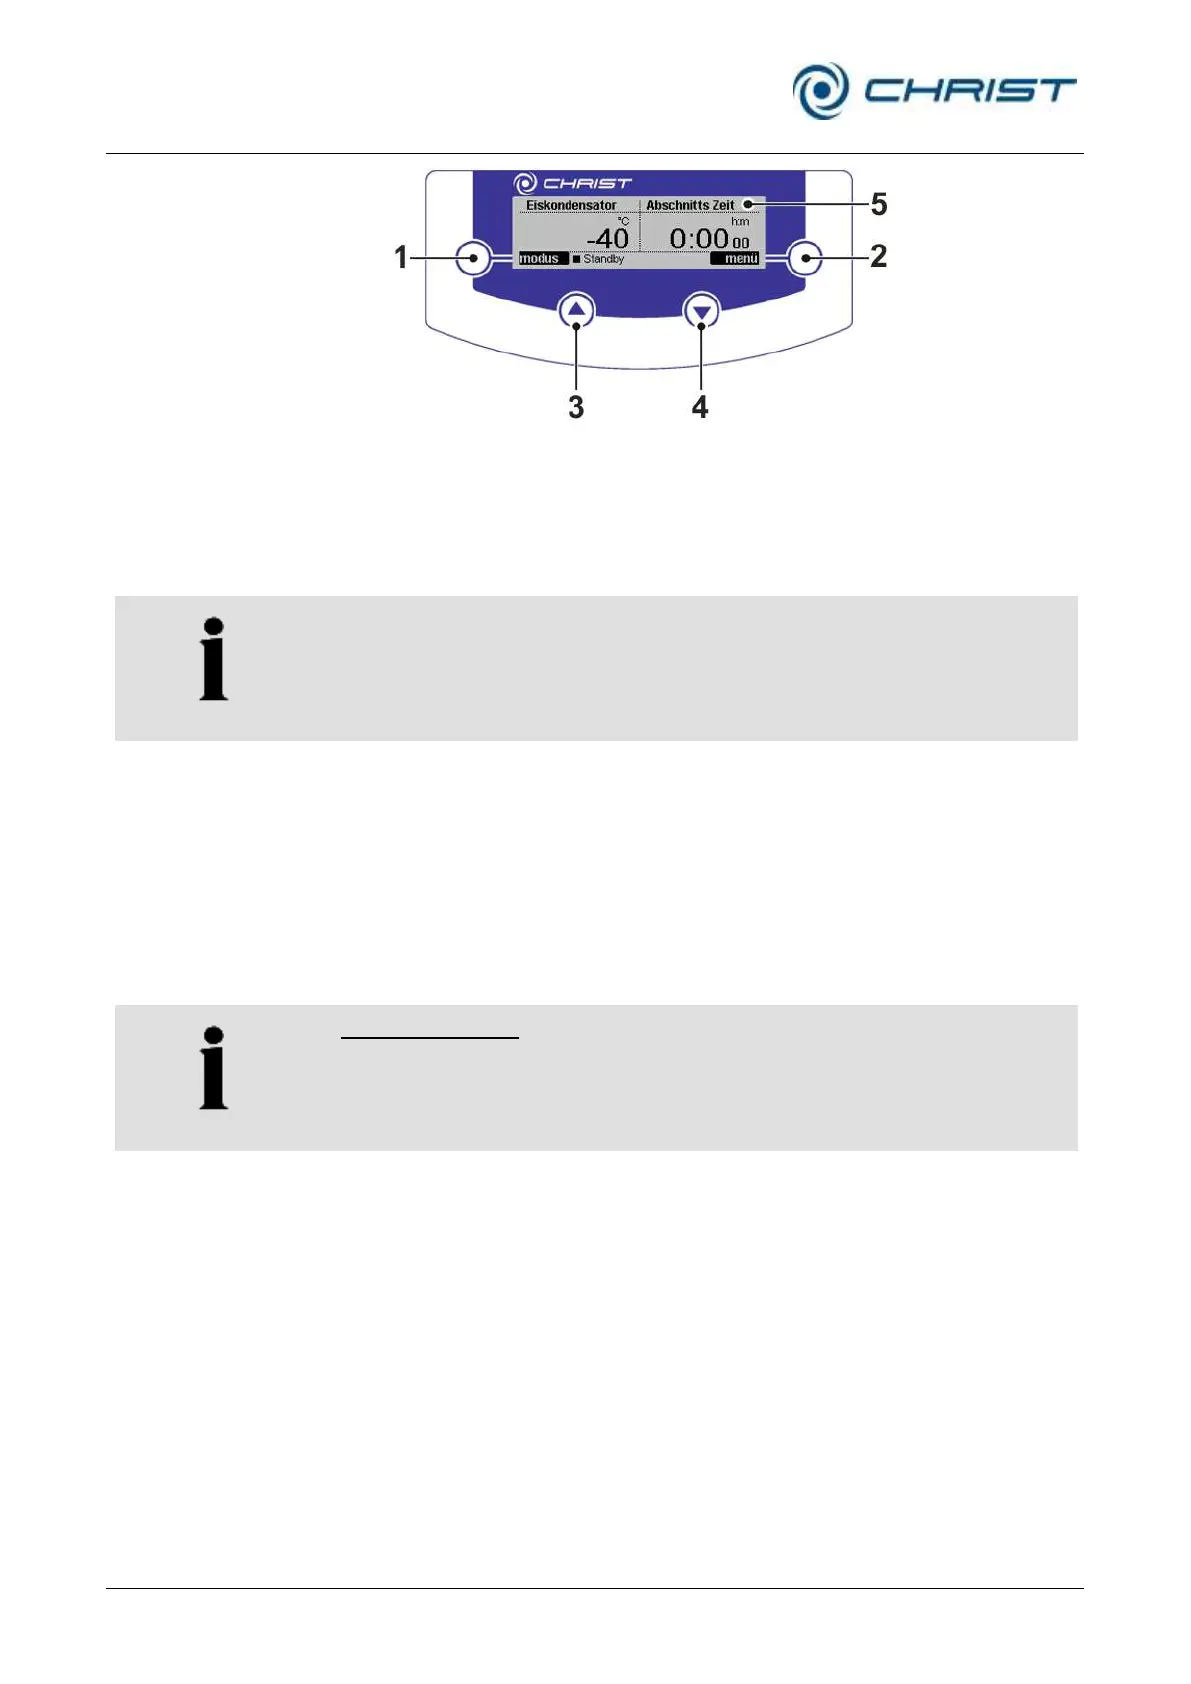
1 Left function key
2 Right function key
3 "Up" key
4 "Down" key
5 Display
Fig. 54: LDplus user interface
Step-by-step instructions – shelf drying
1 Freeze the sample separately, e.g. in a deep-freeze.
Ensure that the layer thickness of 1 to 2 cm is not exceeded, since
otherwise the drying time needs to be extended.
2 Check the ice condenser chamber and ensure that it is completely free
from water residues.
3 Close the media drain valve and install the base plate.
4 Switch the unit on 20 to 30 minutes prior to the start of the drying
process in order to let the vacuum pump warm up.
5 Place the plate rack on the base plate.
6 Transport the frozen samples as quickly as possible from the deep-
freeze to the freeze-dryer and place them on the shelves.
Recommendation: Store the product vessels on the aluminium shelves or,
if possible, the entire rack with the shelves in the deep- freeze. The
advantage is that due to the higher cold storage capacity of the aluminium
material, the product will remain frozen for a longer period of time so that
the sample will not thaw.
7 nstall the drying chamber. Prior to doing so, check whether the O-ring
is completely free of dirt particles. The ground-in stopper of the acrylic
glass bell must be greased with high-vacuum grease.
8 Ensure that all of the valves of the acrylic glass bell are closed.
9 Ensure that the aeration valve is closed.
10 Ensure that the media drain valve is closed.
11 Start the main drying process either by opening the manual shut-off
valve or by waiting for the electromagnetic valve to open. Vacuum is
applied to the chamber and the freeze-drying process commences.