This is to ensure that the EMI gaskets on all of the modules are fully compressed in order to maximize
the opening space for the new or replacement module. If the captive installation screws are loose, the
EMI gaskets on the installed modules will push adjacent modules toward the open slot, reducing the
opening size and making it difficult to install the module.
Step 1
Attach an ESD grounding strap to your wrist and to ground.
Step 2
Choose a slot for the module and remove the module filler plate covering the selected slot by removing the two Phillips
pan-head screws from the filler plate.
Refer to your software release notes for any information on slot or chassis restrictions for the module that you are
installing.
Step 3
Remove the new module from its shipping packaging and from the antistatic shipping bag.
To prevent ESD damage, handle modules by the carrier edges
only.
Caution
Step 4
Fully open both ejector levers on the new module.
Step 5
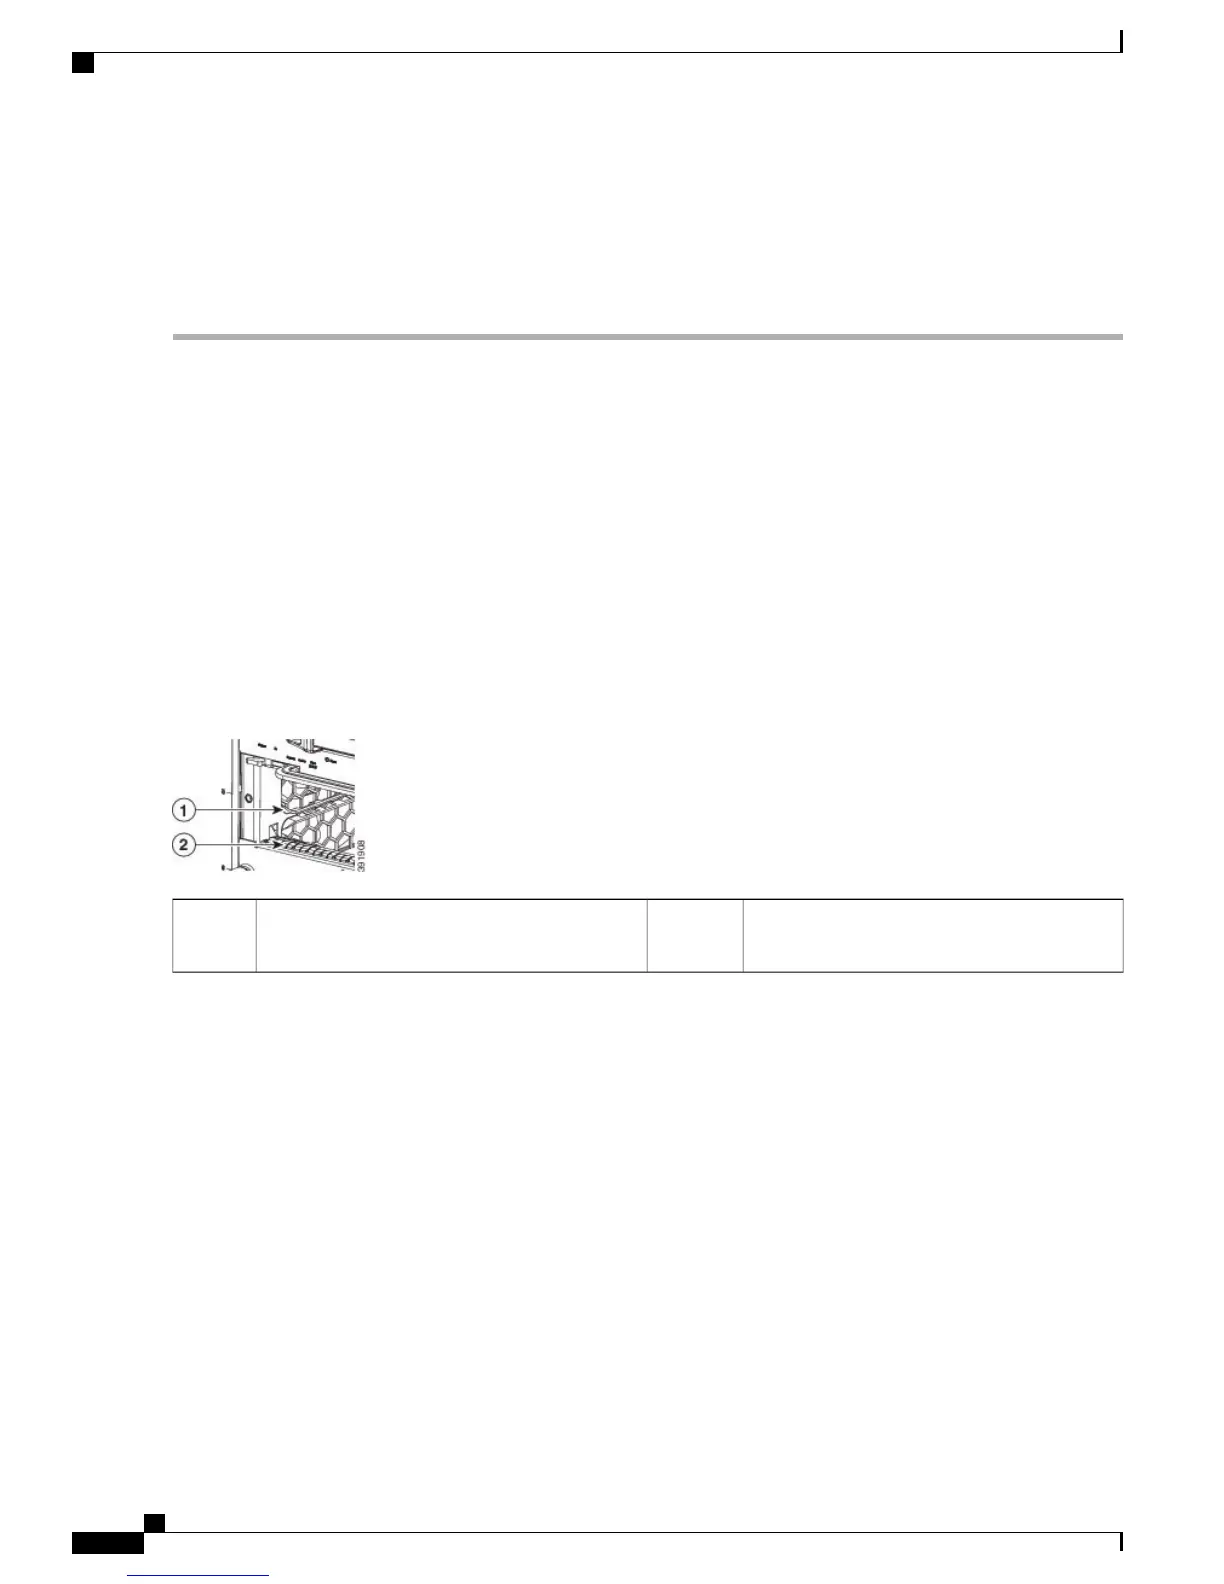
Position the new module in the slot. Make sure that you align the sides of the module carrier with the slot guides on each
side of the chassis slot.
Figure 8: Locating the Slot Guide and EMI Gasket
EMI gasket.2Slot guides. Modules to be inserted between
these slot guides.
1
Catalyst 6800 Ethernet Module Installation Guide
26
Installing and Removing Modules, Transceivers, and Attaching Cables
Installing an Ethernet Switching Module