• Three 8-18 Phillips pan-head screws
• Two 10-32 Phillips pan-head screws
• Screwdriver
Procedure
Step 1 Place the mounting tray on to the mounting surface.
Step 2 Use a 0.144-in. (3.7 mm) or a #27 drill bit to drill three holes, 1/2-inches (12.7 mm) deep in the desk.
Step 3 Insert the three 8-18 Phillips pan-head screws in to the slots on the mounting tray, and tighten them.
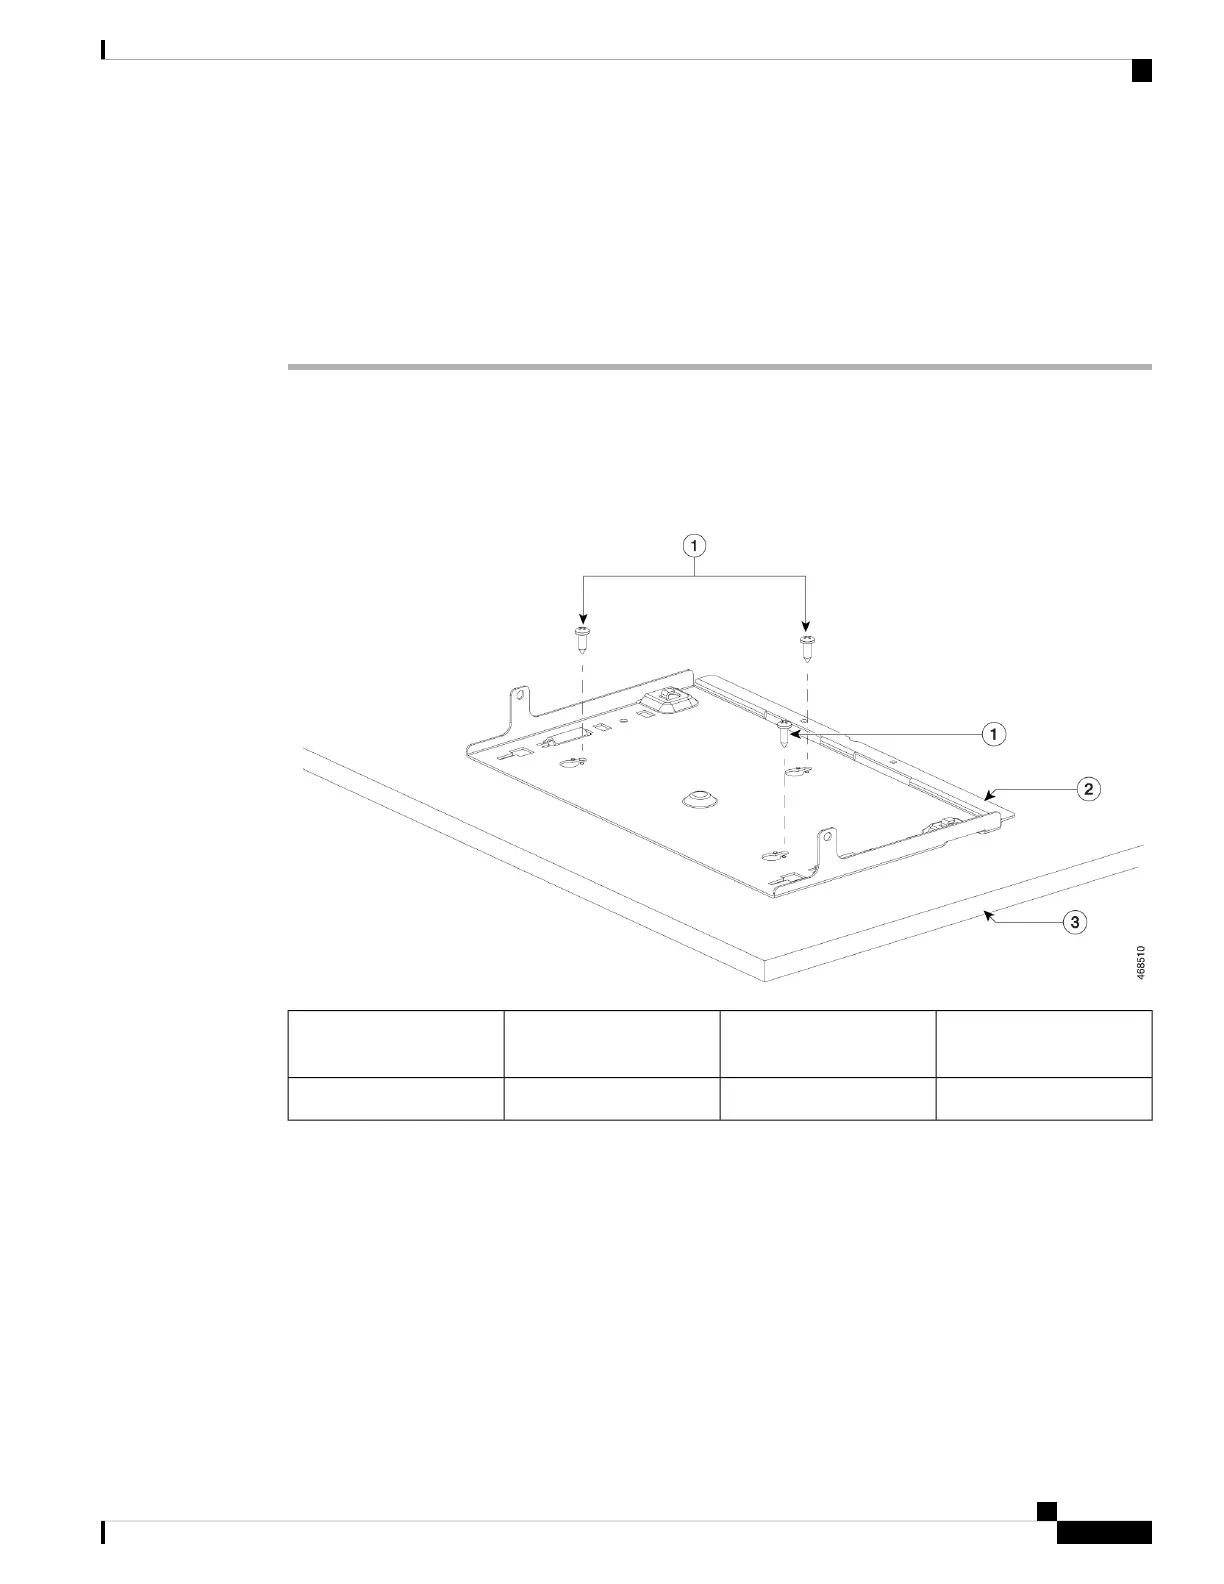
Figure 23: Attaching the Mounting Tray to the Desk or Shelf
Desk3Three 8-18 Phillips
pan-head screws
1
--Mounting tray2
Step 4 Place the switch on the mounting tray, slide it slightly forward so that the mounting tray hooks on both the
sides engage with the switch.
Cisco Catalyst 9200 Series Switches Hardware Installation Guide
53
Installing a Compact Switch
Mounting using the Mounting Tray and Screws
 Loading...


