8
6x
24x
(FH M4x10, Torx 20)
You also need the number and
type of screws that are required
for fastening the rails safely to the
wall (not provided by Cisco).
joining bracket
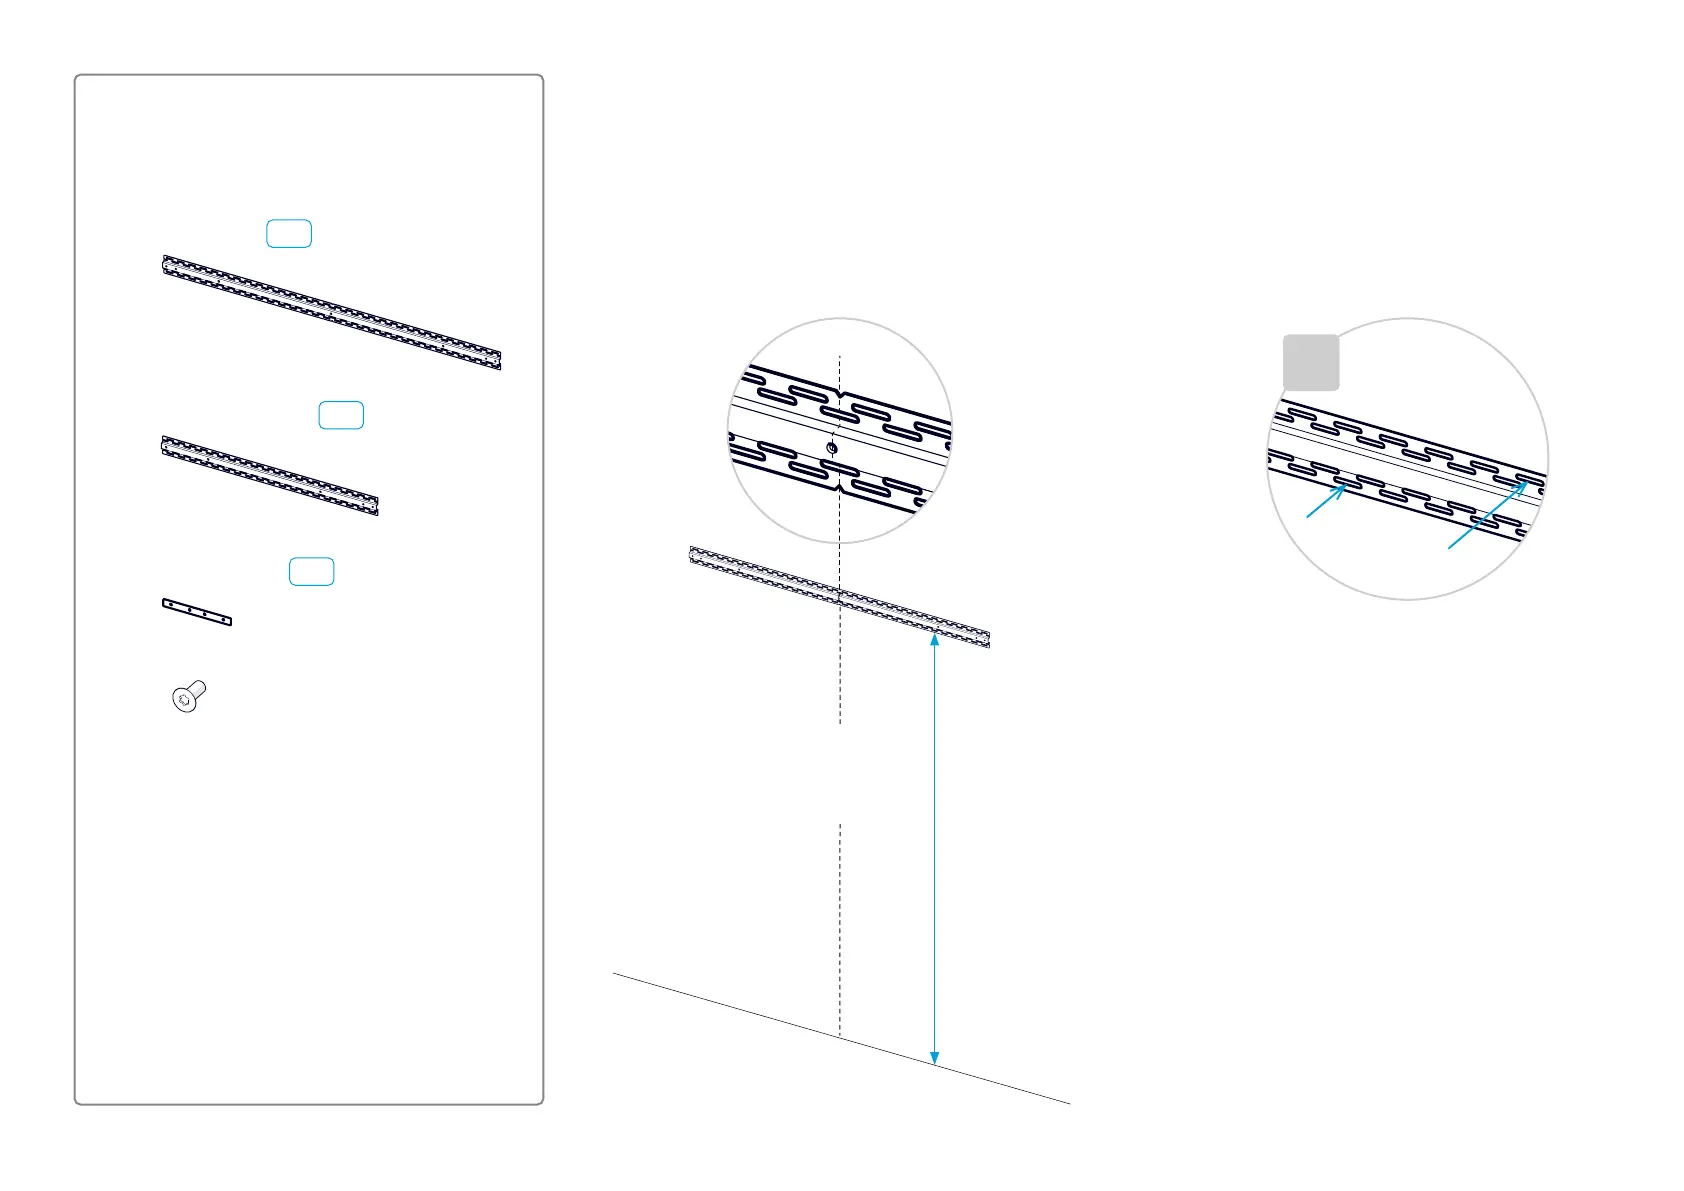
1. Start with the center part, and find the position
of the upper rail.
The distance from the floor to the lower edge
of the rail is shown in the illustration.
Rail parts
1.1. Fasten the top rail
×n
3x
center part A1
A2
6x
left and right parts A2
2. Fasten the center part of the rail to the wall.
Use the type and number of screws that are
required to support the system. You can use
any of the horizontal slots in the rails.
2.60 m (102.4 in.)
Center line
 Loading...