Getting Started
Connecting the Access Point to a PC
Cisco AP541N Dual-band Single-radio Access Point Quick Start Guide 9
1
Display the Configuration Utility by Using
Cisco Configuration Assistant 2.1 or higher
Use Cisco Configuration Assistant 2.1 or higher (CCA) to configure the access
point when it is deployed in a Cisco Smart Business Communications System
(SBCS) network with a UC520 or SR520.
This procedure assumes you are familiar with CCA. You can find additional
information about CCA at http://www.cisco.com/en/US/products/ps7287/
tsd_products_support_series_home.html
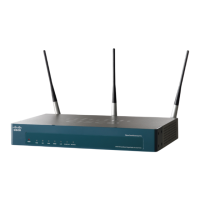
To configure the access point by using CCA:
STEP 1 Connect the Ethernet port on the access point to a switch port on a SBCS device.
STEP 2 Power on the Cisco AP541N.
STEP 3 Connect a PC with CCA installed to any access switch port on the UC520 or
SR520.
STEP 4 Create a new CCA site by entering a name and the IP address of the UC520 or
SR520.
STEP 5 Connect to the CCA site by using the appropriate login credentials.
STEP 6 Click Window > Topology View.
195058
Internet
DHCP client
 Loading...
