© 1999-2017 Citrix Systems, Inc. All rights reserved. p.28https://docs.citrix.com
Configuring Initial Settings by Using the Serial Console
Jul 11, 2013
When you first install the appliance, you can configure the initial settings by using the serial console. With the serial console,
you can change the system IP address, create a mapped IP address, configure advanced network settings, and change the
time zone.
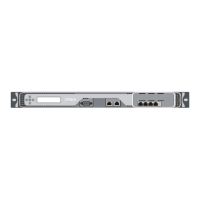
Note: To locate the serial console port on your appliance, see Ports.
1. Connect the console cable into your appliance. For more information, see Connecting the Cables to the MPX Appliance.
2. Run the terminal emulation program on your computer to connect to the appliance.
For Microsoft Windows, you can use HyperTerminal.
Note: HyperTerminal is not automatically installed on Windows 2000 Server, Windows Server 2003, or Windows Server
2008. To install HyperTerminal, use Add or Remove Programs in Control Panel.
For Apple Macintosh OS X, you can use the Terminal program or the shell-based telnet client.
Note: Mac OS X is based on the FreeBSD UNIX platform. Most standard UNIX shell programs are available from the
OSX command line.
For UNIX-based workstations, you can use the shell-based telnet client or any supported terminal emulation program.
3. Press ENTER. The terminal screen displays the logon prompt.
Note: You might have to press ENTER two or three times, depending on the terminal program you are using.
4. Log on to the appliance by using the administrator credentials.
The default user name and password is nsroot.
5. At the command prompt, type config ns to run the configuration script.
6. To complete the initial configuration of your appliance, follow the prompts.
Note: To prevent an attacker from breaching your ability to send packets to the appliance, choose a non-routable IP
address on your organization's LAN as your appliance IP address.
Instead of step 5 and 6, you can directly enter the commands for the initial configuration. Log on to the appliance and at
the command prompt, type:
set ns config - ipaddress <IPAddress> -netmask <Netmask>
add ns ip <IPAddress> <Netmask> -type <Type>
add route <Network> <Netmask> <Gateway>
set system user nsroot <Password>
save ns config
reboot
Example
set ns config - ipaddress 10.102.29.60 - netmask 255.255.255.0
add ns ip 10.102.29.61 255.255.255.0 -type snip
add route 0.0.0.0 0.0.0.0 10.102.29.1
set system user nsroot administrator
save ns config
reboot
The initial configuration of your appliance is complete. To continue configuring the appliance, see NetScaler Gateway.
Note: For information about deploying a high availability pair, see Configuring High Availability on NetScaler Gateway.