RADIUS SL 860 07.2019 en 18
6.2.4 Adjustment with hydraulic pressure to the unit (stroke limitation)
Move the RADIUS blade share to the working position. In this position, the blade share must be able to move
forward by 5 mm (1/5”) if you press forward from the rear at the outer end. This play is necessary to keep some
distance between the piston rod of the cylinder and the cylinder bushing. If this clearance is not present, adjust it
using the set screw located in the stop of the bearing housing.
6.2.5 Adjustment of the sensor rod
The setting of the sensor rod is simple and fast: Lift the button on the sensor unit slightly and then move the
sensor rod forwards or backwards in the desired direction. When driving uphill, it is advantageous to position the
sensor rod slightly in front of the blade share. The same applies if the plants have grown at an angle (inclined
forwards) or if the forward speed is higher than 8 km/h (5mph). The sensor rod height can be adjusted via the
screw and counternut on the clamping piece.
6.2.6 Working in strong weeds
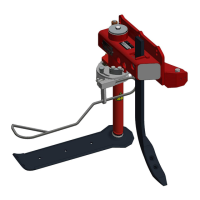
If the sensor rod is already pushed backwards by strong weeds, the
sensitivity of the sensor unit can be reduced by inserting a spring
CW009.020600 (Figure 13, item 1). Place the spring between the hook
(item 2) and the adjusting screw (item 3).
6.2.7 Changing the blade share
If the RADIUS blade shares are worn out, they should be replaced in good
time. To do this, loosen the screw (Figure 14, item 33) from the RADIUS
shaft and clean the matching surface (serrated disc Figure 14, item 31).
Make sure that all threads are free of dirt. Place the new blade share on the
serrated disc and tighten the screw firmly. (Tightening torque 190 Nm)
6.2.8 Front engaging tools for RADIUS SL 860
As a general rule, the RADIUS units should only be operated with front engaging tools (see chapter 3.3). These
tools should generally run 20 mm (0.8”) deeper than the RADIUS blade share in order to protect the shaft from
stones etc. (Figure 3).
CLEMENS offers various front tools for a large variety of soil conditions. The
grubber share, for example, is excellently suited to ripping the soil thoroughly
and deeply. In greened plantations, either the oscillating disc colter (Figure 15)
or the disc plow is used.
The oscillating disc colter cuts a clean edge on the vegetation. The disc
plow, on the other hand, can also be adjusted for slightly hilling up or plowing
back. For stronger hilling up and ploughing back work CLEMENS offers the
clearing body LW1.

 Loading...