Disassembly
2 - 28 Removing the Floppy Disk Drive Assembly
2.Disassembly
Removing the Floppy Disk Drive Assembly
1. Turn off the computer, remove the battery (page 2 - 8), hard disk (page 2 - 9), RAM (page 2 - 10), CD Device (page
2 - 12), Bluetooth module (page 2 - 14), Wireless LAN module (page 2 - 15), CPU (page 2 - 16), keyboard (page 2 -
18), keyboard shielding plate (page 2 - 19), the top case and LCD (page 2 - 20), speakers (page 2 - 25) and main-
board (
page 2 - 26).
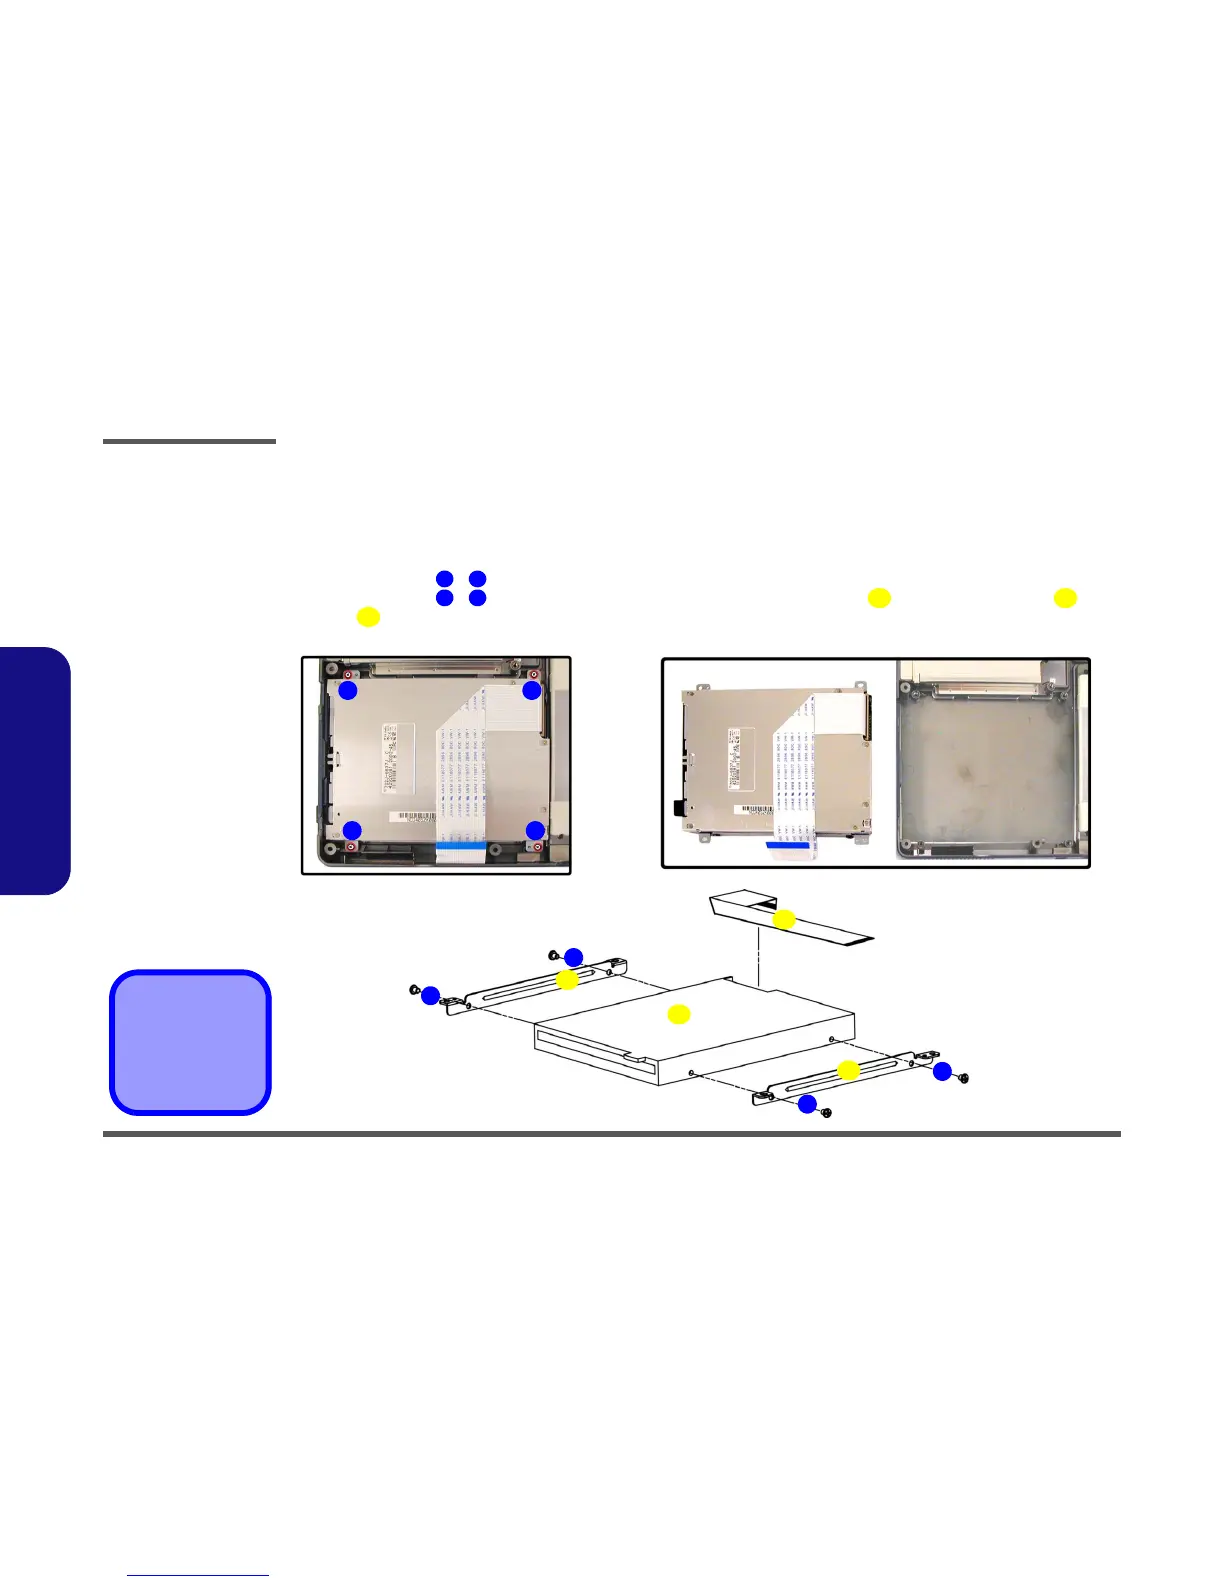
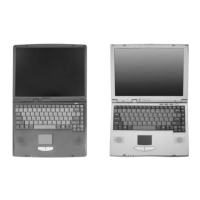
2. Remove screws - (Figure 21a) and lift out the floppy disk drive assembly.
3. Remove screws - (Figure 21c) and you can then separate the brackets , floppy disk drive unit , and
cable .
9. Brackets
10. Floppy Disk Drive
11. Cable
•8 Screws
Figure 21
Floppy Disk Drive
Assembly Removal
a. Remove the screws
b. Lift out the FDD assem-
bly
c. Separate the brackets,
FDD and cable.
1 4
5 8
9 10
11
1 2
a. b.
10
34
c.
9
9
11
5
6
7
8