Disassembly
Removing and Installing the Processor 2 - 17
2.Disassembly
Removing and Installing the Processor
Processor Removal Procedure
1. Turn off the computer, remove the battery (page 2 - 5), and component bay cover (page 2 - 10).
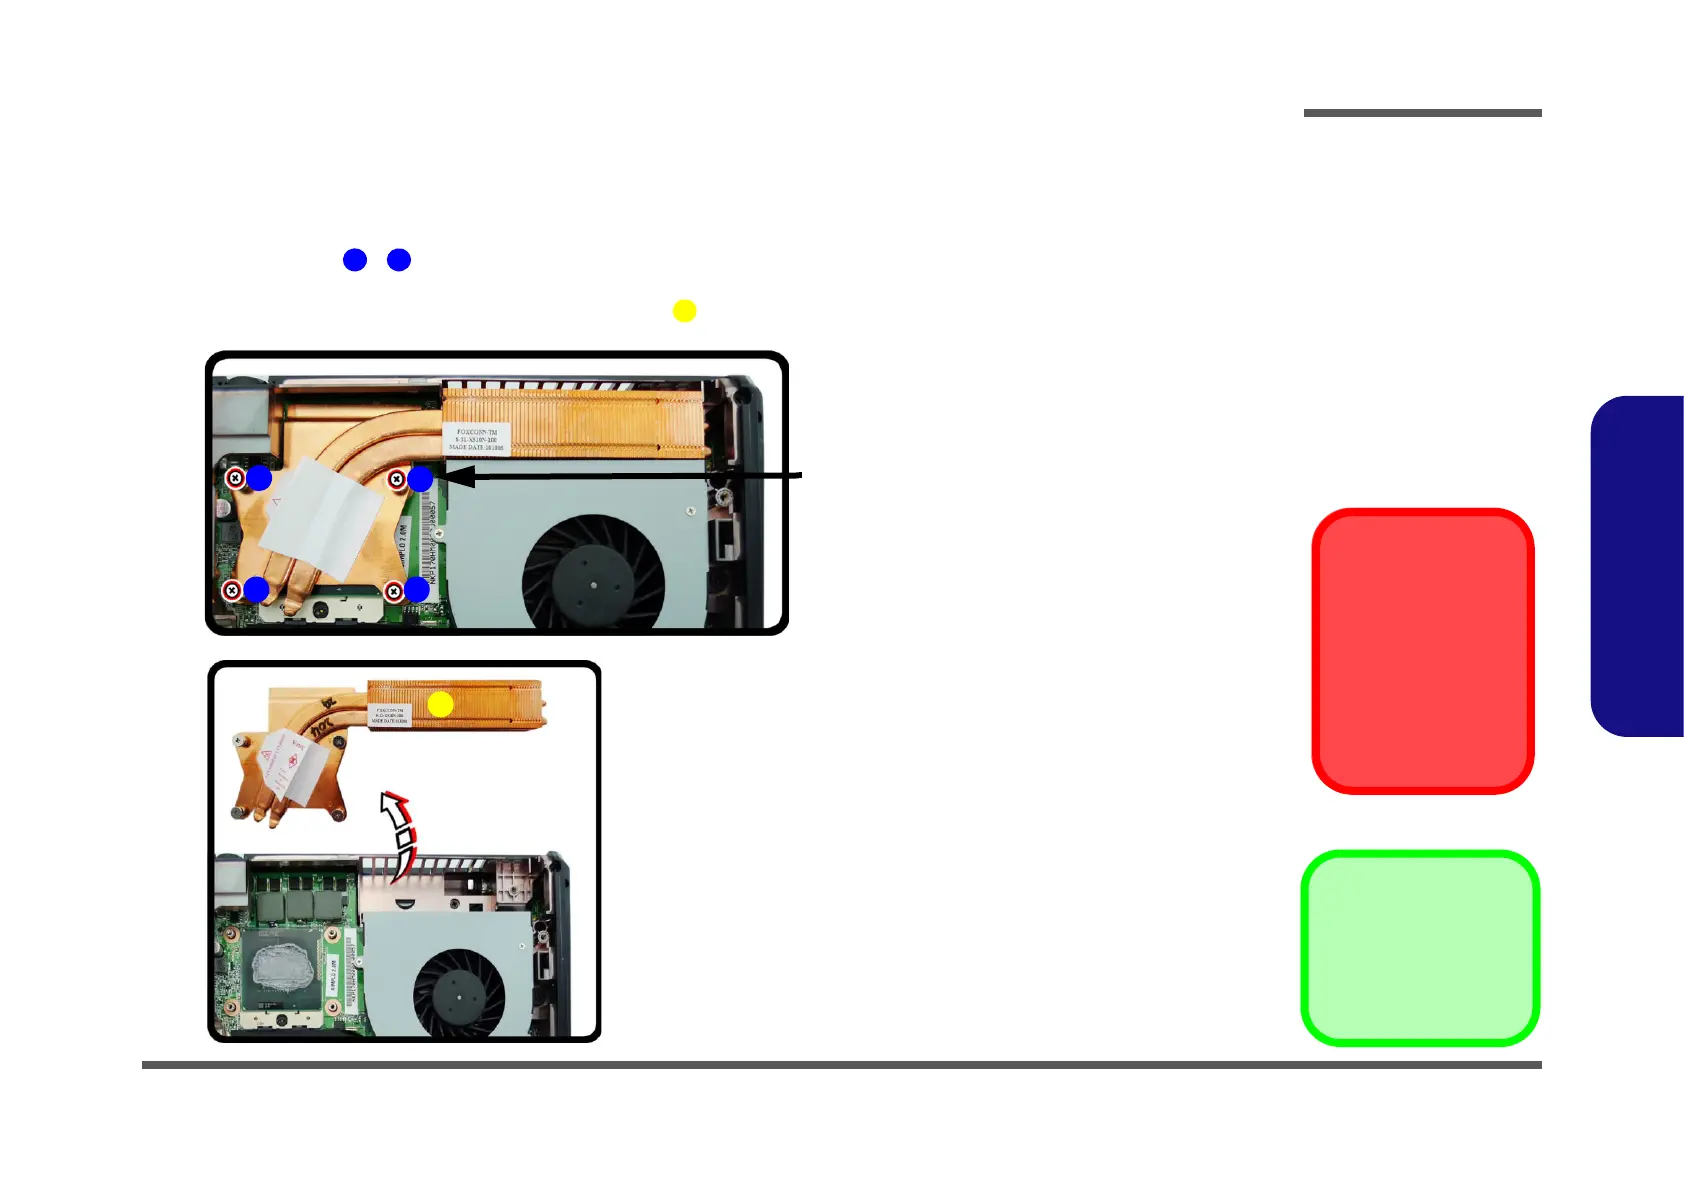
2. Remove screws - from the heat sink unit in the order indicated on the label (i.e screw 4 first through to screw
1 last Figure 13a)
.
3. Carefully (it may be hot) remove the heat sink unit (Figure 13b).
Figure 13
Processor
Removal
Procedure
a. Remove the screws
in the correct order.
b. Carefully remove
the heat sink unit.
CPU Warning
In order to prevent
damaging the contact
pins when removing
the CPU, it is neces-
sary to first remove the
WLAN module from
the computer.
5. Heat Sink Unit
•4 Screws
a.
5
b.
Note: Loosen the screws in the reverse order
4-3-2-1 as indicated on the label.
2
1
4 3