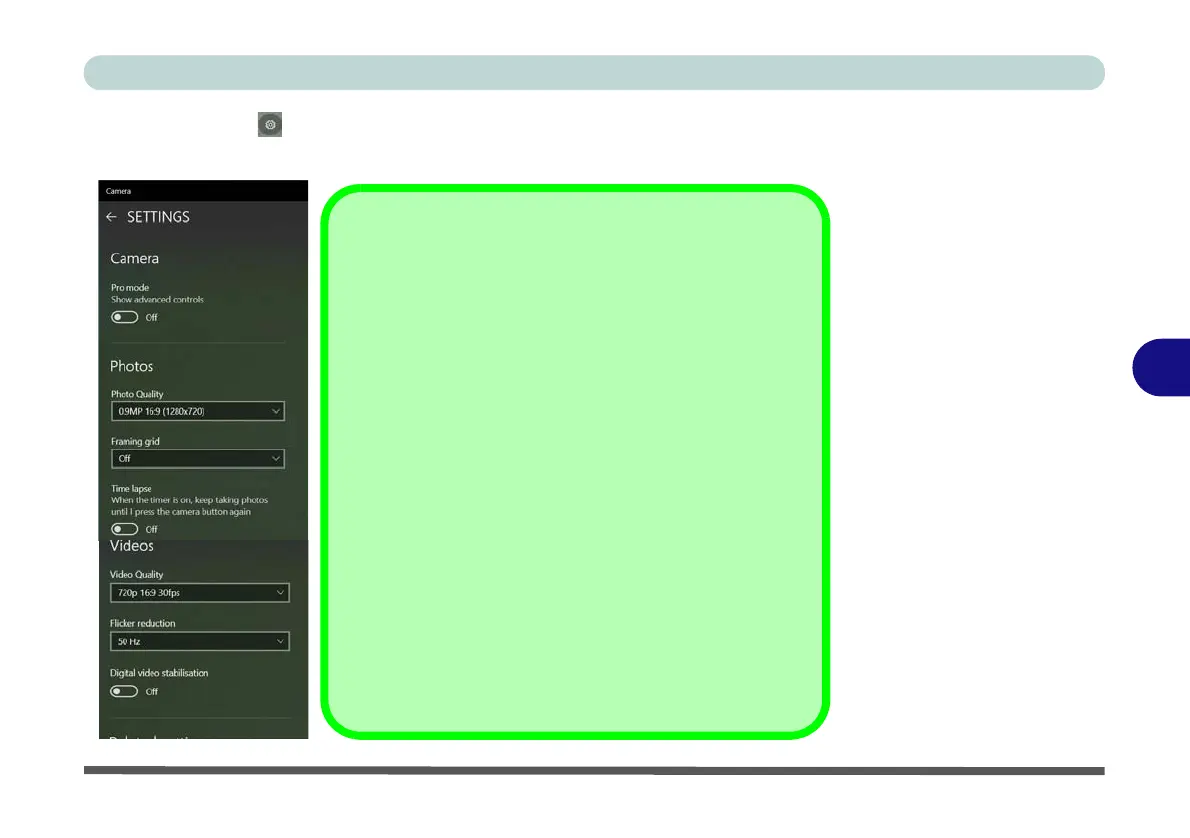
6. Click Settings to access the camera settings menu to select/deselect Pro
Camera Settings
The
Self Timer
can be set
to take Photos after
2
, 5 or 10 sec-
onds.
You can use a
Framing grid
to help you line up pictures.
The
Photo Quality
can be changed to that which the system
supports.
Time lapse
can be
set to keep taking photos until the camera
button is pressed again.
The
Video Quality
resolution and frame rate can be set to any
supported by the system. Note that capturing high resolution
video files requires a substantial amount of disk space for each
file. After recording video, check the video file size (right-click
the file and select Properties) and the remaining free space on
your hard disk (go to File Explorer, right-click the hard disk,
and select Properties). If necessary you can remove the re-
corded video file to a removable medium e.g. a USB Flash
drive.
If you need to reduce any screen flicker, change the settings
in
Flicker reduction
to either e.g. 50Hz or 60Hz.