28
Installation
6.5 Condensate drain
During winter operation the unit generates condensate,
which must be directed to a suitable place for drainage.
Drainage can be channelled (recommended) or free.
6.5.1 Channelled drainage
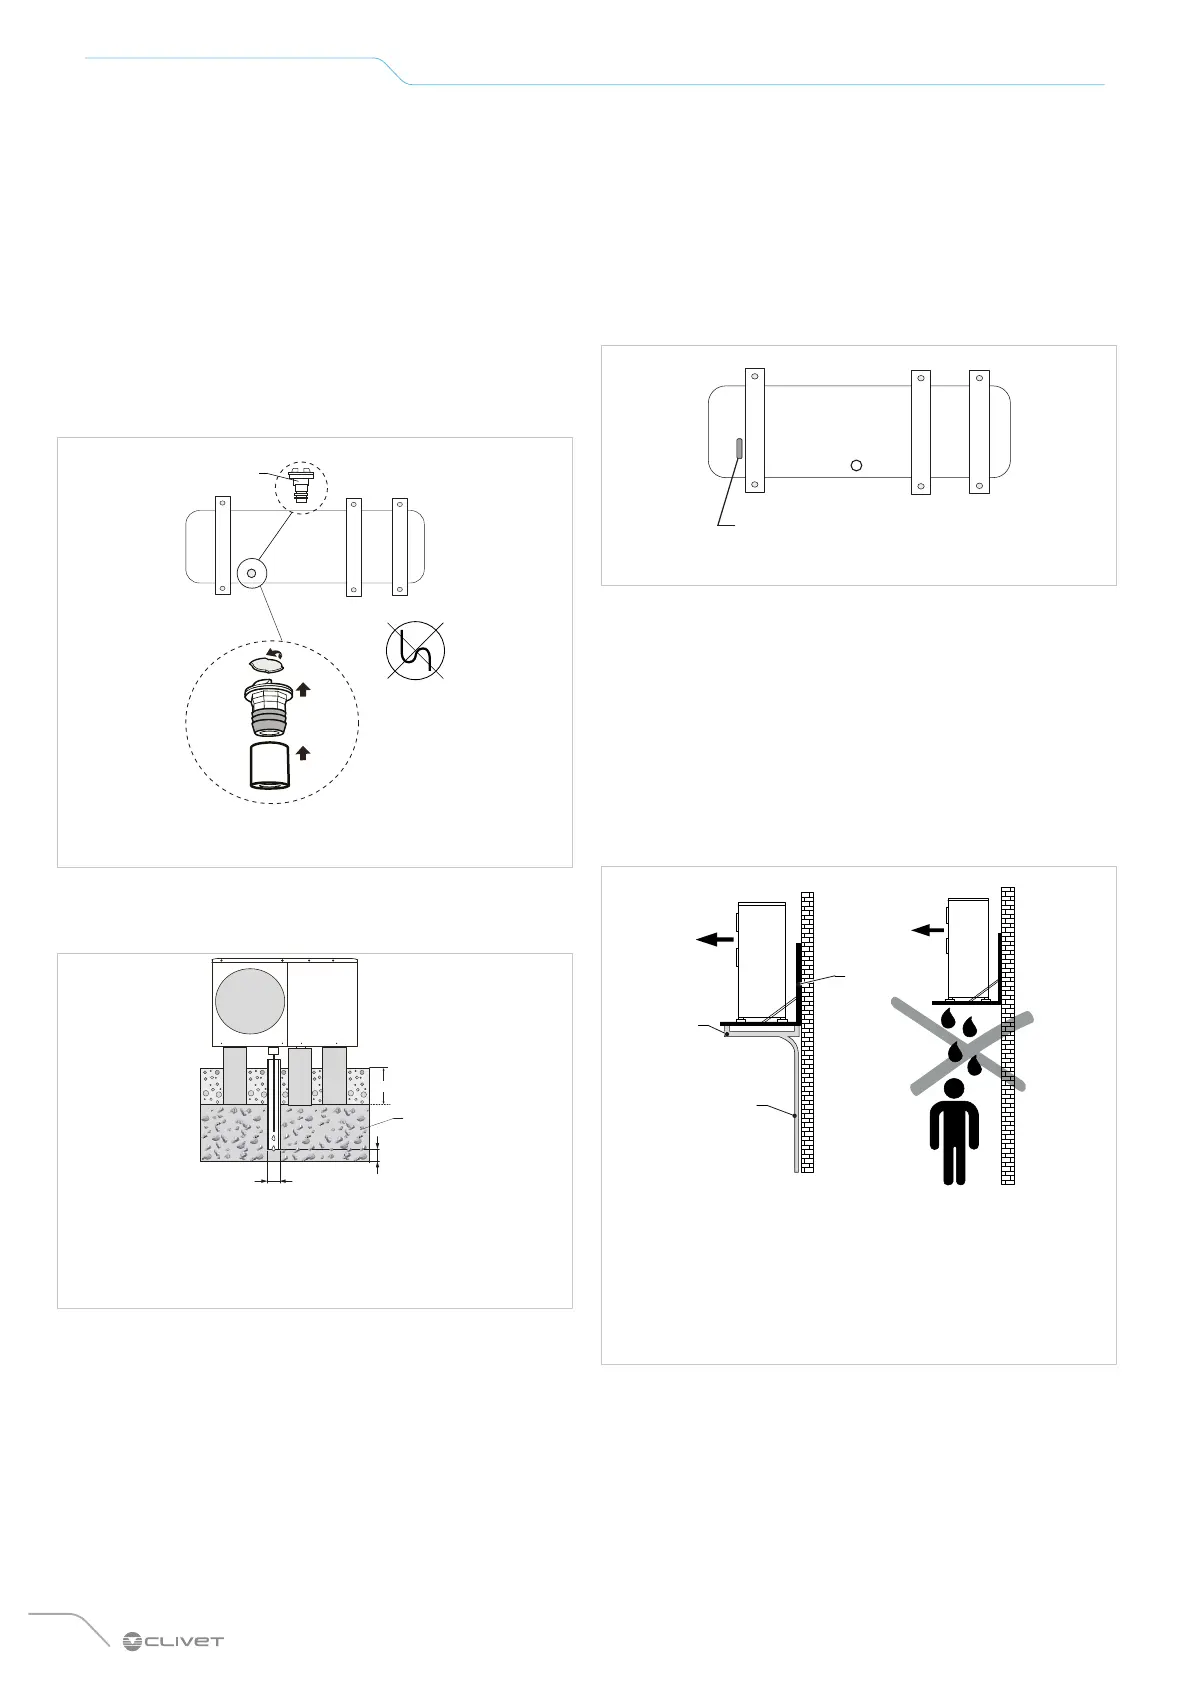
► use the condensation drain fitting supplied with the unit
► put it in the fitting provided at the bottom
► connect a drainpipe
► direct the drainpipe to a suitable drainage point.
1
90°
1 Condensation drain connection
Avoid siphons.
100mm
100mm
Min 900 mm
1
2
1 Frost line
2 Layer of gravel or pebbles to help with condensation
drainage
To prevent the water downstream of the drain from free-
zing, install the pipe below the frost line.
I
f necessary, use heating cables with antifreeze fun-
ction.
Avoid short radius bends that can cause obstructions.
Avoid possible accidental obstructions during opera-
tion.
Avoid spills in places where people pass by.
6.5.2 Free drainage
For installations in frost-free locations, the condensate can be
drained without channelling it.
In this case:
► remove the cap from the bottom of the unit
1
1
Drain hole covered by a rubber cap
Avoid spills in places where people pass by.
6.5.3 Positioning on the wall
There are two kits available:
• kit containing wall fixing brackets
• kit containing anti-vibration mounts
Refer to the accessory’s instruction sheet.
3
1
2
1 Drain pan (accessory supplied separately)
2 Unit support brackets (accessory supplied separately)
3 Condensation drainpipe (to be provided by the customer)
 Loading...