46-80 Installation and User Guide V1.0
19
Zone 1 Facility Port
Zone 1 of the 46-80 is provided with a FACILITY PORT in the
form of an RJ45 connector on the rear panel ([13] on page
13). This may be used to connect a Cloud remote active
input/control module, but may also be used as a general-
purpose auxiliary balanced input (see Page 29 for more
information on this application). Note that an audio source
connected via the FACILITY PORT will only be available in
Zone 1, and no other.
Active modules operate from DC power supplied by the
46-80. The current consumed by each module is minimal and
in the vast majority of installations there will be no power
supply issues.
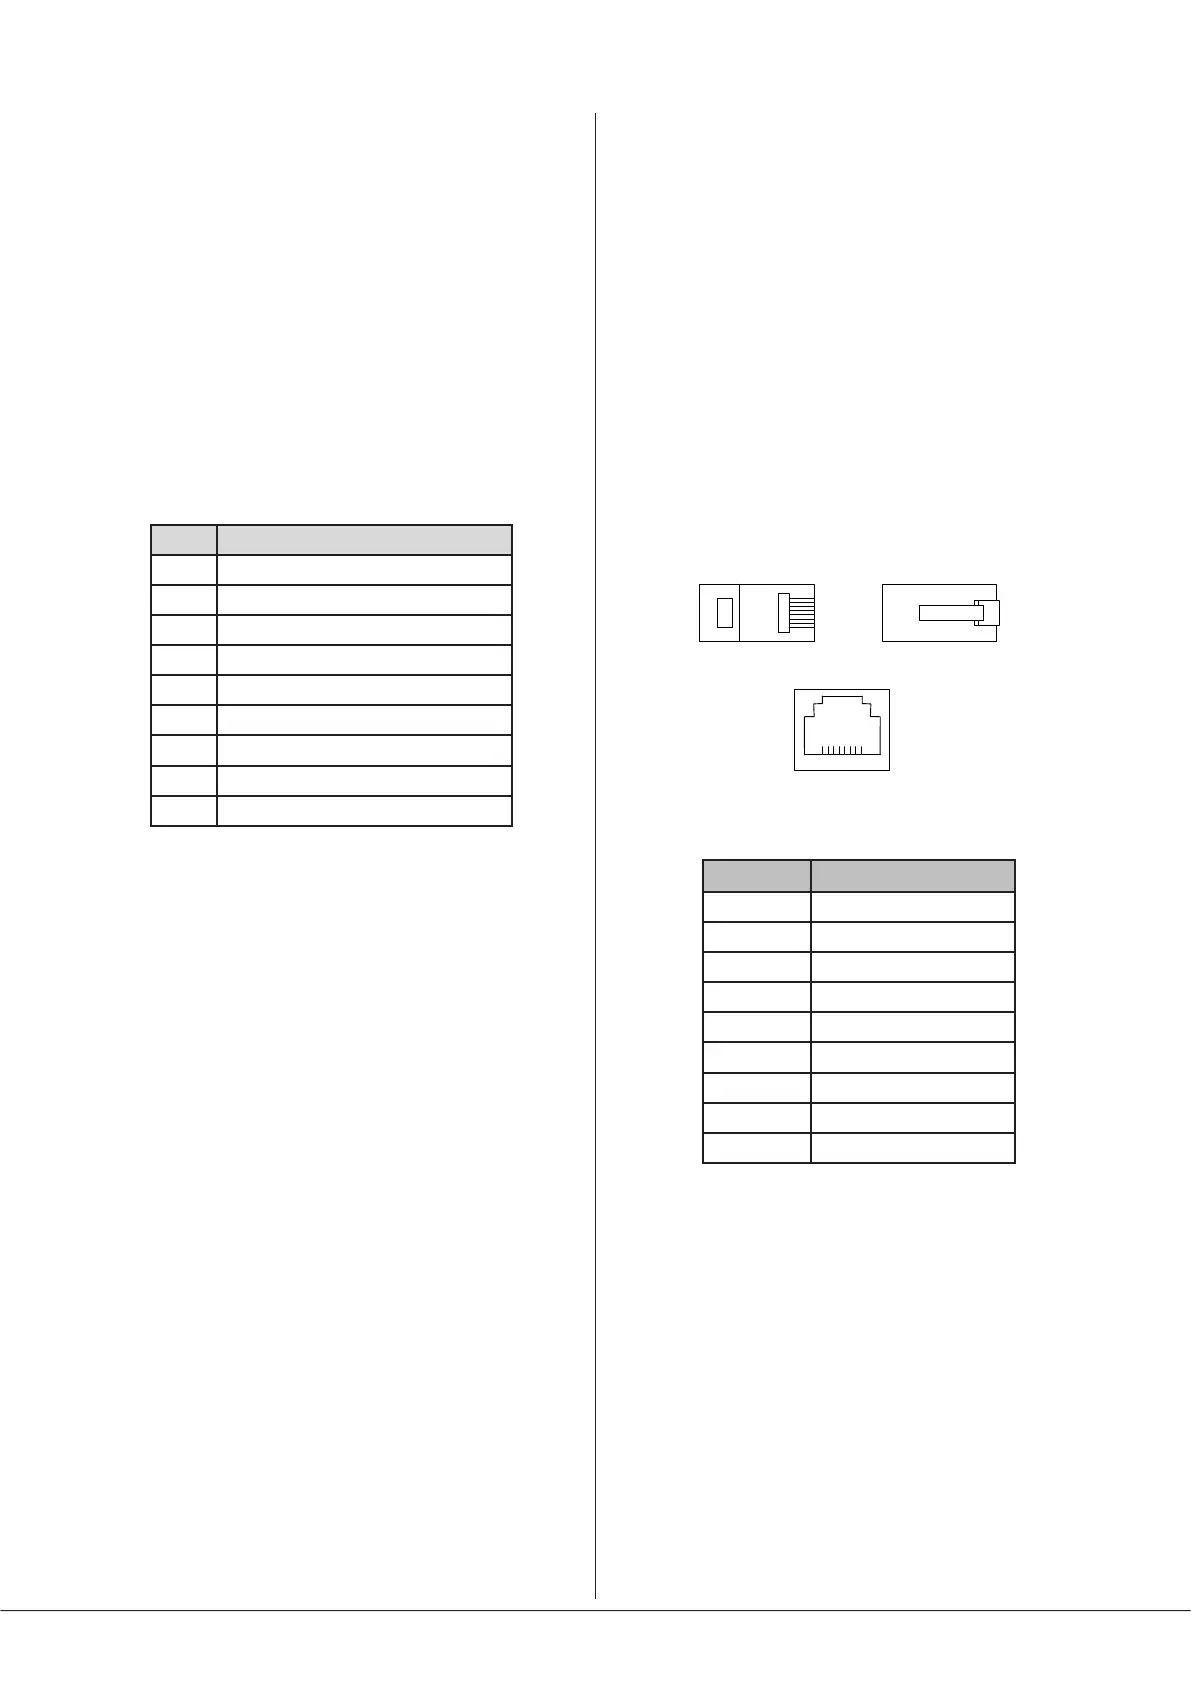
The pinout of the FACILITY PORT connector is given in the
table below:
PIN USE
1 Remote source select
2 Remote level control
3 Balanced audio input hot (+)
4 Balanced audio input cold (-)
5 Noise Gate control
6 -Vsupply
7 +Vsupply
8 0 V DC
9 VCA control voltage
Connecting an active remote module
The following Cloud active remote input modules are directly
compatible with the 46-80 and may be connected to the
FACILITY PORT using screened Cat 5 cable:
• LM-2 combined mic/line input and music source/level
control module
• BT-1 Bluetooth wireless input module
• L-1 stereo line input module
• M-1 balanced mic input module with priority control
Note that as the cable carries analogue audio, only screened
Cat 5 should be used. All the remote modules listed above
use RJ-45 connectors as their interface: ready-made screened
Cat 5 cables may be used if suitable lengths are available.
Otherwise, install bulk screened Cat 5 cable and t crimpable
screened RJ45 connectors, using the standard wiring
convention:
RJ45 PIN CAT5
1 Brown + White
2 White + Brown
3 Green + White
4 White + Blue
5 Blue + White
6 White + Green
7 Orange + White
8 White + Orange
RJ45 can Cable screen
NOTE: The LM-2 has an IN connector as well as an OUT: this
allows multiple LM-2s to be “daisy-chained”. If more than
one LM-2 is being installed – typically at different locations
in the same zone, connect the OUT socket of one to the IN
socket of the next.