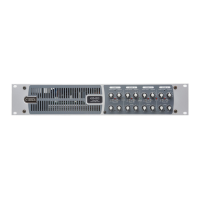
46-80 Installation and User Guide V1.0
31
Table of internal jumpers and default settings
The table below lists each jumper and its purpose, together with location and factory default setting.
JUMPER PCB DESCRIPTION EFFECT DEFAULT
J1 Upper CDPM bus termination
ALWAYS ON – DO NOT MOVE
ON
J2 Upper Mic-over-Facility port priority
OFF: Mic signals will be mixed at full level with Facility Port input
ON: An input at Mic 1 or Mic 2 will cause a signal from the
Facility Port to duck
OFF
J3 Main Zone 1 65 Hz High Pass Filter
OFF: full frequency response
ON: 65 Hz hi-pass lter enabled for Zone 1
OFF*
J4 Main Zone 2 65 Hz High Pass Filter
OFF: full frequency response
ON: 65 Hz hi-pass lter enabled for Zone 2
OFF*
J5 Main Zone 3 65 Hz High Pass Filter
OFF: full frequency response
ON: 65 Hz hi-pass lter enabled for Zone 3
OFF*
J6 Main Zone 4 65 Hz High Pass Filter
OFF: full frequency response
ON: 65 Hz hi-pass lter enabled for Zone 4
OFF*
J7 Main Power amp Z2 input source
D: Power amp Z2 is fed from Z2 pre-amp
R: Power amp Z2 is fed from Z1 pre-amp
D
J8 Main Power amp 32 input source
D: Power amp Z3 is fed from Z3 pre-amp
R: Power amp Z3 is fed from Z1 pre-amp
D
J9 Main Power amp Z4 input source
D: Power amp Z4 is fed from Z4 pre-amp
R: Power amp Z4 is fed with source selected by J7
D
J10 Main APD Test Mode
FOR FACTORY USE ONLY - DO NOT FIT A JUMPER
J11 Main NVM Reset Restores factory settings
J12 Main Spare
FOR FACTORY USE ONLY - DO NOT FIT A JUMPER
J13 Main Programming header
FOR FACTORY USE ONLY - DO NOT FIT A JUMPER
*These jumpers are factory-set to ON in Model 46-80T.
Restoring factory settings
If it is necessary to restore the 46-80’s settings to their original factory defaults, temporarily t a jumper to the J11 header and
power-cycle the unit. Remove the temporary jumper before replacing the lid.

 Loading...