Chapter 2: To get started
98-143082-D To connect to LAN 9
For information on how to configure the WLAN interface in the EXPLORER 510, see WLAN
interface setup on page 44.
For information on how to set up the LAN network, see Terminal settings on page 53.
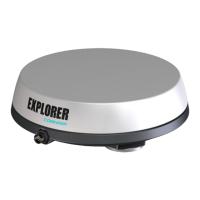
To connect to LAN
The EXPLORER 510 does not have a LAN connector, but you can use the USB to LAN Converter
Cable supplied with your EXPLORER 510 to connect your computer.
Do as follows:
1. Connect the USB to LAN Converter Cable to the USB interface.
2. Connect your LAN cable between the USB to LAN Converter Cable and your computer.
Your computer should now be connected to the EXPLORER 510 and you should be able to
access the web interface as described in the next section.
To access the web interface
If you are not using the EXPLORER Connect app, you can use the built-in web interface for
configuration and operation of the EXPLORER 510. To access the web interface, do as follows:
1. Start up the terminal.
For details, see To switch the EXPLORER 510 on or off on page 8.
2. Connect your computer or smartphone to the terminal, e.g. using WLAN as described n the
previous section.
3. Open your browser and enter the IP address of the terminal in the address bar. The default
IP address of the terminal is 192.168.0.1
If the terminal is in pointing mode or waiting for a PIN, the web interface will start up on the
relevant page. Otherwise it will start up on the dashboard. For more information on the web
interface, see The web interface on page 32.
The USB charge current must be set to 1.0 A. This is the default setting. See USB
interface setup on page 45.